4 Ways to Minimize Clutter

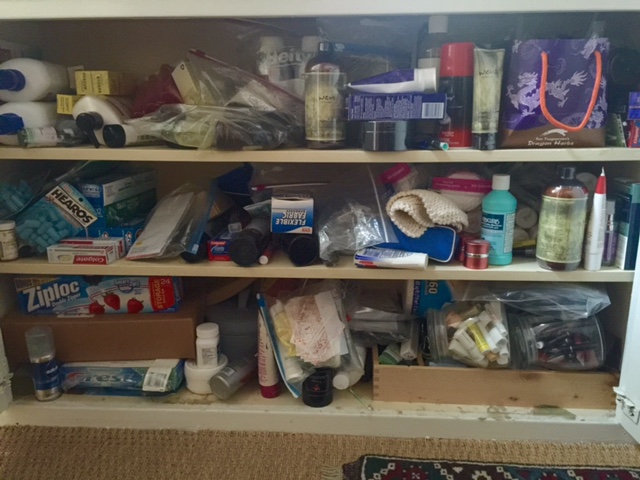
I can't tell you how many times I'm working with a client, and we are organizing under the bathroom sink, and we find 10 tubes of toothpaste, 7 sticks of deodorant and multiple shampoos and conditioners.  They start to get mad at themselves for letting their toiletry supply get out of hand. The truth is, it's hard not for it to get out of hand, and here's why...

First off, many people buy things in bulk. You may be one of those people. "But it was such a good deal" you say, as we are throwing out the oversized, expired containers of ketchup. Here's something to consider when buying at a wholesale/warehouse store: say you like tuna, and you eat it about once every one to two weeks, so you buy the package of 24 cans and get a great deal. But here's the rub: those cans will be in your pantry for the next 6-12 months. You may have the space for the tuna, but for larger bulk items this starts to max out the pantry in no time at all. For items with a shorter shelf life, you may be wasting your money in the long run, and for the average household, many sundries are unnecessary in bulk.

Solution - When buying in bulk, ask yourself how long it will take for you to consume the whole thing. Will it expire before you use it? Do you have the room to store it? 

Example two: you receive monthly orders of hair and beauty products delivered right to your door. For instance, from my own personal experience is Wen hair products and Cindy Crawford Meaningful beauty. I remember being excited to start using these products, but come a few months later I was surrounded by enough cleansing conditioner and under eye cream to last me over a year. So I called to cancel and they did everything in their power to persuade me not to. After another month of smaller shipments, I finally stood my ground and canceled, knowing I could always start up again if I wanted to. However, some of my clients don't realize that they never canceled in the first place, and are still paying for and receiving products they don't use anymore. This extends beyond beauty products; another client had water delivered faster then they could drink it, and giant jugs were swallowing the living room. Don't forget about those magazines you're not reading. Sure, a magazine doesn't occupy that much real estate, but I bet I don't have to tell you that they stack up quick.

Solution - Keep like items with like items; that way you realize how much you have and how much you're using. If it's too much, then call and cancel the subscriptions. The convenience of automatic delivery is not always the best.

Common-clutter-maker #3: You don't know what you have, so you keep re-buying things you already own. You frantically search for something you know you probably have, but give up after 5 minutes and remember that Amazon Prime can get it in your hands the next day. I can't stress enough that everything in your home needs to have a home. When every item has its place, then the next time you need it, you can find what you're looking for in the first place you look. It may seem daunting, but go through ALL of your stuff; decide what to keep, what to donate and recycle/trash. Then choose the best home for your items, so the next time you need that specific hair tie or food dehydrating tray, you know right where it is. Pro tip: hiring a professional organizer can greatly alleviate the stress of de-cluttering your personal inventory. ;)

Solution - Find a home for everything in your home. This takes time but in the long run you will save yourself time, money and aggravation.  

Lastly, and perhaps the hardest, you don't want to throw out something you paid a lot of money for, yet you don't like it and will never use again. It's hard for my clients to put that piece of clothing in the donation pile that still has the hefty price tag on it, or throw out the expensive makeup they only used once but wasn't their color. At the time of purchase it was a good idea, but now it is a good idea to get it out of your space. If you don't love it, lose it; whether you donate, recycle or sell it, you will not regret letting go of things that don't serve you.

Solution - Don't hold onto things because of their monetary value. Know that every item in your home holds energy, and items you don't love could be costing you a lot more then they're worth. 

The silver lining to this is, while working with my clients during the de-cluttering stage of organizing, they start to visualize their spending habits vs. their consumption habits. After this, they are changed forever. Now, they make better decisions about what to buy in bulk; they know not to buy another white t-shirt because they know where the 7 they own live, and they can better choose what periodicals actually need to show up at their doorstep.

Stop the clutter before it starts.

Or start stopping the clutter.  

Thanks for reading and happy organizing:)

5 Ways to Label Your Stuff

Labeling is the last step in the organizing process. It happens after you've set aside time for dedicated de-cluttering, after going through all your things and getting rid of the stuff you don't want or use, after you're left only with the things you need, use and love. The label goes on after your trip to The Container Store for a stylish upgraded storage solution, and after every item in the process has been nestled in a location that is intuitive to your lifestyle. Now. Now is the time. All you have to do is label.

As a professional organizer in LA, I know that if you label your stuff, it will save you time and aggravation. Here are some ways to get you started with the final step in organizing, labeling: 

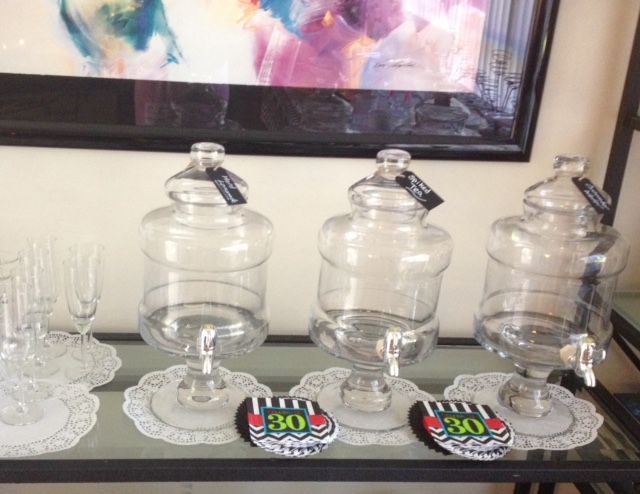
Easily the least-tedious and hand-touched way to label is to utilize containers with blank labels already on them. I love using these Jars (above) in the pantry; they have a clean look and they're air-tight to keep your food fresh. Tip - Cut out the directions from your favorite pantry items and place it in the jar with the expiration date on it.

Sticker labels are another way to go. I like using the chalkboard type for easy re-purposing, and I use them just about everywhere: kitchen, bedroom closets, hallway closets, etc.

Hanging labels are great when you can't use labels with adhesives. I often use the chalkboard gift tags but there are tons of different types. I primarily use hanging labels for baskets, but they also come in handy at parties to label beverage servers, favors, etc.

Of course, I cannot get through this blog without talking about my organizing companion, the P-Touch. I got my first label maker over 10 years and I still use it. It's great for canisters in the pantry, folders for the filing cabinet, for craft bins and drawers. The P-Touch-80 is easy to use and it's light weight. And 10 years. That's longer than most of my relationships.

About a year ago I upgraded to Brother P-Touch D400AD - don't worry, P-Touch-80 is thankful for the shared workload. The P-Touch D400AD offers more personality then the P-Touch-80, boasting nifty boarders, basic clip-art-like pictures, and a variety of fonts. If my clients are game, I ask them to choose the pictures and boarders to personalize their space. 

Of course, if you don't want to get too fancy, you can just print on address labels and call it a day. I employ this method for larger jobs for efficiency and to avoid hand cramps, and to corporate clients for a more professional, less personal touch.

In the end it doesn't matter what method you choose, but take my word as a professional organizer; labeling your items will make your day-to-day life easier: imaging finding exactly what you are looking for in the first place you look for it, every time.

Find this helpful? 

I'm always looking for knew ways to label things. 

Have a great method? I'd love to hear it! Thoughts on labeling? Leave them below! 

Thanks for reading, and happy organizing!


4 Tools to Organize the Kids' Craft Closet

With the summer just around the corner and school letting out, it's a perfect time to get the kids' craft closet/area in order. There is nothing worse than knowing you have projects to entertain the kids for the afternoon, but can't find the things that go together: you located the paint but not the brushes, you have the glitter but no glue, you have all-the-beads-in-the-world but no string. 

I was helping a client get organized in Malibu this week, and came up with some tools to get organized that will work for any child's craft closet:  

  • Plastic Bins, with or without lids
  • Modular Drawers with inserts
  • Stackable Paper Drawers
  • White Dry Erase Clingboard

I'm always at The Container Store where there is a plethora of plastic bins. I picked these basketweave bins in white because the size and style worked for this project, and I needed vertical clearance in order to store larger craft items. I used the 6.5 qt bins with lids to house the sidewalk chalk and other outdoor toys. Bonus with these bins: if you leave them outside it's okay; they're waterproof...as long as the lid is put back on;)

The second tool, modular drawers, are fab because they are sturdy, they come in many different sizes, and can be arrange in a variety of ways. I added small and medium inserts to these drawers to better organize brushes, scissors, sticks etc. 

Stackable paper drawers make the list because they are perfect for craft paper, tape, glue, stamps and stickers. I like that the drawers easily come all the way out; you can take the whole drawer with you to the craft area! When crafting is complete, everything goes back in the drawer for easy clean-up. Another stackable version that click and stack are great for pens, pencils, crayon and markers.

The fourth item I added for fun...well maybe fun for me, because I like making lists.  How often, when it comes to craft time, you're not sure what you have?  You forgot what you bought and now the babysitter is here, and you need to rush off to an afternoon appointment, but can't remember what to tell the sitter? With the dry eraser board, you write down the fun craft projects as you buy them, before storing them. Creativity can be more impulsive when you know what you have and where to find it!

To finish up the Malibu craft area, I labeled all the drawers with a p-touch label maker...I'll talk about how to make labeling fun in my next blog.

Did you find this helpful? 

I'm passionate about organization! I'm always interested in new ideas; what do you do to keep the craft area in order?


3 Ways to Organize Baby Clothes

For new and expecting moms, it can be overwhelming with all the baby items that come into the home. Many of the items are baby clothes. You see cute outfits at the store, or there was a great sale and maybe they're four sizes too big, but you get them anyway because they'll eventually fit, right?! And it's not just you, friends and family give baby clothes as gifts or bags of hand-me-downs that can range from all different ages. But what do you do with the clothes in the meanwhile? For this blog we are going to concentrate on clothing storage solutions for newborn to two year olds. 

I've found the best way to get started is to make piles of clothes by size. We know the first two years are broken down into newborn and/or 0-3 months, 3-6 months, 6-12 months, 12-18 months and then 18-24 months. First we separate, then we decide what we want to keep. Even if that skull-and-crossbones onesie was a gift for your darling Penelope, or the threadbare hand-me-down was given by a cousin you don't see enough, it doesn't mean you have to keep it. Focus on what serves you, and what will be right for your child.

Now that we have our "keep" piles, separated by size, we can decide how we want to organize the clothes. You can use one or a combination of these ideas, but I like incorporating all three.

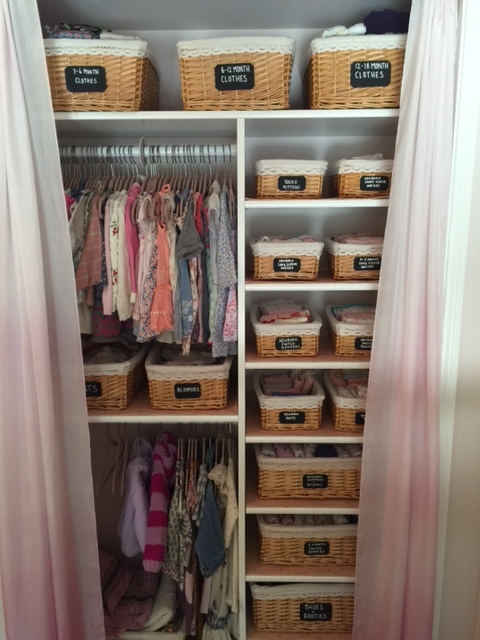
  • Baskets with chalkboard labels.

  • Dividers for hanging clothes.

  • Clear airtight plastic storage bins with labels.

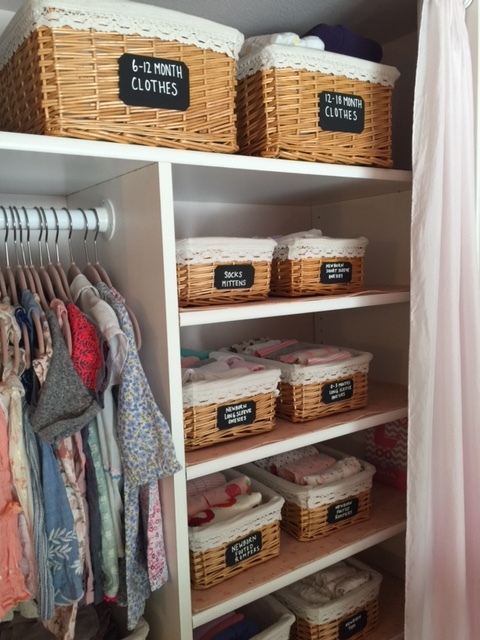
The baskets with chalkboard label method is great if you have a lot of shelf space; I encourage storing the baskets on the shelves in a closet or bookshelf. Pro Tip: Don't forget to measure your shelves before buying any baskets to make sure they will fit properly. Adhere chalkboard labels on them if they don't already come with them.

This method is great because as your child grows, you can easily swap the sizes. The baskets in the picture below did not come with labels, so I purchased chalkboard gift tags from The Container Store, trimmed them to the shape I wanted, and used this double sided tape to attach them. Personalize it: there are oodles of baskets and labels to choose from, so you can add your own style to your organization endeavors.

The hanging clothes with dividers method is terrific if you have lots of hanging space. You can use clothes dividers, pre-labeled by month/size, or use plain ones. With the latter of the two, using a label maker or chalkboard labels for each divider, allowing an easy change of the sizes as your child gets older.

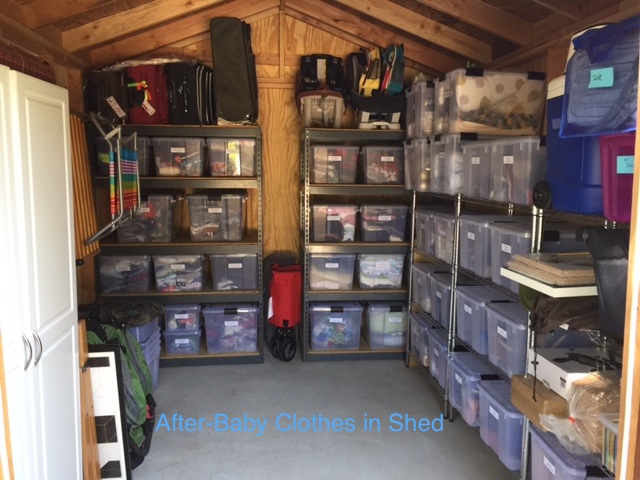
The third method works for the months to come. The labeled, airtight storage allows for long term keeping, and knowing your baby's clothes are staying clean, and bug and dust free, is especially great if you are storing in an attic, basement or shed. This is also wonderful if you plan on having more children. When you are done with one size, replace it with the next size up, and the first size goes into storage.


The picture of the shed is from a client that has four boys. We wanted to keep all the hand-me-downs organized, so when she is ready for the next size up, she knows exactly where everything is. We also did bins for shoes for the kids by size. 

Did you find this helpful? Comment below with your thoughts, and I would love to hear how you organized your children's clothes! For more useful tips check out Momlovesbest


A Few Ways to Store Your Purses

Living in Los Angeles, I get to work with a lot of opened minded clients, that let me try different organizing ideas to discover what works best for them. After I finished organizing this client's closet, the last thing to consider was her many purses and bags. 

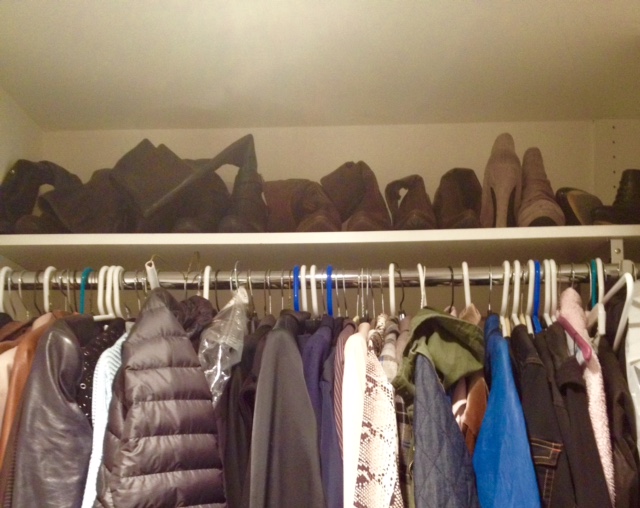
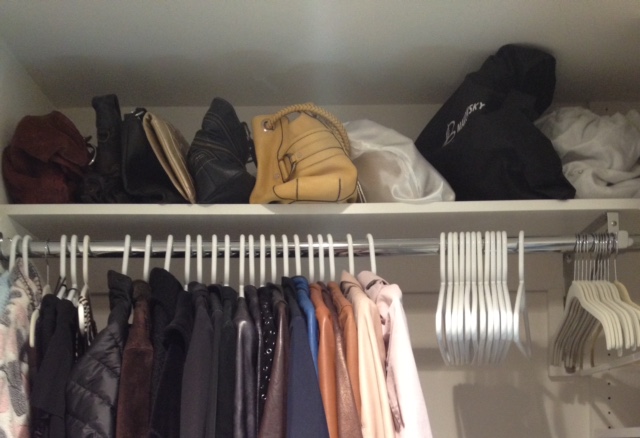
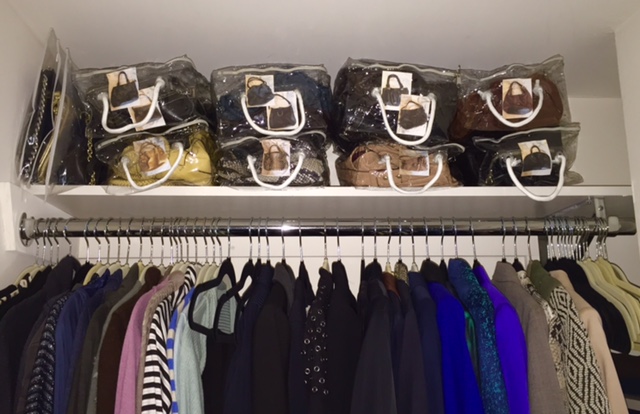
It would have been fine to keep the bags neatly on the top shelf of her closet, but I was concerned about the dust and not being able to see the purses that were in the duster bags.  For me, out of site, out of mind; I forget I have, and I feel this is the same with my clients. 

So, off to The Container Store I went, in search of a solution to the problem of dust, seeing all the bags, and time ... I don't want to spend the time looking through duster bags to find a purse for the evening.

I don't know why I find such joy out of using an organizing tool for something that was actually designed for something else ... anyway, I found sweater storage bags, small PEVA Chest Clear 12" x 9" x 6", just big enough for one or two purses, and the storage bags can be stacked; I love it when you can use more vertical space. 

Ok, that works, right? Well ... now you can see the bags but all the black and brown ones look the same. So, I went back to the old picture trick. It works great for shoes, and now I will be using this for purses as well. I don't have a polaroid camera anymore, but I did have 8168 shipping labels. I took pictures of all the purses on a white background, printed them out on the labels and cut them with a paper cutter for a straight edge. They stick on really well, so no peeling corners over time.

What I also like about the pictures, is if you want to store the purse in the duster bag that it came with, you can and still know what is what in your closet. 

Of course, there's not only one way to organized purses. Here are some other tools to use. I like these Cubbies that are made for shoes and purses, as well as Hanging Canvas Shelves; these are great for clutches.

Like these tips or have a great one to share? Let us know in a comment below. 

If you have a storage dilemma, I can help! Email me at info@spacetolove.com. 

So Organized it's a Little Creepy

My screenwriter friend from New York is staying with me here in LA while he pitches his new script around town. He was settling in last night and heads to the bathroom. He asks, "Can I borrow some toothpaste?" I say, "Sure thing, it's in the medicine cabinet". I heard him call out from the bathroom "Oh my god, it's so organized in here it's a little creepy." Not a reaction I ever thought I would get.

Am I that organized that it's a little creepy? After he was done brushing his teeth I had to go in there and take a look. I opened the cabinet and thought...actually, it could be even more organized then this, I'll fix it tomorrow. Oh no, maybe I do have a problem. Wait...is being over organized even a problem? I'm not OCD.

Last month's blog was about organizing a medicine cabinet, but the one you usually have in the kitchen because you have kids. Well this one, now that my friend brought it up, is about the bathroom medicine cabinet. The next morning he was off to meetings and I went in the bathroom to straighten up. 

I approached this as I would if I were one of my clients. I went through everything and got rid of items that were expired and wasn't using anymore, or had a better home somewhere else. I didn't get rid of much but it still made a difference.

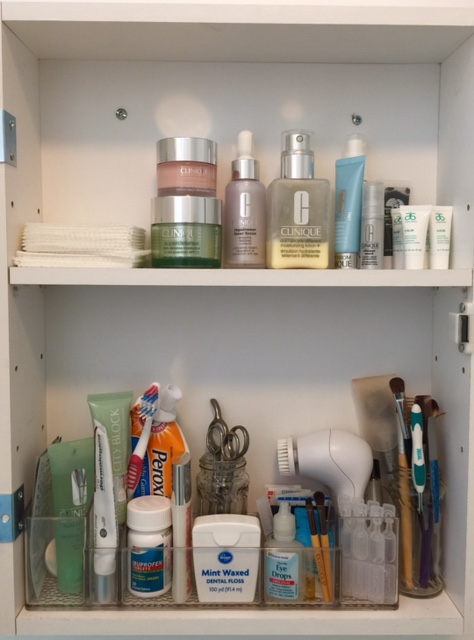
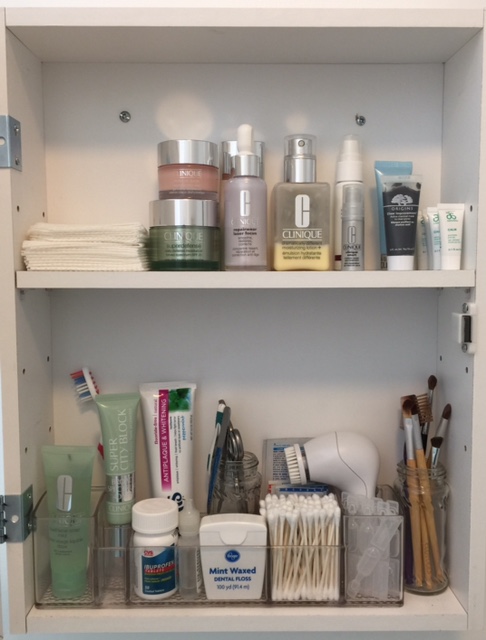
I'm a fan of the medicine cabinet organizer in there. It makes things so much neater. There are always the small tubes, tweezers, scissors, q-tips, etc., that take up so much horizontal space, and then they are usually falling out when you open up the cabinet, so annoying. The organizer that I have is from a few years ago, and I think I bought it as a desk organizer, but decided it worked better in the bathroom. If you wanted to get one, the Container Store has something similar with a small drawer in it, even better. I also recommend the magnetic toothbrush/cosmetic holders you can stick on the back of the door. Get them on Amazon. I had them in my last place but this door is wood.

Anyway, back to the reason for this blog ... can you tell the difference in the before and after? I think it looks better and feels better. 

Oh, and do you think I'm too organized? 

4 Easy Steps to Organizing Your Medicine

With January starting and this crazy cold, rainy weather we are having in Los Angeles, I thought why not talk about organizing your medicine. I work with busy moms a lot that know as soon as school starts sick kids are soon to follow. However, with this weather we want to be prepared more then ever.

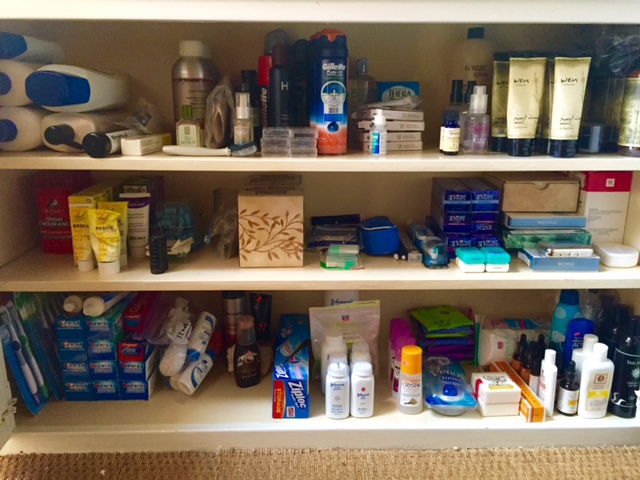
For this mom of four, I needed to come up with a solution that would help her find what she needed within seconds. I organized the medicine by making different categories for ailments as well as age groups.  Now, it is easy for her to find what she needs quickly and when the time comes to see what she is out of. Follow the steps below to use this to organize your medicine, hair products and/or makeup.

Before & After

Before & After

Four easy steps to getting organized.

1. De-clutter - Go through everything and get rid of all items with past expiration dates, any items you don't use anymore and anything that never worked in the first place. (I tried sleep aids once that never helped me sleep, so no sense in keeping them.) 

2. Put like with like - Start by making piles of Flu/Cold, teething, kids vitamins, adults vitamins, rashes/skincare, first aid, pain reliever etc. You will see what categories you need as you go through the items that you're keeping.

3. Count and Measure - Once you have all your items separated count how many categories you have so you will know how many bins or baskets you'll need. Then measure your cabinets width, depth and height. The worst is getting excited about organizing and running to the store to get containers then realizing you bought the wrong size and not enough or too many. I had a lot of different categories with this client so I chose smaller thinner bins from The Container Store that could easily fit five across the cabinet. 

4. Label - I love putting labels on everything. It helps see what you have at a glance and saves you time not to have to go through everything. I used a simple P-Touch label maker. It made it fast and easy. 

I feel that keeping it simple is the way to go. If you would like any suggestions on organizing products or have any questions on organizing please comment below or email me at info@spacetolove.com. 


Slim Down your Closet for Summer

Decisions decisions...What gift should I buy for the graduate? What to get dad for father's day? What am I bringing for the 4th of July picnic?  

Anybody want to add, What clothes to keep in my closet? to that list?

While shopping for the perfect gift and making fun summer plans with your family and friends is not a chore, I don't think cleaning out your closet has to be either. It can be fun and really rewarding. It's like giving yourself a gift and everyday you get dressed will feel like a holiday.

All you have to do is ask yourself a few simple questions about the clothes that you have in your closet.

Of course, if you don't like the garment anymore, just donated it. However, not all pieces of clothing will be that easy to decide on. 

Below are three questions to ask yourself. 

1. Does it fit me? Right now? Today? Not two months from now or two months ago.  

2. Am I holding on to it out of obligation? If someone bought it for you and you really don't like it but feel bad getting rid of it. 

Also, I didn't say in the video another thing about obligation, is when you paid a lot for clothing but don't like it. You had a bad day and went out and bought an expensive outfit, harmless. Now, a year later, it's still in your closet with the tags on it. You know you're never going to wear it. You've even tried it on a few times hoping it will look as good as it did in the store but it just doesn't work. However, you won't let it go because of the money. If it makes you feel guilty or bad it's still costing you.

3. Have I worn this in the past six months? Did I wear it this past season? Every new season is a new opportunity to purge.

Bonus tip...I would wear it but I need to get them fixed first. They need to be hemmed, the button fell off or it needs to be taken in. Any unfinished project is unnecessary clutter for the brain. Put the items in a bag by the door and set a day with in the next 3 weeks to get it done or off to Goodwill it goes. You will feel so much better either way.

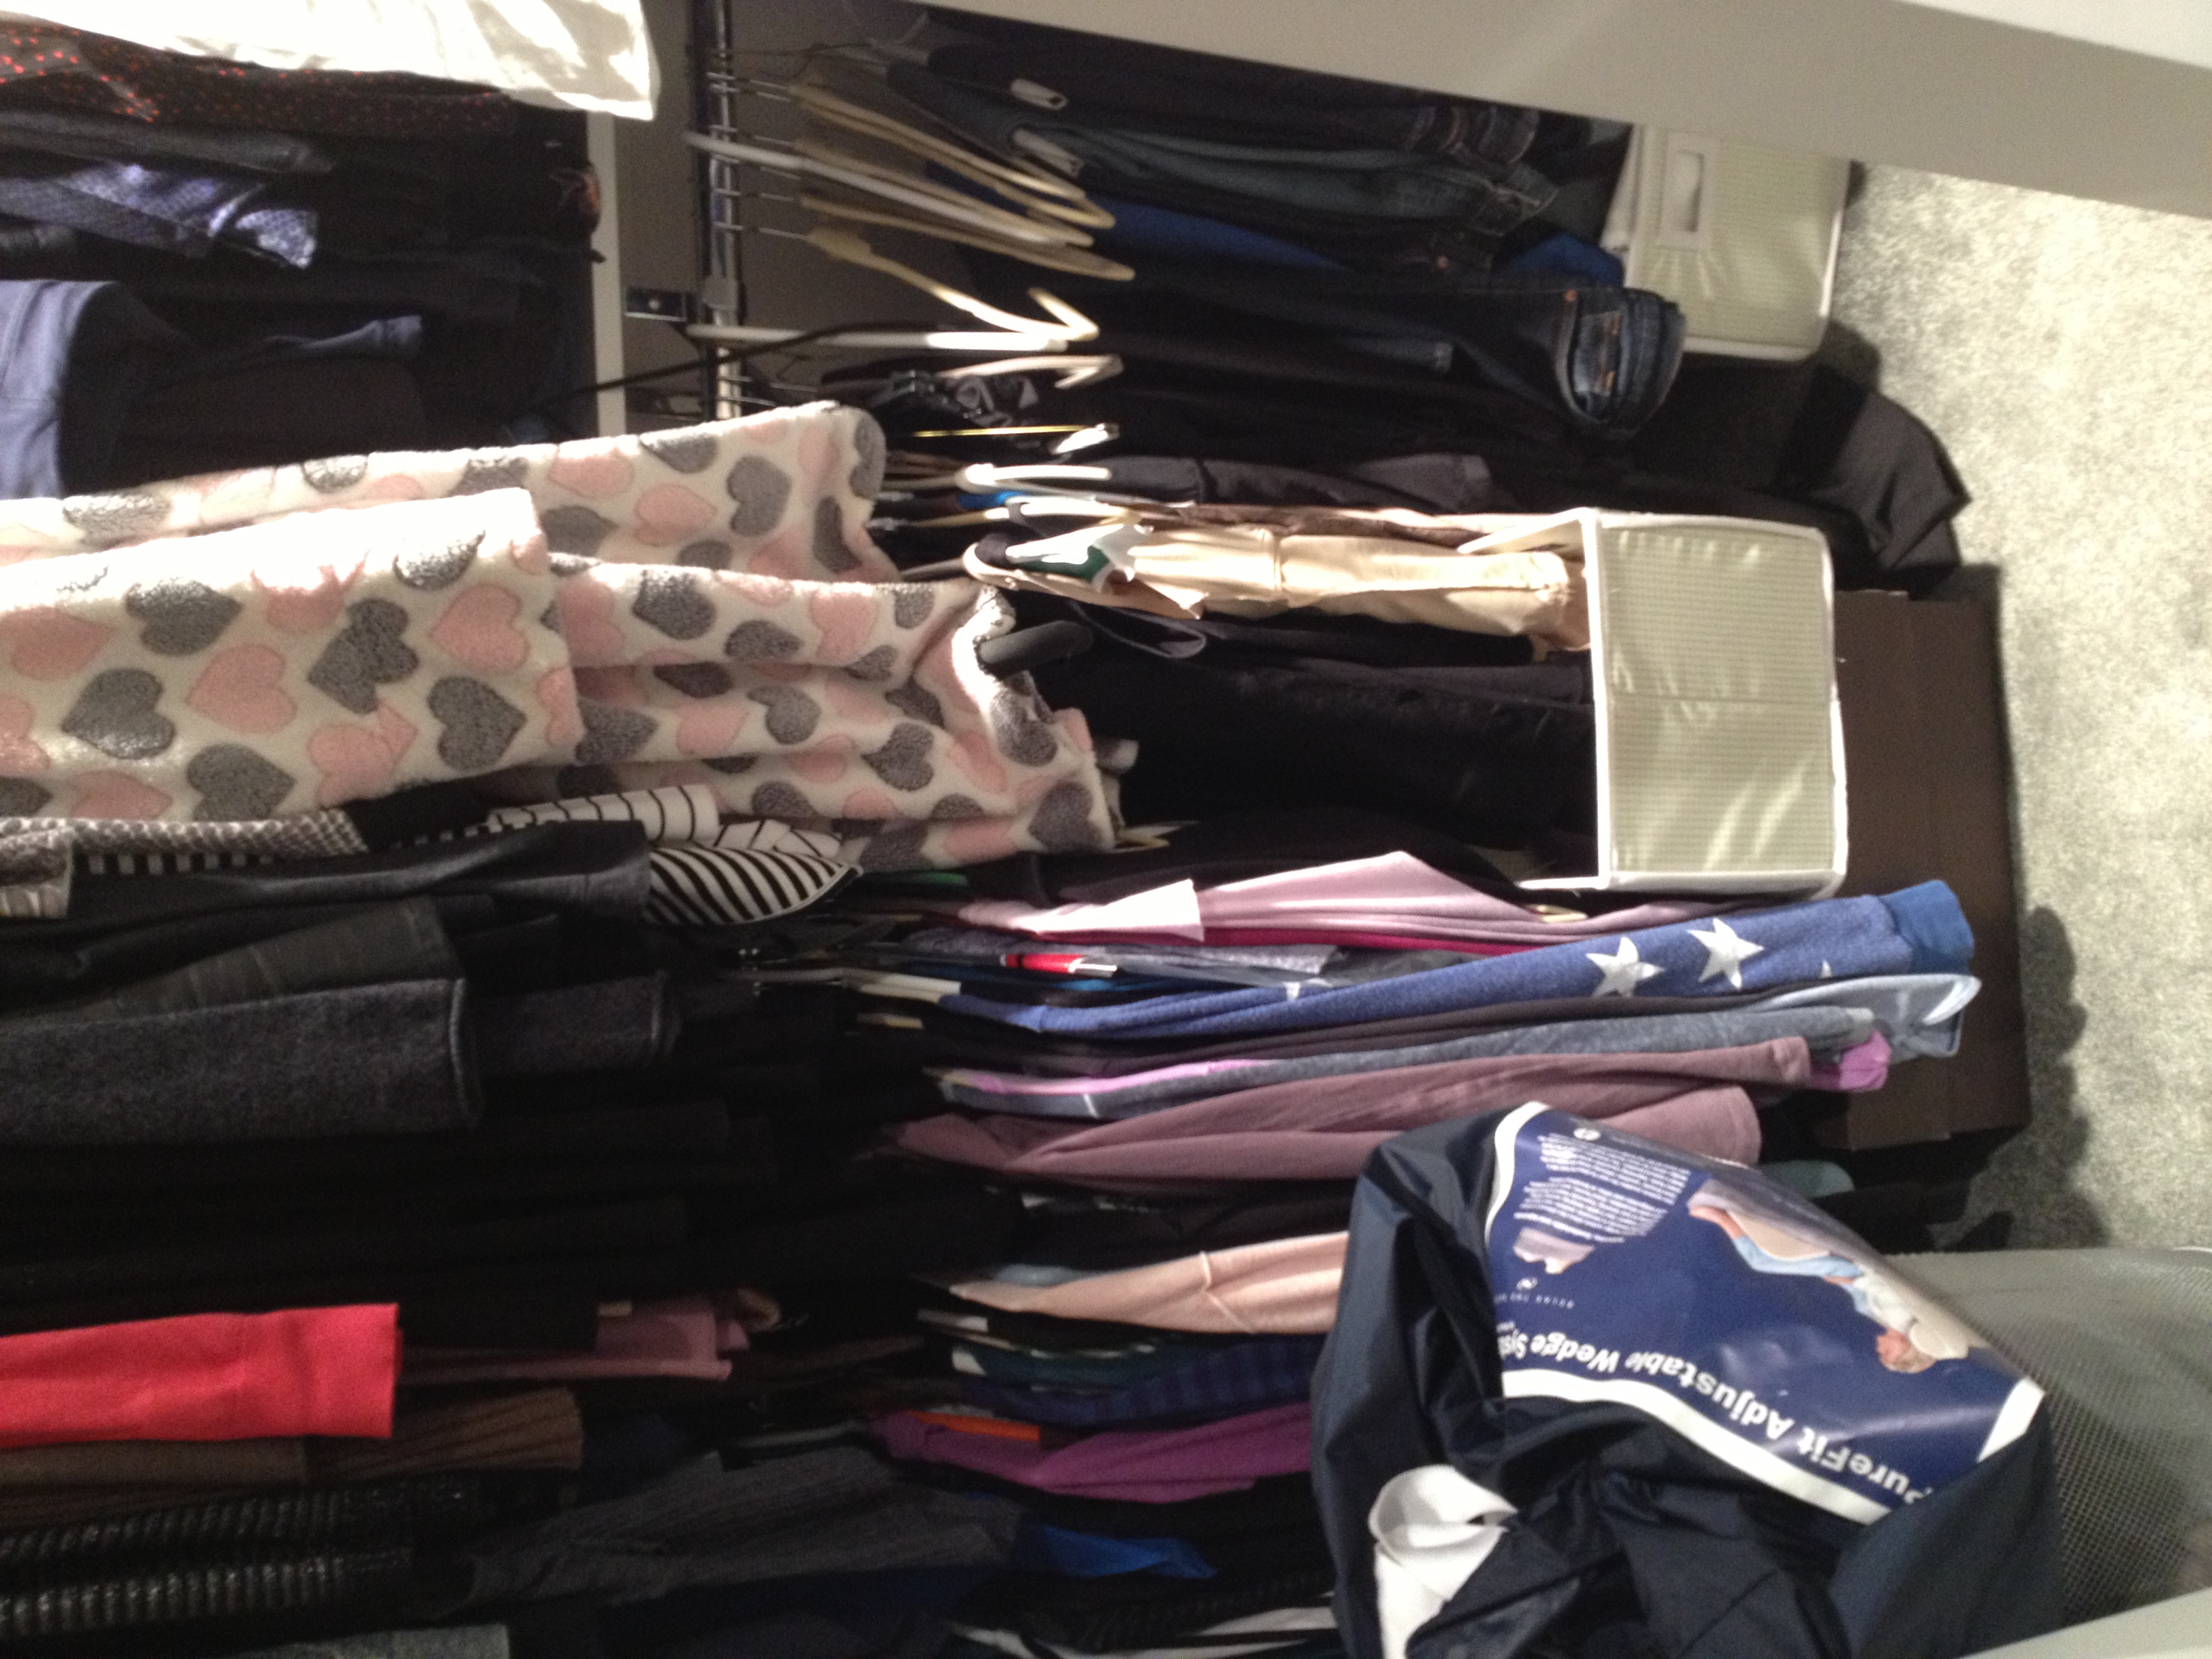
I added before and after pictures from a past client for some motivation. 

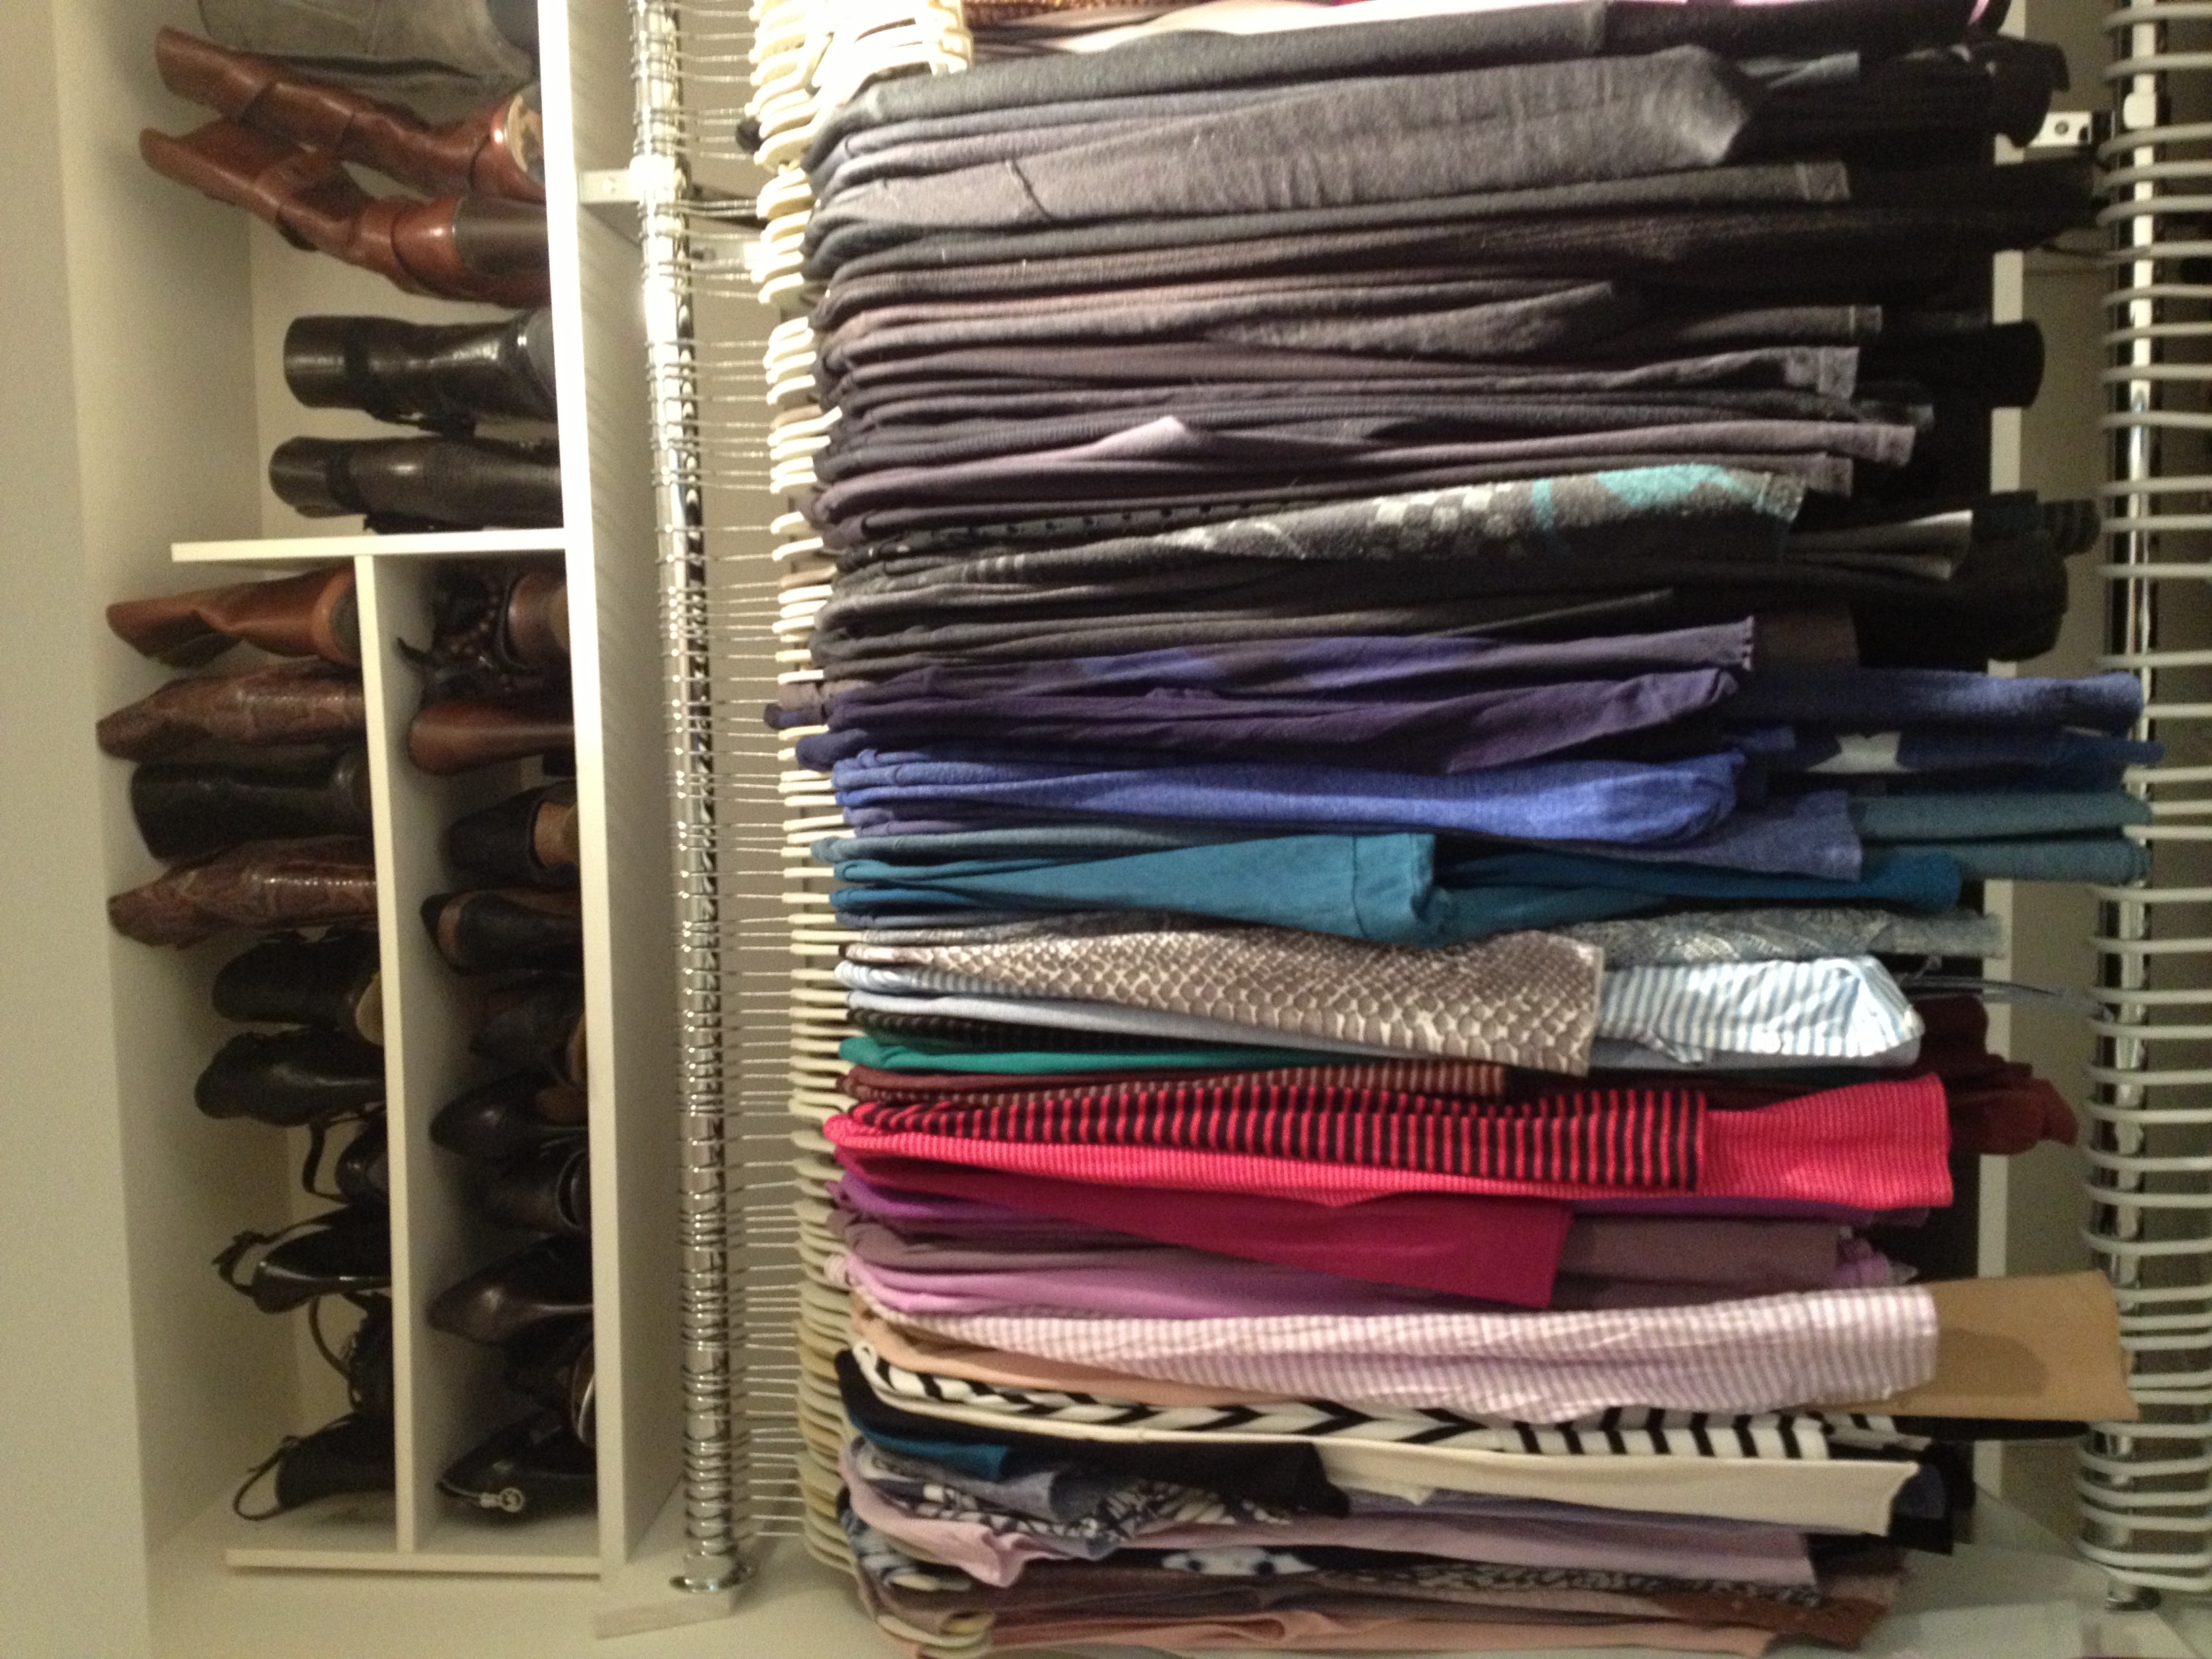
So, if you're feeling motivated, the way to start is by taking everything out of your closet and before you put the items back ask yourself the questions above. If you're keeping them put them back in the closet. If not, have a bag ready for donations and another for mending. It also helps to have a "maybe" pile, something you're not sure you want to get rid of yet. If that is the case, you can give yourself more time to decide at the end.

I always say, "if your not wearing it, it's best to give it to someone else that really needs it".

Also keep in mind, as you're slimming down your closet, you're making room for new and better things to come into your life.

It's a win win! 


Enhancing My Career with Lights and Mirrors

Lighting and mirrors can turn a room around but can it change the direction of my career?

The career/life path section of your home is usually when you first walk in. If you're curious, use the bagua map to help locate the career area of your home. My career section was looking really sad and it didn't have proper lighting there either. 

As I'm trying to incorporate Feng Shui principals into my home I know there are certain elements you need for each section of the bagua map. For the career section the element is water, the color is black, free form shapes, metal and round objects. Fountains are great.

I couldn't get a fountain so I went in search for a mirror, which is also good for this area.  

I wanted to find one that had some of the elements in it.  I looked for a round mirror with a metal frame that had a free flowing design. The bookshelf was already black so that was working for me. To help brighten up my life path I was also on the look out for a floor lamp.

I love Lamps Plus I found the mirror and the lamp there and they were having a sale, yay!

I also de-cluttered the books and magazines on the bookshelf and gave it a good cleaning. This is so important if you want to change things for the better in any area of your life.

Now, I feel good when I'm in that space. I use the mirror as a last look before heading out the door. The lamp has directional lighting so I can use it when I'm reading on the couch. As for my career, I was setting my intention on what I want for my career as I was cleaning and putting things in place. We'll see...I have faith.

If anything, it did inspire me to write this blog post. 

You're Only as Good as Your Bag

As a professional organizer you need your tools. That could be a screw driver one minute and then a label maker the next. How does an organizer stay organized when they are going to a clients house to get them organized? It's all about the bag.

I've been waiting for the perfect organizing bag to come into my life. Finally, a year later I made it to the travel section of The Container Store. (I've been to this store a million times!) There I found this Eagle Creek travel bag that had everything I needed. Lot's of room without being too big, a lot of pockets without getting too confusing and thick shoulder straps that don't slide off.   

Also, in the travel section were clear plastic toiletry bags. I had to pick up a few of these. I put labels and scissors in one and tapes with glues in another. Now, when I pull these out, I can see exactly what I have without having to open them. Big time saver.

I have been working all this time, showing up at a clients house, with three bags. One for tools/hardware, another for office supplies and then my personal tote bag that included my notepad, pens, markers and the clients folder. Somehow, with all these bags I always felt like I was forgetting something!

It was too much to think about before heading to a clients house. Now, I just slide in the clients folder and I'm out the door.

I'm all about simplicity and less stress. Now, with the right bag, I achieved just that!


Is there such a thing as a "Woman" Cave?

I love wrapping gifts. I always thought I would get a part time job in the mall wrapping gifts during the holiday season, just for fun. It didn't happen but my love for wrapping never faded. One day my neighbor came down stairs in a hurry asking if I could hide her husbands gift for his birthday. I said yes and she brought down this huge unwrapped box with the items for wrapping and of course, I happily volunteered to wrap it for her. 

A new client of mine wanted to get her wrapping room organized. My first thought was, "You have a wrapping room?!"

One thing I love more then wrapping is organizing things when they're really messy. What is it that people are always saying..."Choose a job you love, and you will never have to work a day in your life".

Time just flew by as I "worked" on this room. Putting all like items together. All Thank You cards with Thank You cards and Birthday cards with Birthday cards. Placing the ribbons out on the shelves ready to be made into bows. Finding homes for all To and From tags, gift bags, wrapping paper and hostess gifts.

My client didn't think it could get it done in one day and I was a little skeptical myself but it all fell into place.

And who doesn't love before and after pictures?! These are my favorite so far.  As I stepped back to take the after picture, I thought, "This would be my man cave, well..."woman" cave. Wait, is there such a thing?" I guess I can google it. Either way, I would be happy as a clam hanging out in this room.

One day I will have my own wrapping room/"woman" cave. Just putting it out there:)


Adding Color With Fabric.

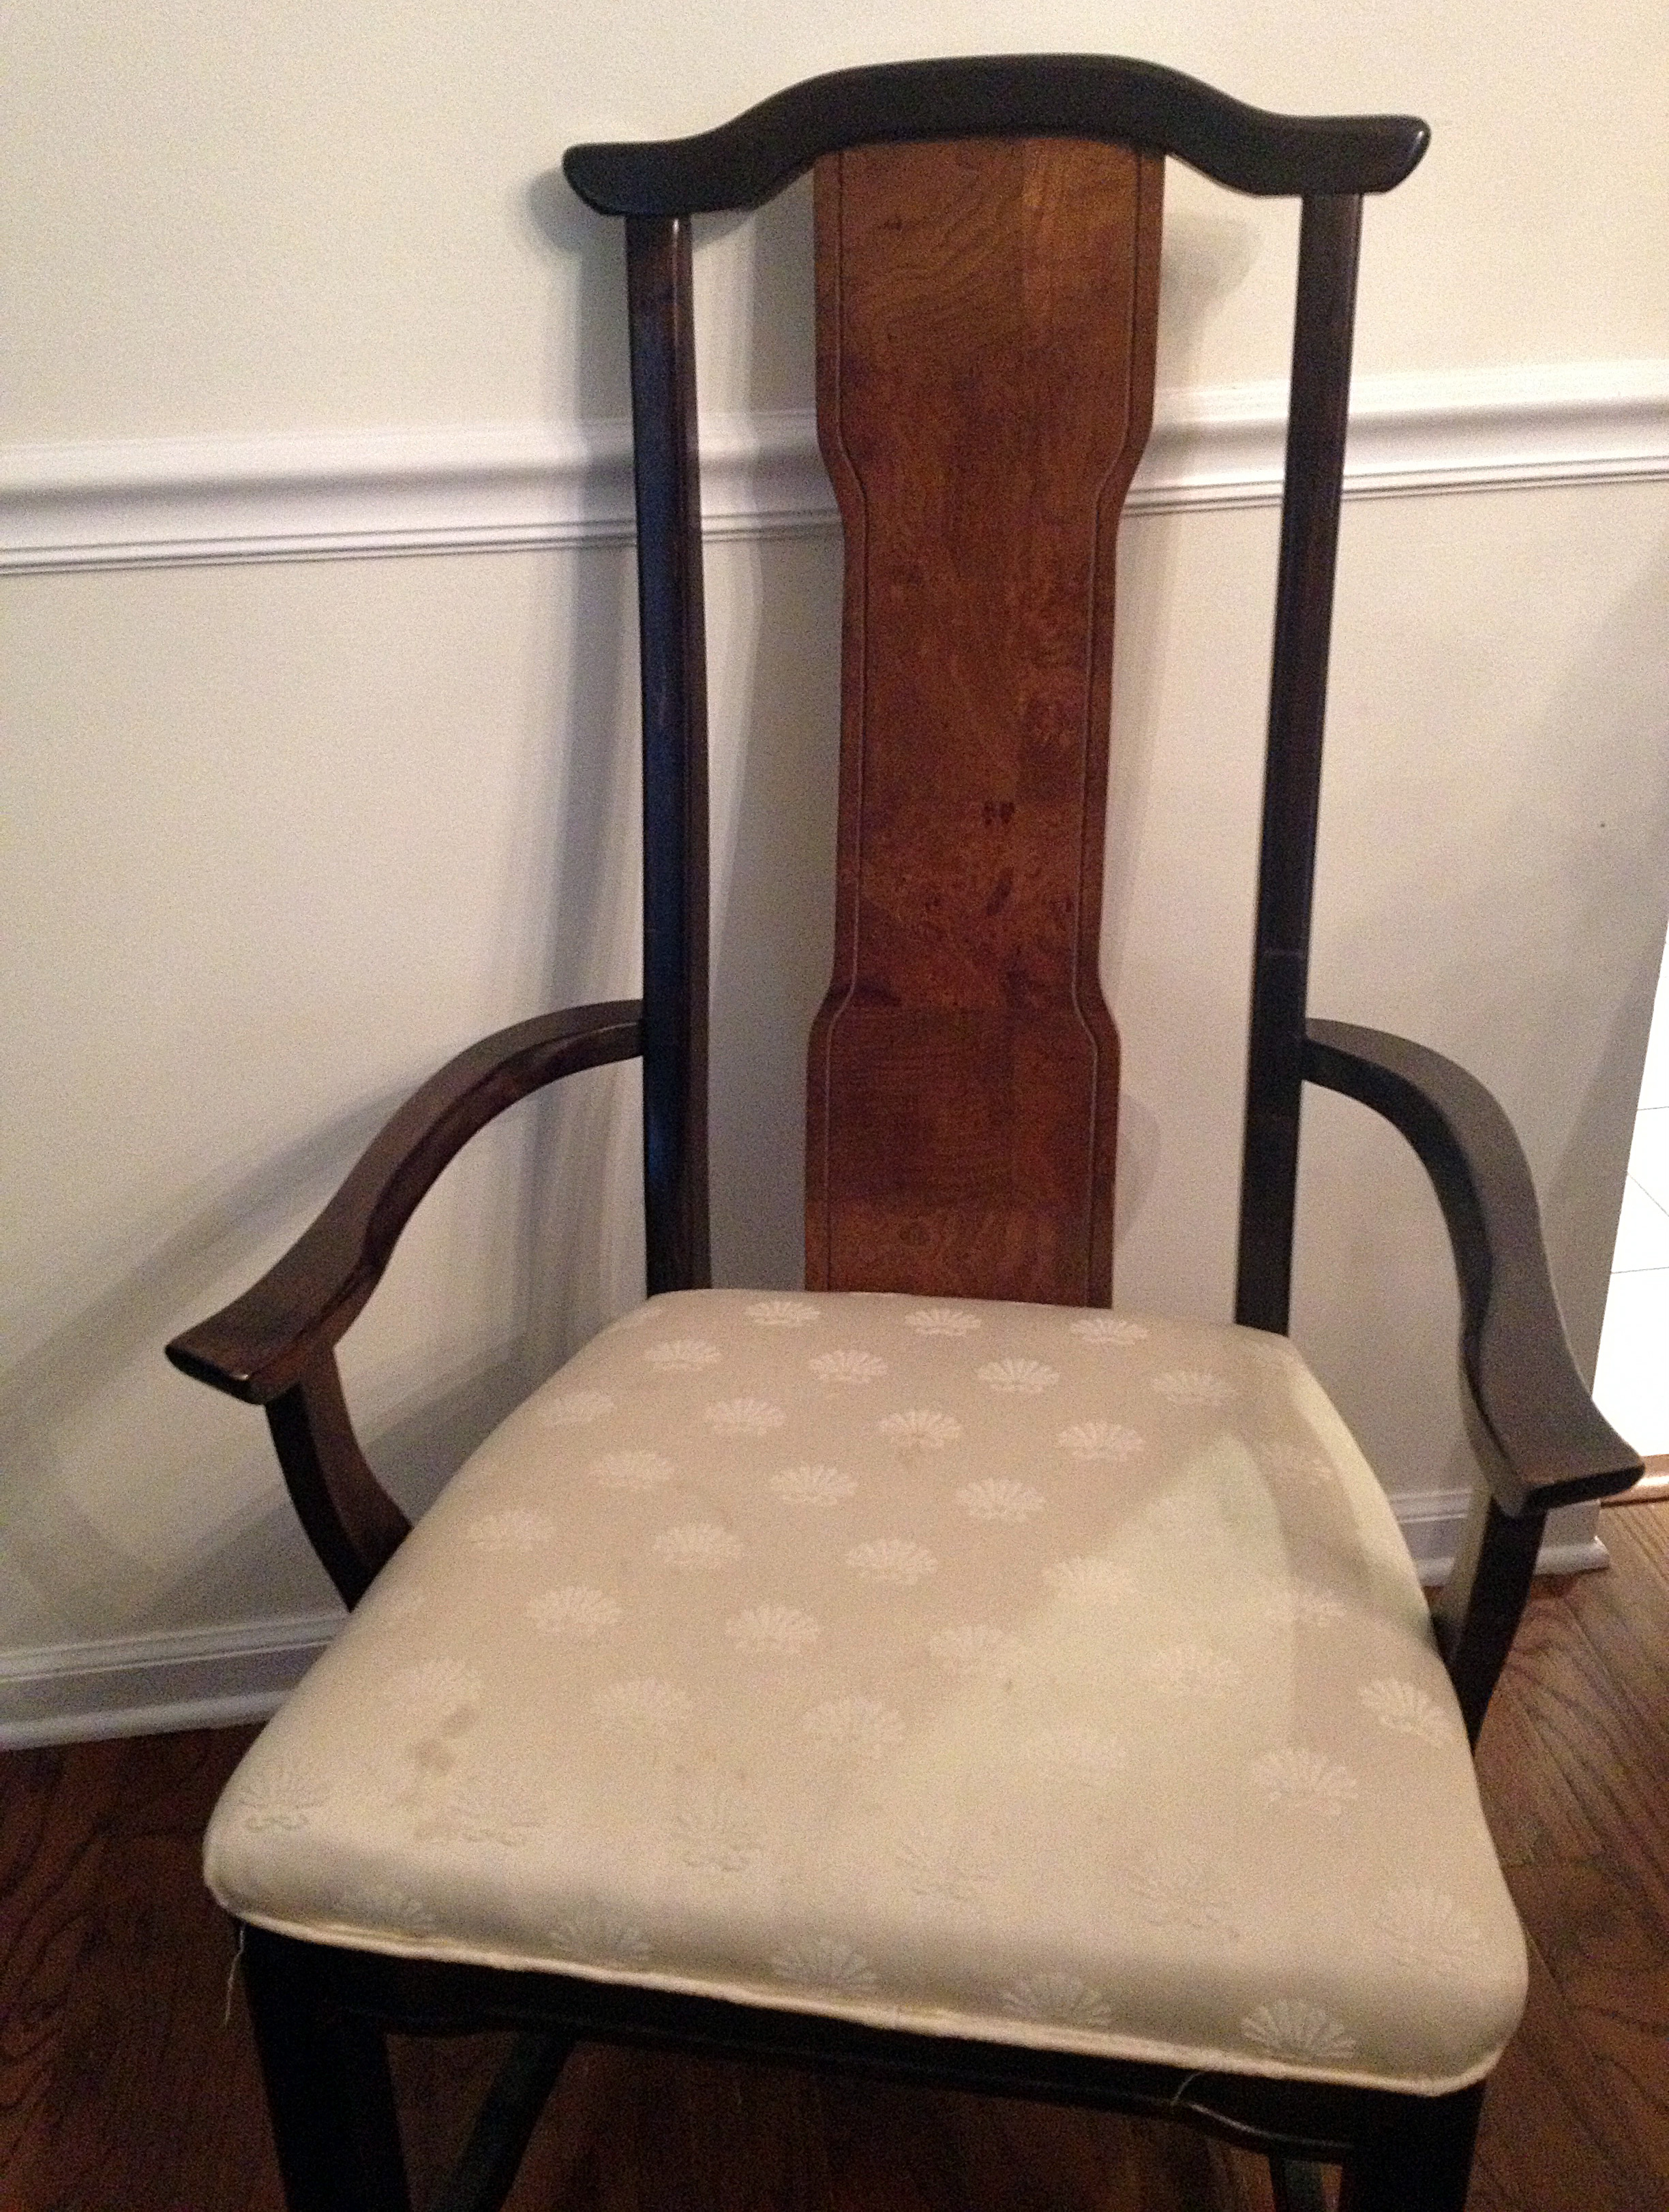
I remember the time my sister asked me to help reupholster dining room chairs and I thought, "How do I get out of this one?" It sounded so labor intensive and to be honest, I didn't think I had it in me to take on such a project. However, my sister does not take no for an answer. 

The next day we got started with just a few tools. I watched as the seat came off the bottom of the chair with just a screw driver. "Well, that was easy" I thought, and then I starting pulling out the staples from the bottom of the seat in order to remove the bottom cloth from the chair. Here I had to put in a little effort but I do like a challenge once I get started onto something. 

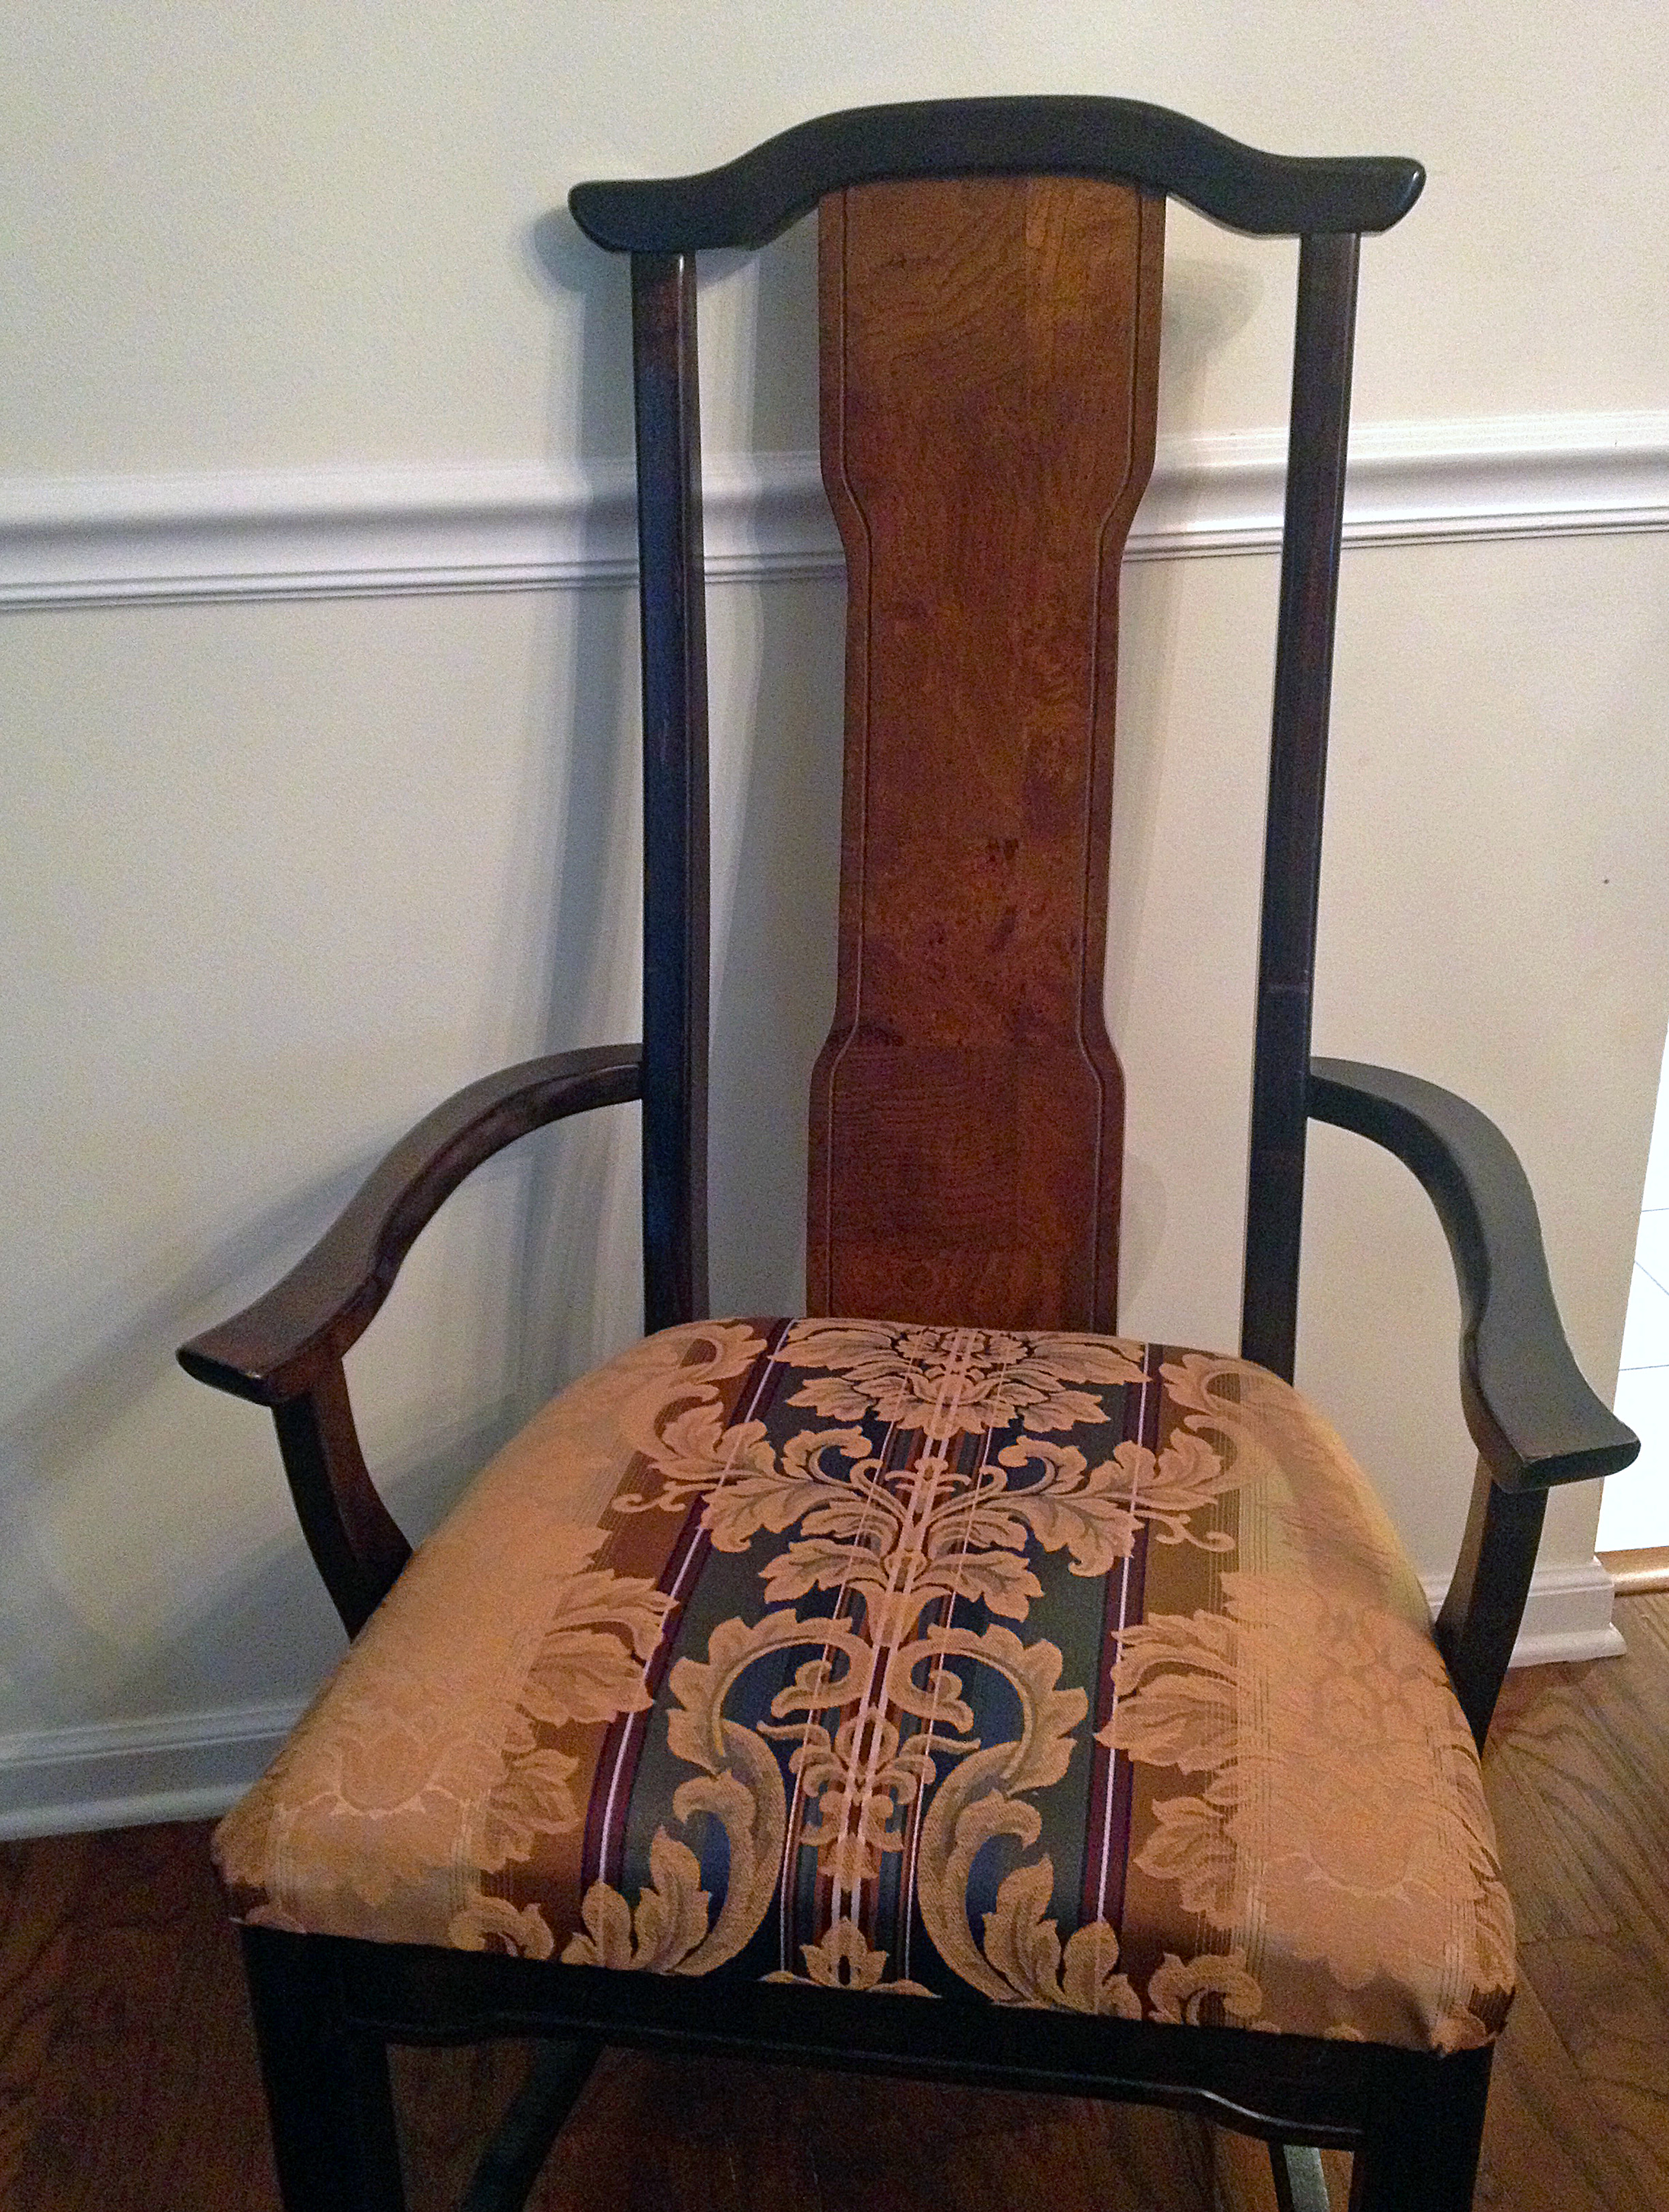
The fun part was lining up the new colorful fabric and then stapling it into place. Just be sure you have it centered. I learned that the hard way. Nobody likes doing things over and want to save you the trouble.

Then we replaced the seats back onto the bottom of the chairs. One after the other and soon enough we completed all six.

Done and done!  They looked so much better.

What was I so afraid of?

Oh and I didn't stop at dining room chairs.

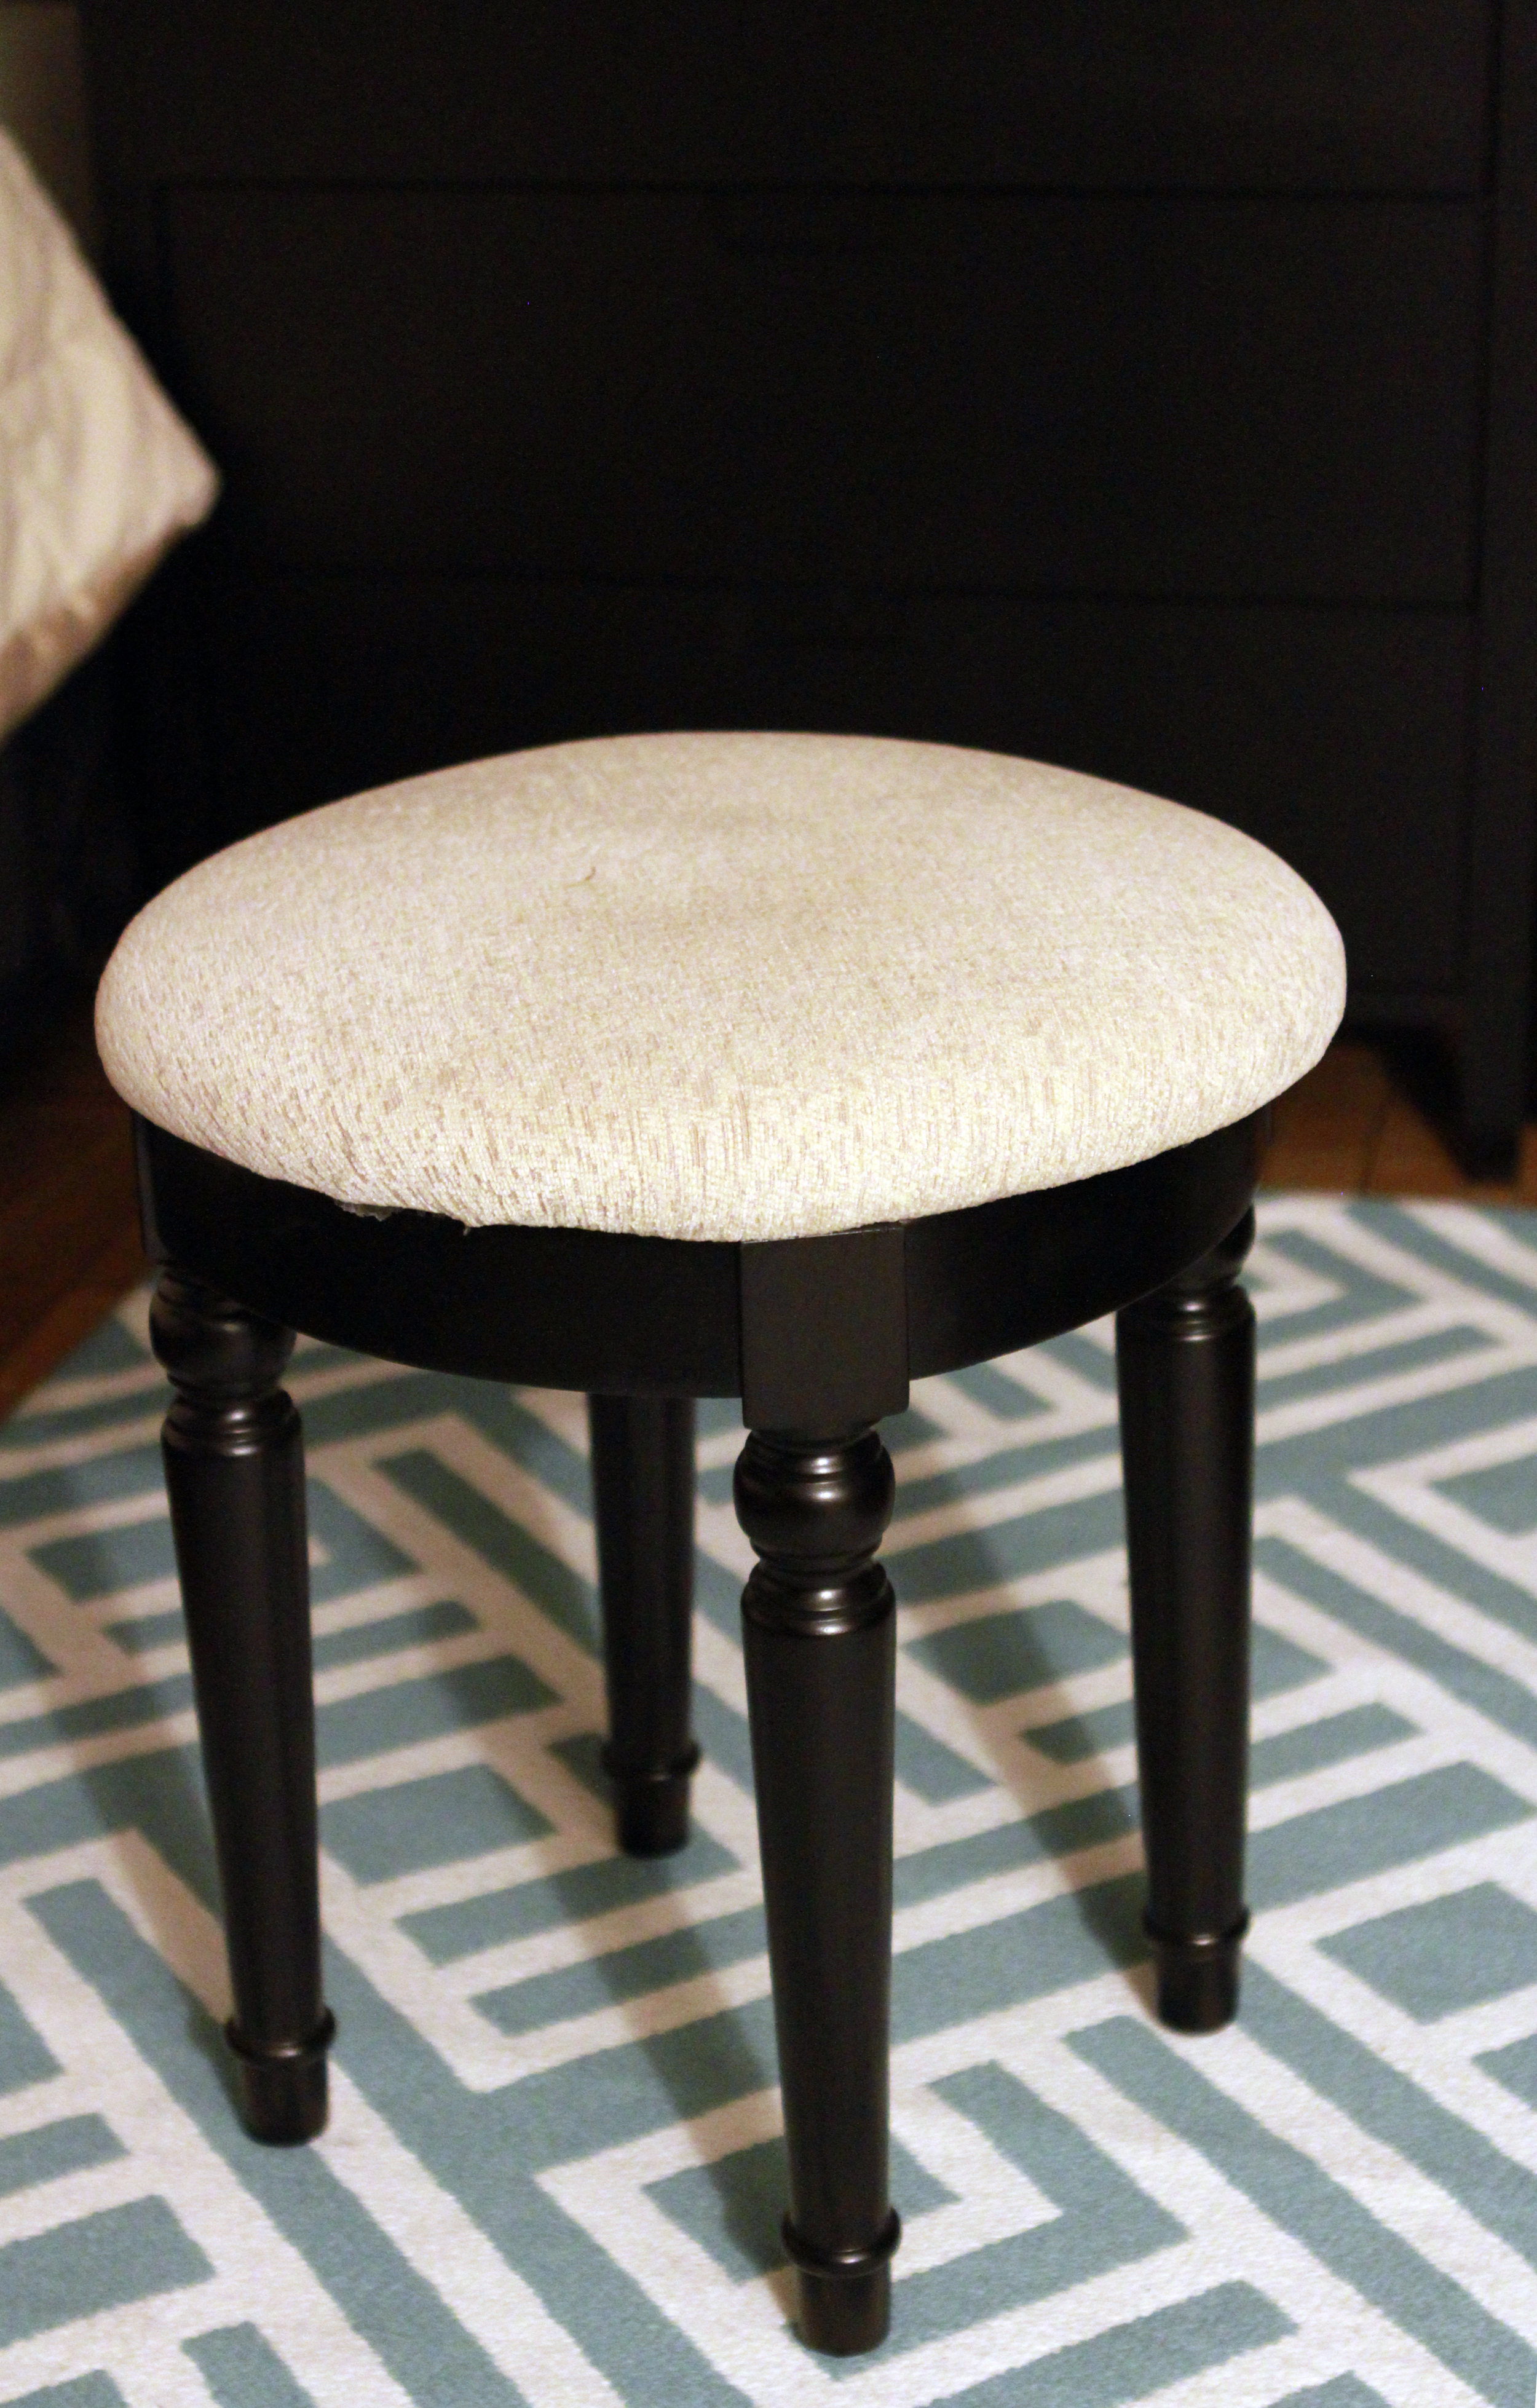
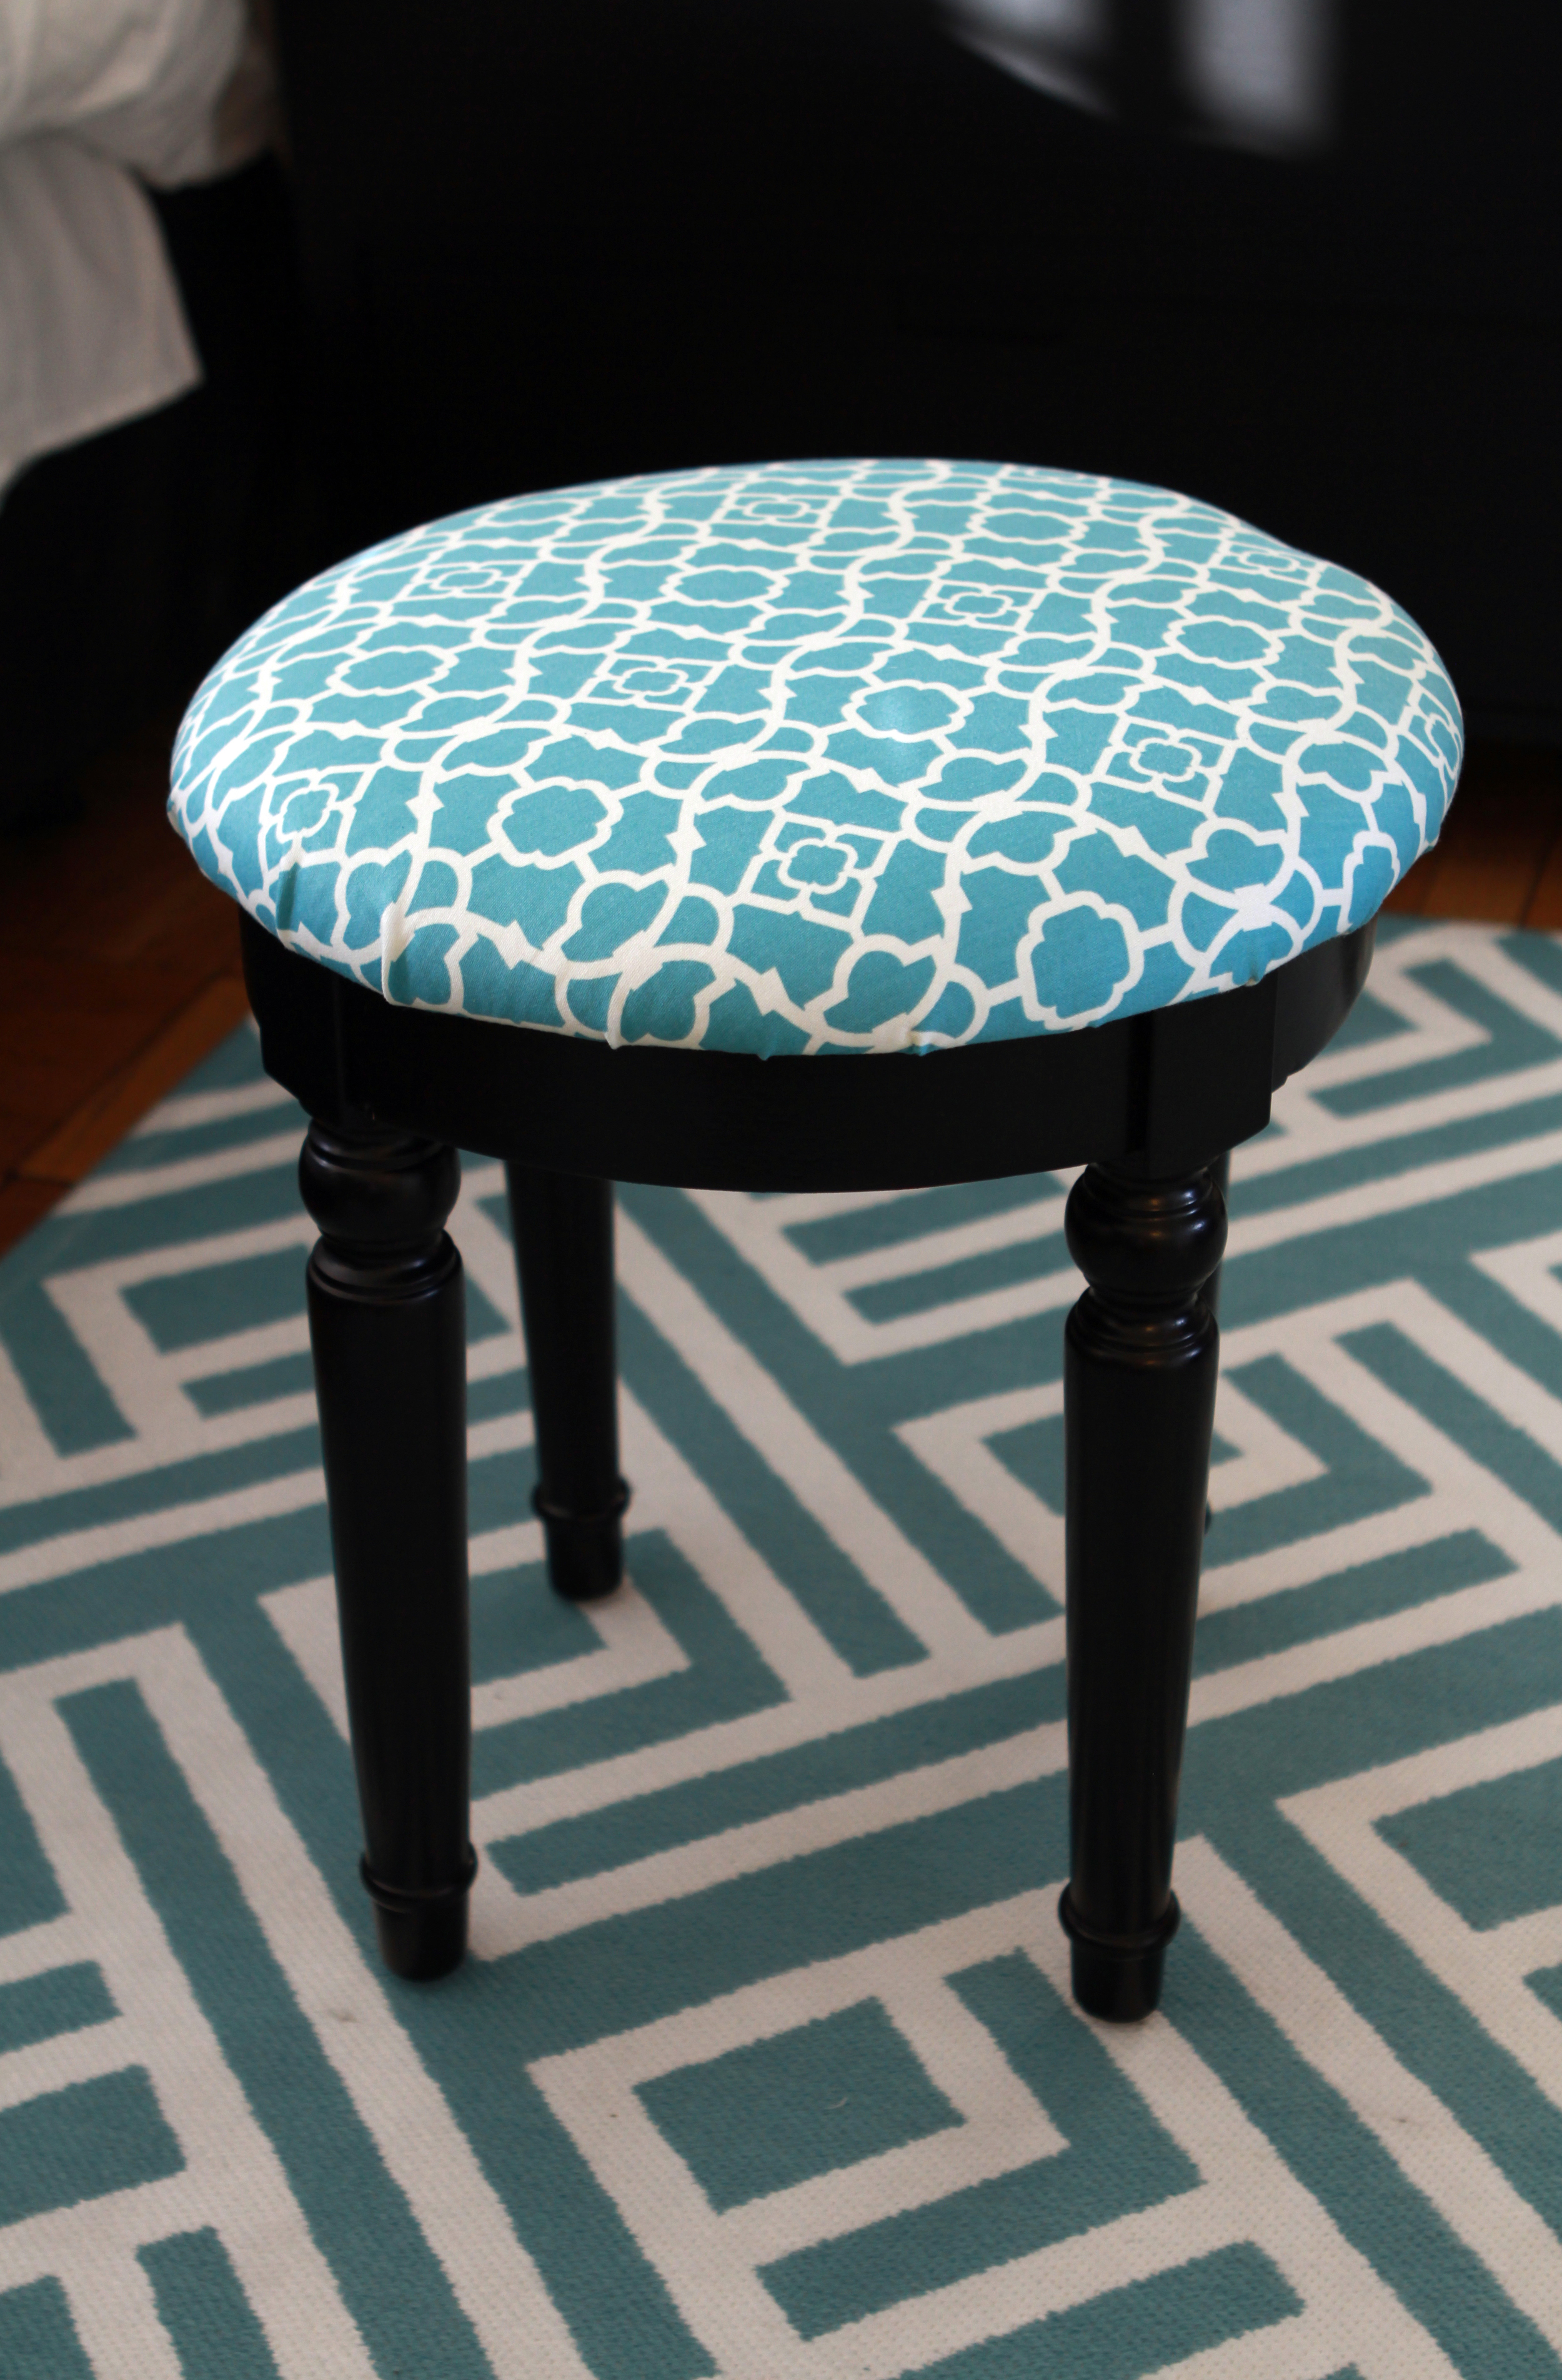
As soon as I got my new vanity set the first thing I did was went out and bought fabric to reupholster the stool. I'm good at the reupholstering part now but I bought way too much fabric, oops.

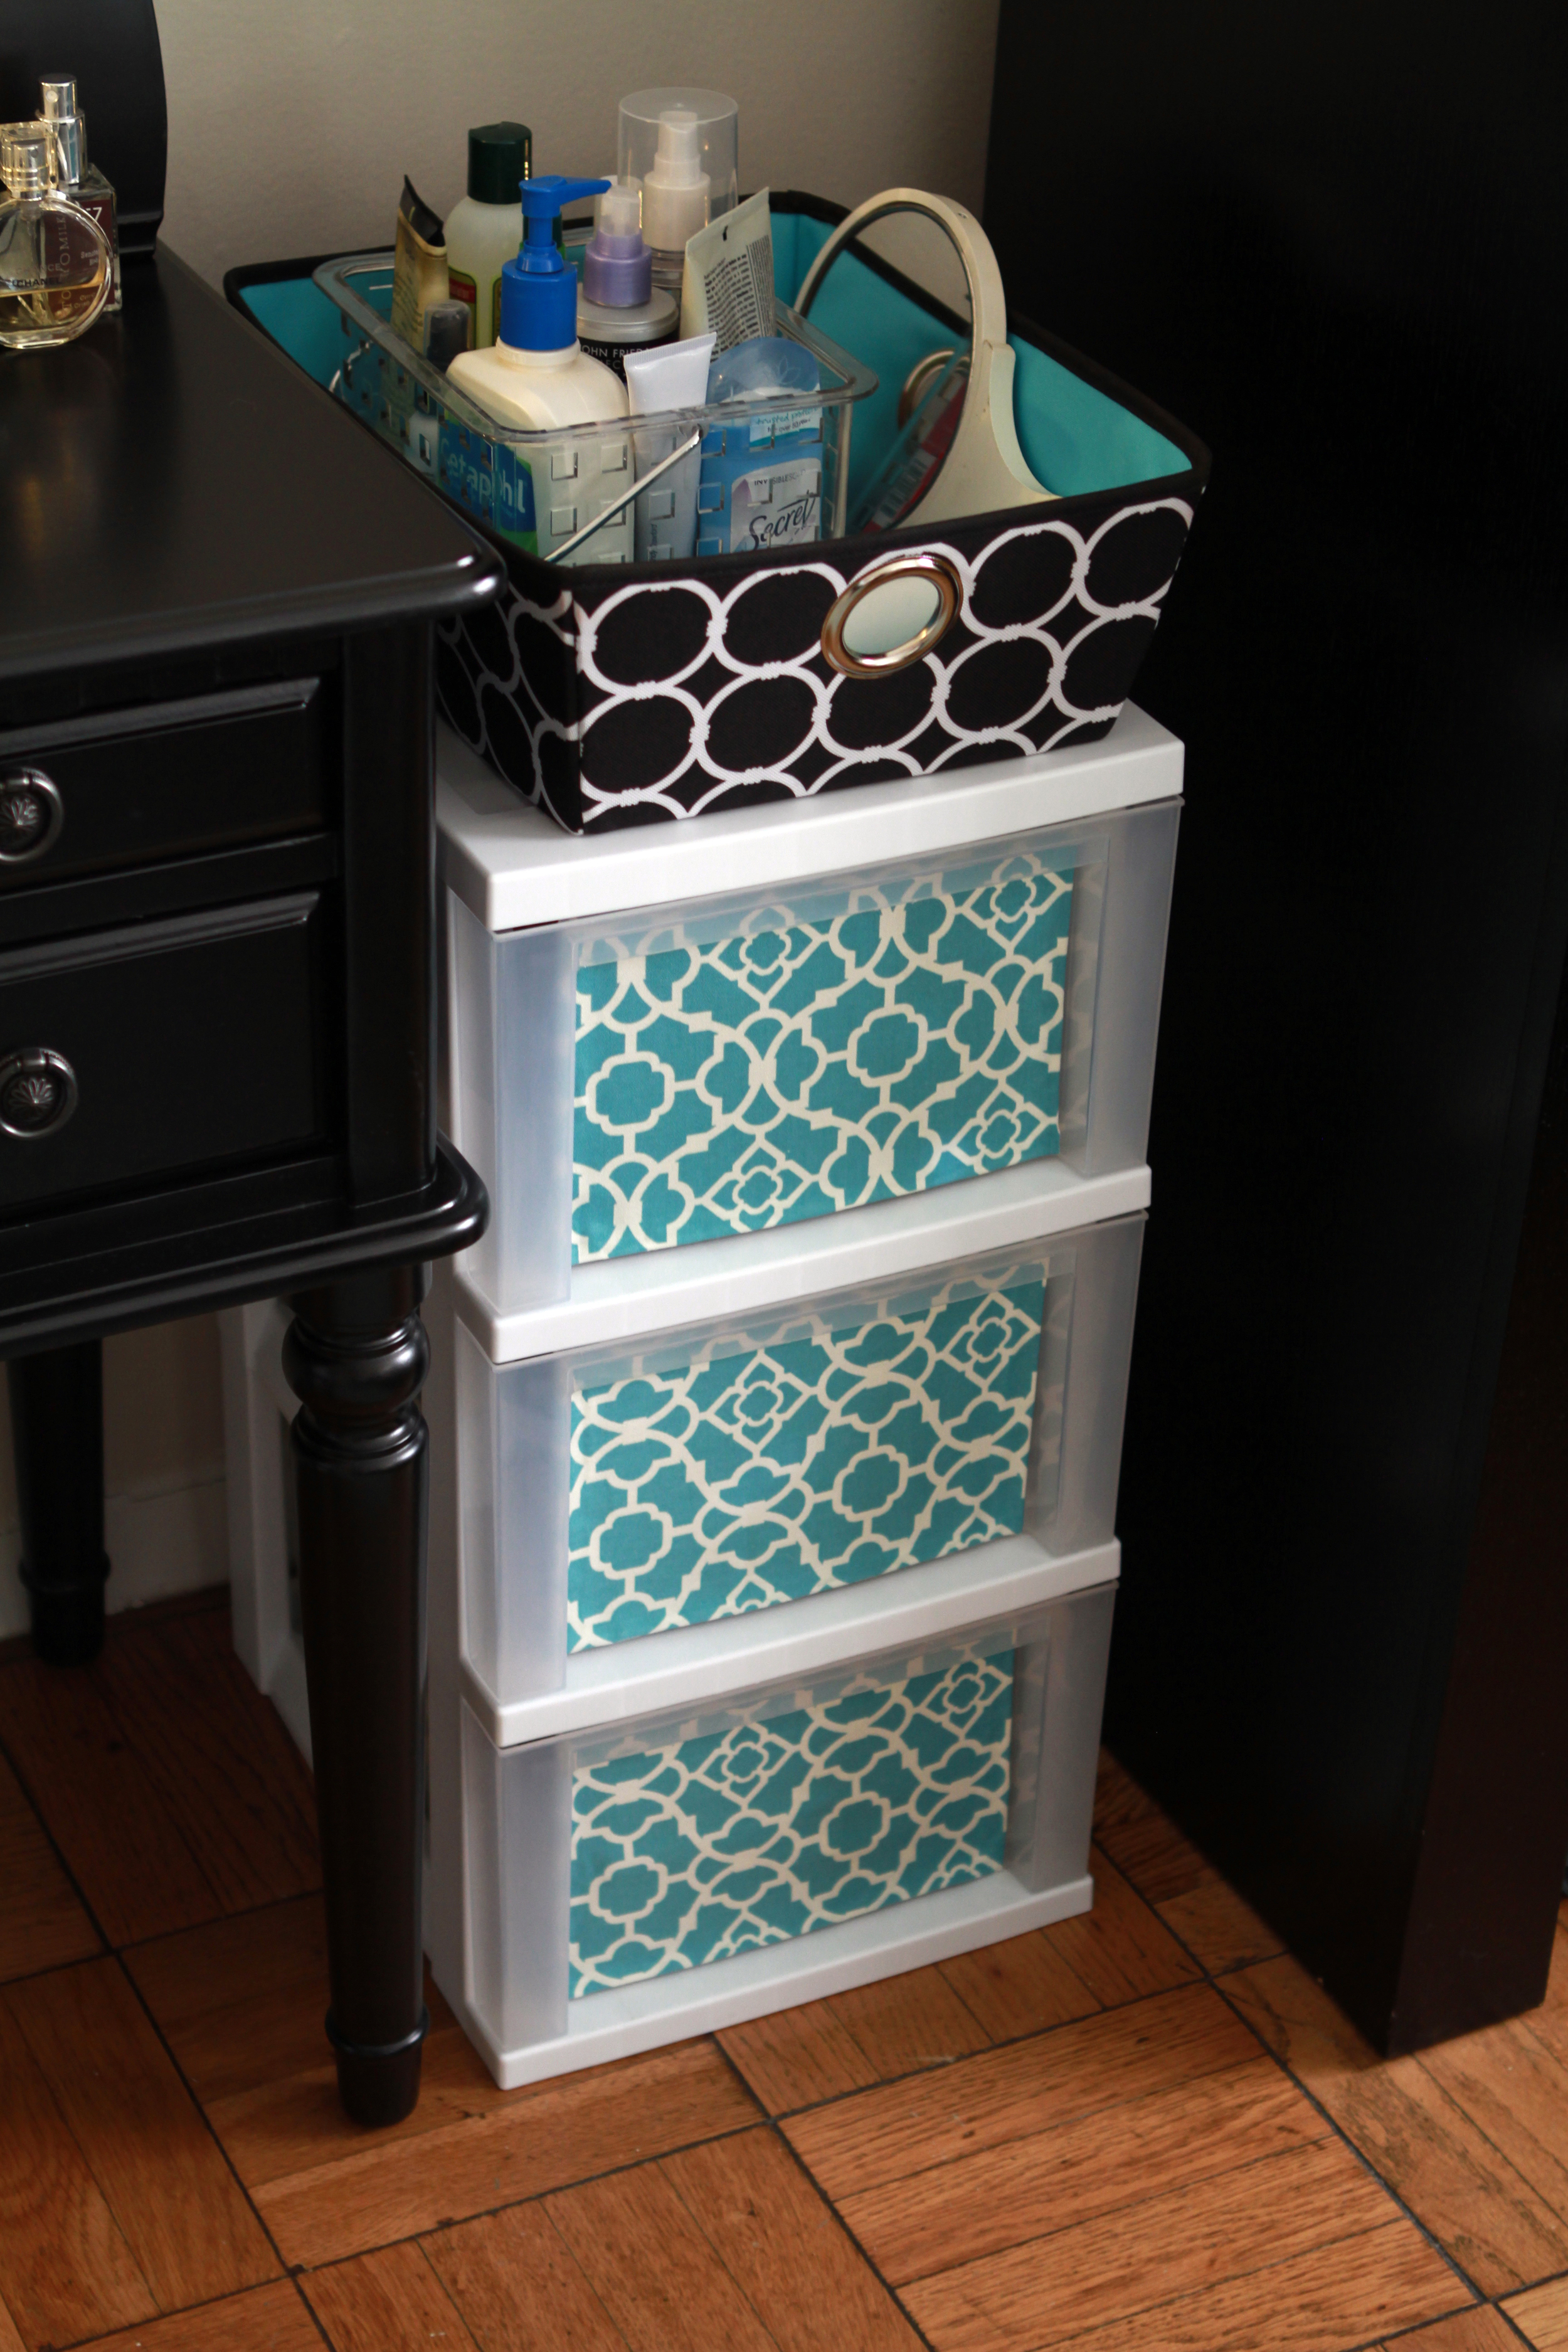
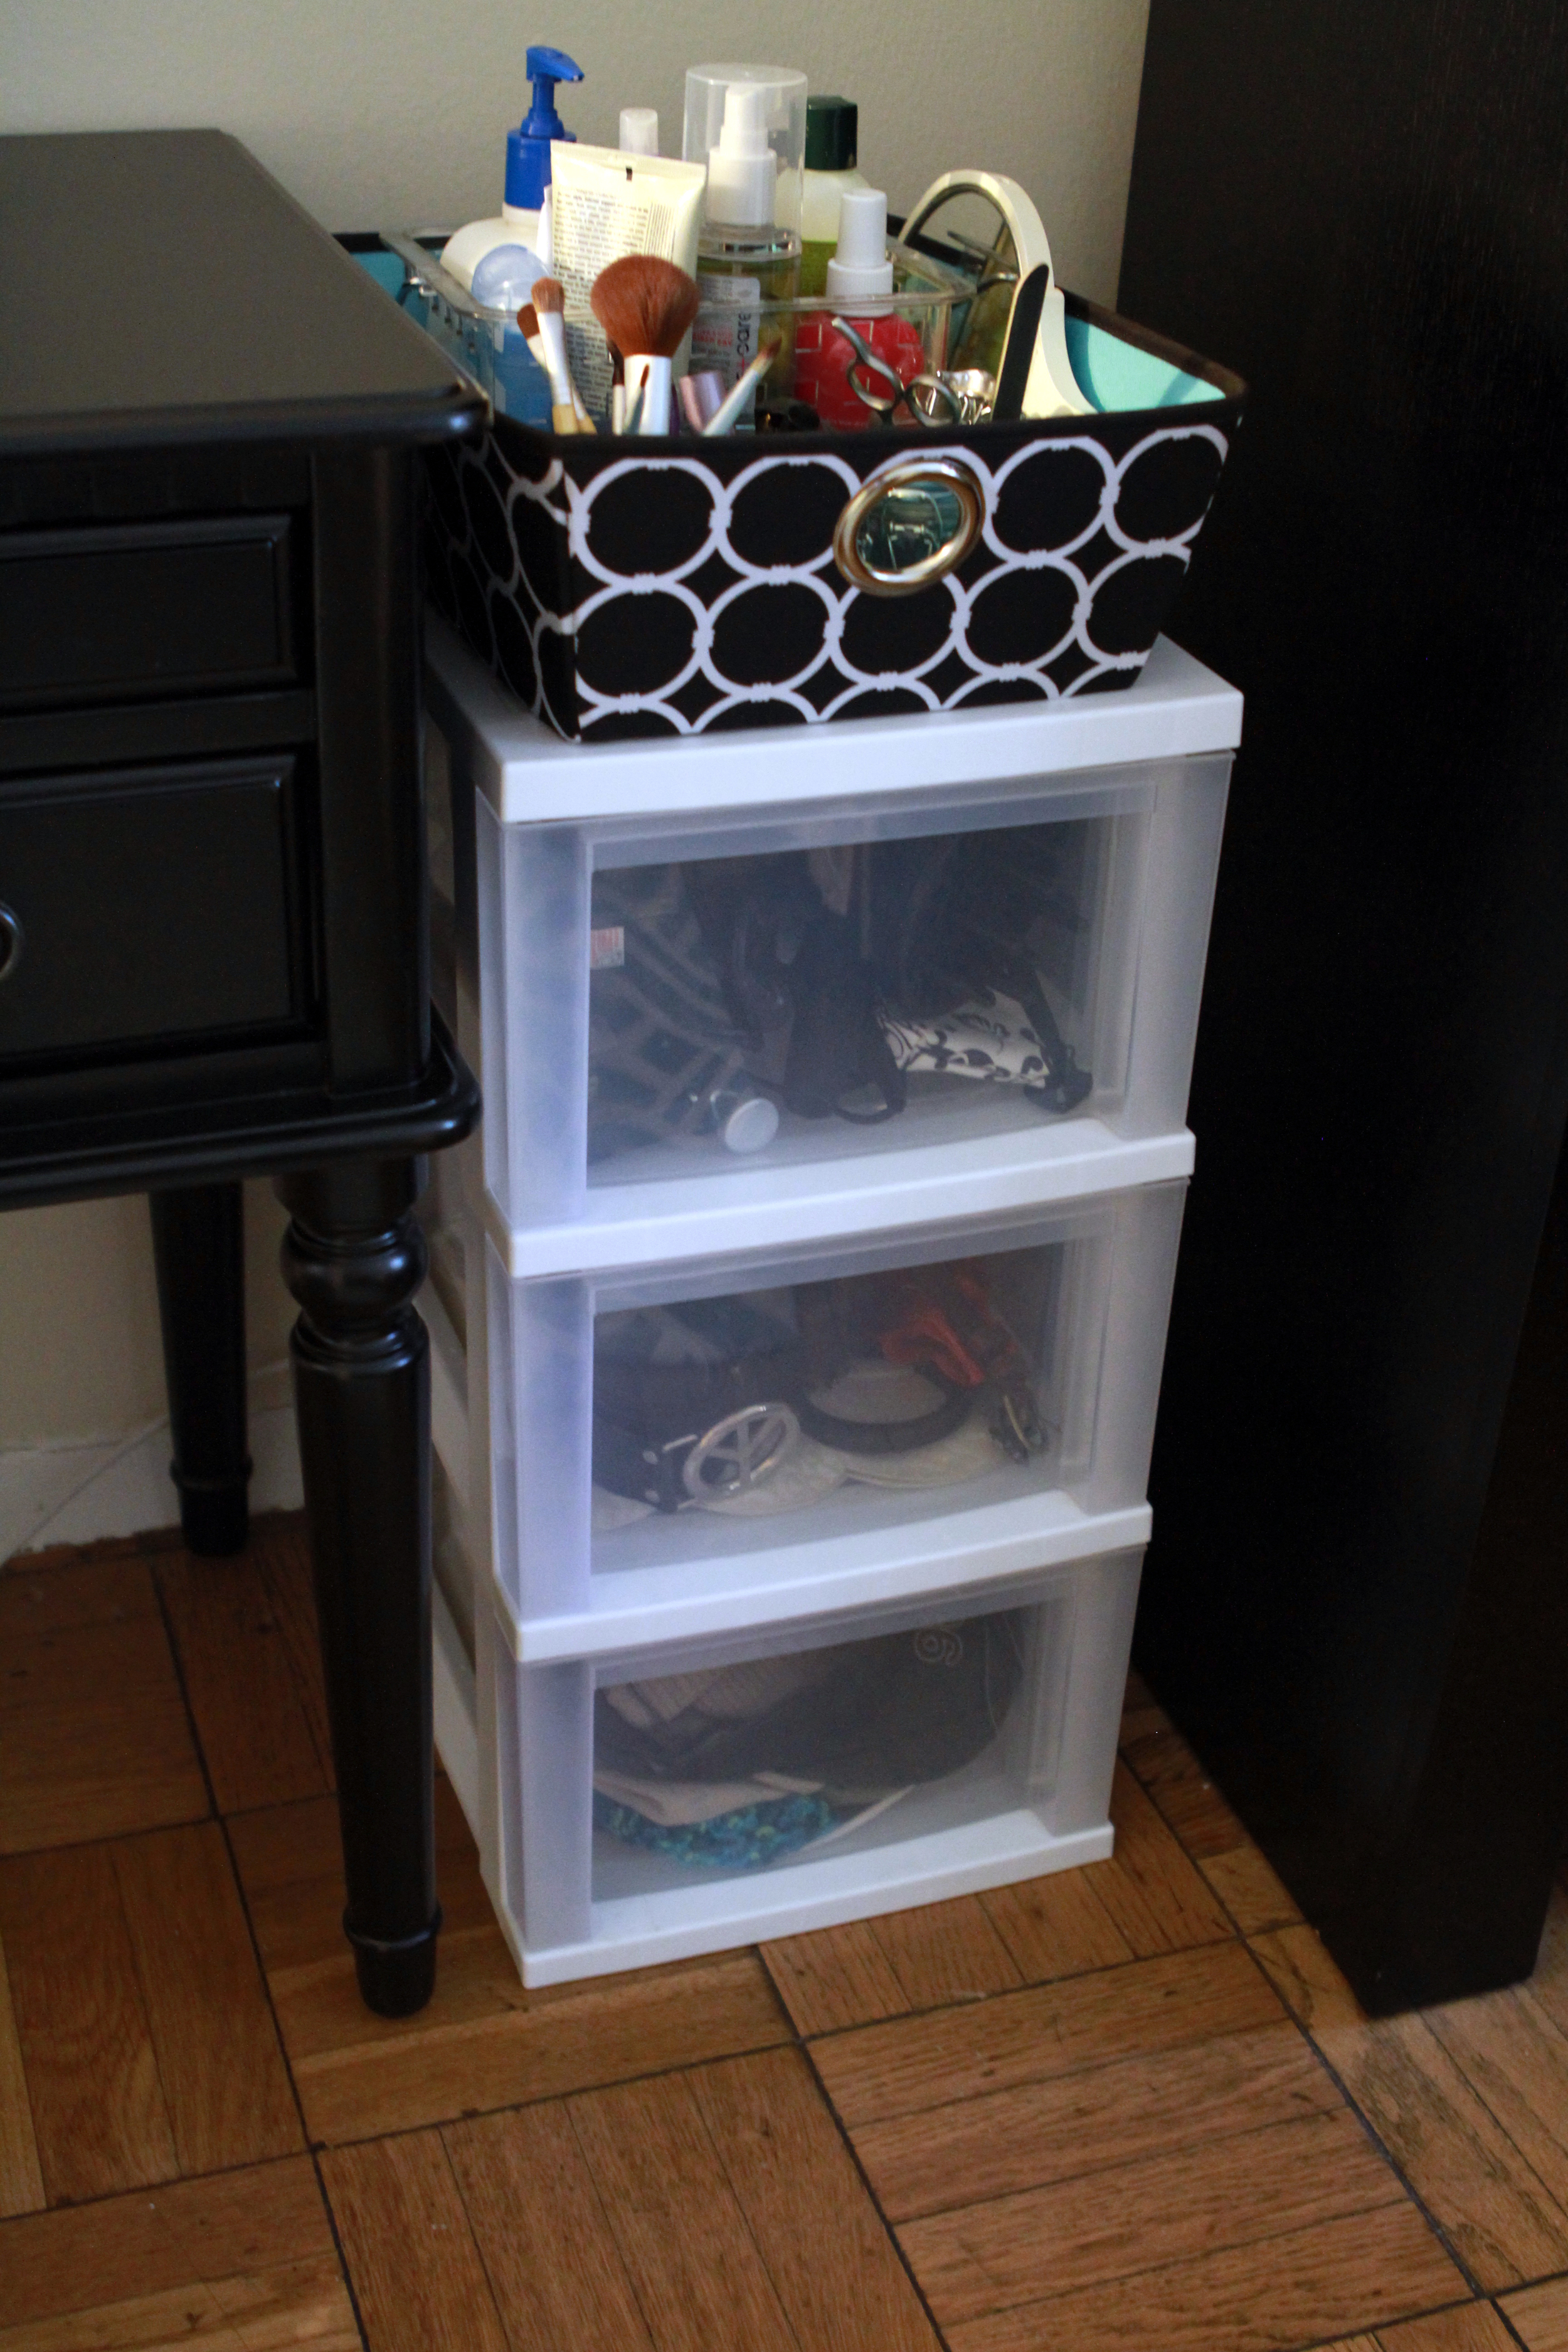
So, I used the extra fabric on these inexpensive plastic drawers. I think I paid $15 for them and I was about to get rid of them. I never really liked them because you can see through the plastic and they just look cheap. So, with my handy dandy hot glue gun, I hot glued a piece of fabric on the front of each drawer. Now you can't see the items that I have in them and they look great with the stool. 

Trying new things can always seem a little daunting but I ended up liking it. You may enjoy it as well. I was going to write out the steps on how to reupholster a chair for you but why bother when its already done on wikiHow

So go ahead and add a little color to your space. It easy:)