How To Organize Your Pantry

I love organizing and I love to travel. As a professional organizer, I sometimes get to do both. This pantry was in Malibu, CA. In this video, you may actually be able to hear the ocean in the background.

Pantries are one of the most satisfying areas of the kitchen to organize. It’s amazing how once you declutter and create categories, then put them back into the pantry, what a big difference it makes. It helps you save time, money and be less stressed. When it’s time to cook, shop, or just look for a quick snack you are fully supported by a well-organized panty.

In this video, I go through the Space to Love® 5 Step Method on how to organize your pantry.

Setup, Sort, Select, Sanitize, Style™

4 Quick tips from the video I want to share.

1 - Take everything out.

2 - Create categories for all your items and group them together.

3 - Get rid of everything that is expired.

4 - When putting food into airtight bins cut out the directions, write the expiration date on it and keep it in the bin.

Watch this short video below for the full process.

This is not the first video I have done on organizing a pantry and it probably won’t be my last:) I really can’t help myself!

I hope you found this helpful and we’re always looking for new ways to improve. What organizing tips do you have for the panty that you would like to share? Leave a comment below. We would love to hear from you.

Time to Digitize

For years I have been helping clients around the Los Angeles area get rid of the clutter and belongings that no longer serve them. But what about personal keepsakes that could still bring joy but are inaccessible and unusable, specifically, the videos and photos rendered obsolete by our fast-moving technology?

Some of you may know that my sister is not well. Her battle with cancer has been devastating, and she will never be the same again. I don’t want to live in the past, but I desperately want to watch the home video of us from when we went to Hawaii. Of course, it is a VHS tape and I don’t own a VCR anymore. I know why I’m keeping it, even though I cannot watch it, and that is the spark for this blog post.

This is where Jeremy Suede from I.O.Solutions comes in. I know Jeremy from NAPO so it was a no-brainer to use his services. Here’s what he did for me:

1 - Converted all VHS tapes into iMovies on my external hard drive.

2 - Transferred all CDs (old photos and headshots) and DVDs (old short films from my acting days) onto my external hard drive.

3 - Transferred all items on my big, old, heavy hard drive to my sleek, new, mega-memory G Drive, then cleared the antiquated device so it could be donated.

I now have all my “stuff” in/on a 4.33” x 3.23” x 0.43” box/hard drive and can access it anytime I want.

Jeremy and I at NAPO-LA’s Monthly Meeting.

Jeremy and I at NAPO-LA’s Monthly Meeting.

How it works…I called Jeremy and he met me at a Starbucks in the Valley, (which was closer to me then his office), where I handed over my precious items. I have to say, when he was walking away with all my memorabilia I had a pit in my stomach thinking, what if he never comes back?!

To put my ‘fear of lack’ to bed, Jeremy did in fact return 2 weeks later with all my “stuff” on my G Drive. I paid him a very reasonable fee through Venmo and we parted ways.

As soon as I got home I plugged my hard drive into my computer and cried like a baby watching the video of my sister and I from over 20 years ago. I couldn’t have been happier.

My sister and I in Hawaii, early 90’s.

My sister and I in Hawaii, early 90’s.

Cautionary tale: Jeremy told me that had I waited any longer, the tapes could have deteriorated and the footage would have been lost forever. I am so grateful I have a physical reminder of a magical memory with my sister.

If you have memories that brings you joy, I urge you to digitize. Whether via hard drive or uploading to your cloud, you can keep more stuff in less space, and have it in a vastly more accessible way. Less clutter, more joy. Win-Win!

I’m thinking this would be a great gift this holiday season: a gift certificate to I.O.Solutions!

Don’t let the past clutter up your present.

I hope you create new wonderful memories this holiday season with your family and friends.

Happy Holidays!

Creating More Space

We all want more space, well most of us. Ever the minimalist, I'm in the middle of downsizing from a mid-city 2-bedroom unit to a Culver City studio apartment; I'm just one person. Not like my client in Los Angeles with a growing family, totaling 8 people.

I've been working with this client for a while now. We've put systems in place to maximize every cabinet and drawer with organizers.  We've de-cluttered every thing that was not used or will never be used in the near future. Not one extra ladle took up valuable drawer real estate, not one mismatched plate in sight, no extra bottom pieces to Tupperware without a matching lid...you get my point. 

So on our latest work day, when I arrived to find my client attempting to put items away from her latest Costco run, all I could think of was, "No, no; these items are never going to fit!" We had maximized her space, but still couldn't accommodate her necessary bulk buys.

I'm a problem solver by nature, but boy, did I need to solve a bulk-sized issue that day. I looked around thinking that there had to be a way to make this work. Where could we add shelves or more storage?  My eyes settled on an unoccupied wall in the kitchen, and the answer appeared. After taking measurements, we concluded we would need something less then 13" deep. I knew it would be tricky, but not impossible.

Looking online, Ikea is always a go-to for me. That's where we found this shelving unit  and wouldn't you know it, perfect measurements! I was off to Ikea.

Did I mention that I build Ikea furniture:)

Did I mention that I build Ikea furniture:)

I do love building things. It was so rewarding to haul this unit in, build the structure, and fill it with items conducive to my client's needs!

Before and after close-up - The shelves are a perfect fit!

Before and after close-up - The shelves are a perfect fit!

Before and after wide view - They actually make the kitchen feel bigger!

Before and after wide view - They actually make the kitchen feel bigger!

We created so much usable vertical space! Now there's room for the extra protein powders and baby formula. The kids' lunch boxes have there own space instead of on top of the refrigerator, and the cook books are actually accessible. Paper towels - stored! Napkins - tucked away! Extra pancake mix - bring it on! 

After Picture front view

After Picture front view

The fun add-ons for better organization we used included: clip-on baskets for bread and produce, bottle rack for the wine:) and baskets for linen and party goods.

It was a great workday solving problems and creating more space to love!


Stay Organized in Your Bathroom & Take Back Your Morning

What would you do if you had extra time in the morning, without having to change your wake up time? Would you make yourself a cup of coffee with extra care, and actually have the time to enjoy it?  Would you write that friend you don't see often enough?  Would you journal, meditate, yoga, or even catch a few more precious Zzzs? Like in any area of the home, having an organized bathroom will save you time and money.  A well-planned bathroom will also reduce anxiety in your morning routine while saving you time, so you are set up to have a good morning, every morning.

So let's take our mornings back!  And let's start with the first stage of organization bliss: de-cluttering. To get started, and I can't stress enough, you must de-clutter first. Go through every individual item, pull what you use and need, then get rid of everything else. Most people tend to collect and hold on too many products, especially makeup. This is usually done with the best intentions; we don't want to be wasteful and there is a chance we might use the product again. I'm guilty of this...I think I might want to wear that purple eyeshadow for a girls' night out or Halloween. Of course, I bought it about 3 years ago, and I haven't worn it once; so, in the trash it goes. It's also good to keep in mind that makeup has a shelf life of about 3 months to 2 years; check out time frames in this article at popsugar.com; you'll be surprised how soon you should be ditching that liquid eyeliner. 

So you've de-cluttered; now it's time to organize what's left. Since we were on the topic of makeup, these are my favorite acrylic drawer organizers from The Container Store. Measure the drawer in your bathroom to find the best fit and arrangement. I also recommend using grip drawer liners to help the acrylic organizers stay in place.  I love these drawer organizers because they can be used for so many different bathroom items...your toothbrush, toothpaste, dental floss etc., and if something spills or leaks, you only need to take out one caddy for easy cleaning.

Let's take a look at the sink area; bathroom counters are a prime spot for clutter. Cluttered Counter Syndrome usually occurs because we like to keep out what we use everyday to get ready in the morning. On the whole, CCS makes sense, but I like to give my clients a basket or bin, and the morning routine goes inside, so things like body lotion, deodorant, hair gel etc., are not lingering on the counter tops. I recommend storing the basket/bin under the bathroom sink, so you can grab the b/b in one motion after your shower, get ready, and then tuck the b/b back under the sink when finished, and, voila! No CCS. 

Now, the under-the-sink area can get a bit cramped, so I've become obsessed with these Like-It modular drawers, because they take full advantage of usable vertical space.  With these modular drawers you can store items with double or even triple the space, and with the variety of sizes, you can find one or two that fit even in the smallest of under-the-sink spaces, and still have room for your morning routine b/b.

So take some time to invest in taking back your morning, and save yourself future aggravation. 

Happy organizing:)


4 Ways to Minimize Clutter

I can't tell you how many times I'm working with a client, and we are organizing under the bathroom sink, and we find 10 tubes of toothpaste, 7 sticks of deodorant and multiple shampoos and conditioners.  They start to get mad at themselves for letting their toiletry supply get out of hand. The truth is, it's hard not for it to get out of hand, and here's why...

First off, many people buy things in bulk. You may be one of those people. "But it was such a good deal" you say, as we are throwing out the oversized, expired containers of ketchup. Here's something to consider when buying at a wholesale/warehouse store: say you like tuna, and you eat it about once every one to two weeks, so you buy the package of 24 cans and get a great deal. But here's the rub: those cans will be in your pantry for the next 6-12 months. You may have the space for the tuna, but for larger bulk items this starts to max out the pantry in no time at all. For items with a shorter shelf life, you may be wasting your money in the long run, and for the average household, many sundries are unnecessary in bulk.

Solution - When buying in bulk, ask yourself how long it will take for you to consume the whole thing. Will it expire before you use it? Do you have the room to store it? 

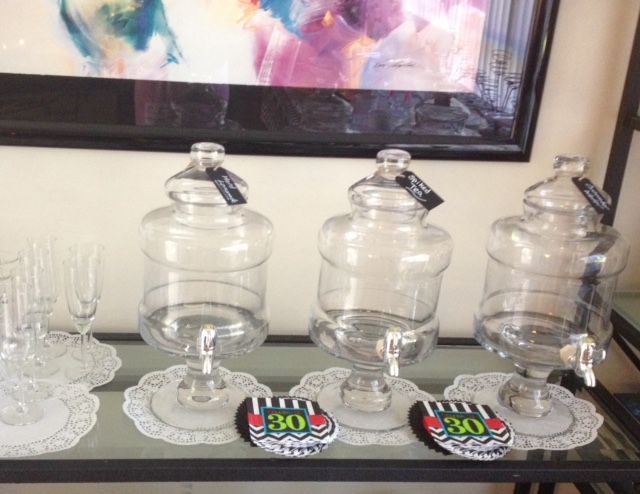
Example two: you receive monthly orders of hair and beauty products delivered right to your door. For instance, from my own personal experience is Wen hair products and Cindy Crawford Meaningful beauty. I remember being excited to start using these products, but come a few months later I was surrounded by enough cleansing conditioner and under eye cream to last me over a year. So I called to cancel and they did everything in their power to persuade me not to. After another month of smaller shipments, I finally stood my ground and canceled, knowing I could always start up again if I wanted to. However, some of my clients don't realize that they never canceled in the first place, and are still paying for and receiving products they don't use anymore. This extends beyond beauty products; another client had water delivered faster then they could drink it, and giant jugs were swallowing the living room. Don't forget about those magazines you're not reading. Sure, a magazine doesn't occupy that much real estate, but I bet I don't have to tell you that they stack up quick.

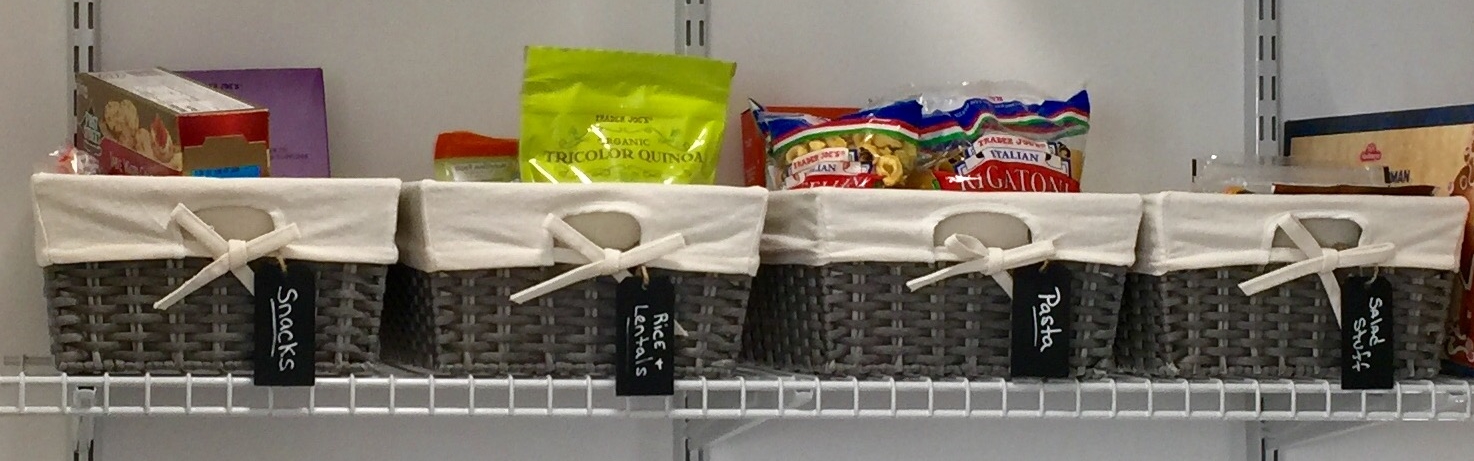
Solution - Keep like items with like items; that way you realize how much you have and how much you're using. If it's too much, then call and cancel the subscriptions. The convenience of automatic delivery is not always the best.

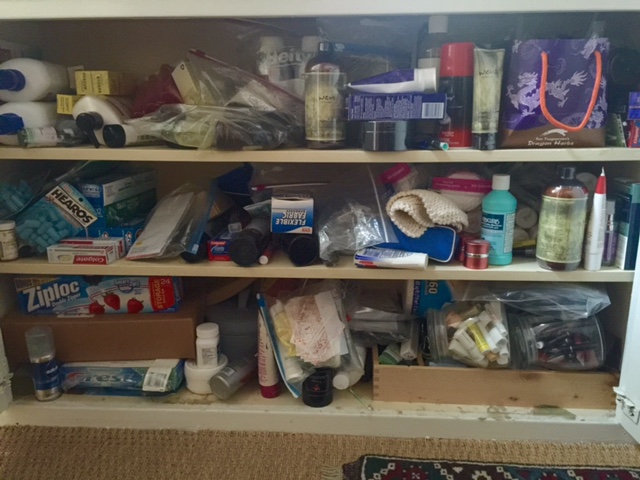
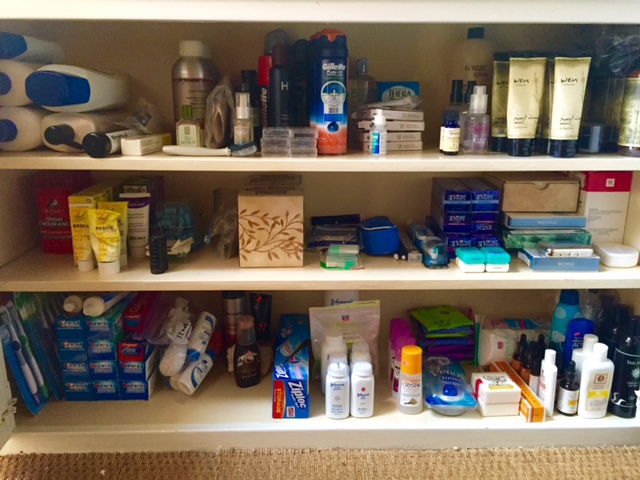
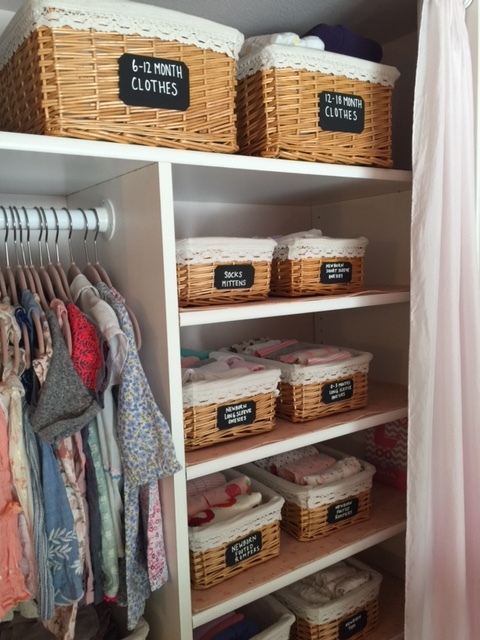
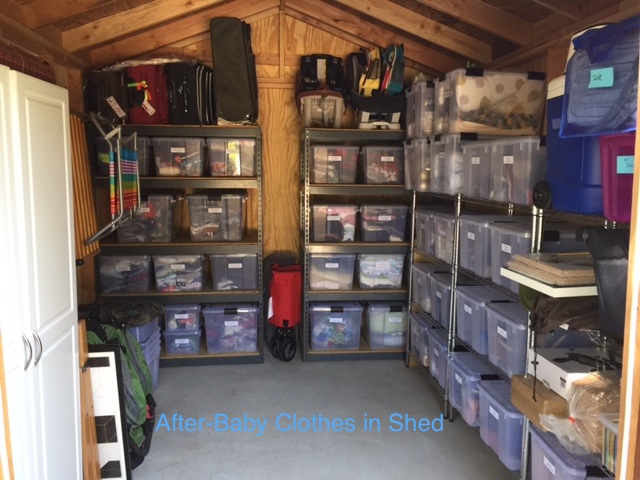
Common-clutter-maker #3: You don't know what you have, so you keep re-buying things you already own. You frantically search for something you know you probably have, but give up after 5 minutes and remember that Amazon Prime can get it in your hands the next day. I can't stress enough that everything in your home needs to have a home. When every item has its place, then the next time you need it, you can find what you're looking for in the first place you look. It may seem daunting, but go through ALL of your stuff; decide what to keep, what to donate and recycle/trash. Then choose the best home for your items, so the next time you need that specific hair tie or food dehydrating tray, you know right where it is. Pro tip: hiring a professional organizer can greatly alleviate the stress of de-cluttering your personal inventory. ;)

Solution - Find a home for everything in your home. This takes time but in the long run you will save yourself time, money and aggravation.  

Lastly, and perhaps the hardest, you don't want to throw out something you paid a lot of money for, yet you don't like it and will never use again. It's hard for my clients to put that piece of clothing in the donation pile that still has the hefty price tag on it, or throw out the expensive makeup they only used once but wasn't their color. At the time of purchase it was a good idea, but now it is a good idea to get it out of your space. If you don't love it, lose it; whether you donate, recycle or sell it, you will not regret letting go of things that don't serve you.

Solution - Don't hold onto things because of their monetary value. Know that every item in your home holds energy, and items you don't love could be costing you a lot more then they're worth. 

The silver lining to this is, while working with my clients during the de-cluttering stage of organizing, they start to visualize their spending habits vs. their consumption habits. After this, they are changed forever. Now, they make better decisions about what to buy in bulk; they know not to buy another white t-shirt because they know where the 7 they own live, and they can better choose what periodicals actually need to show up at their doorstep.

Stop the clutter before it starts.

Or start stopping the clutter.  

Thanks for reading and happy organizing:)

5 Ways to Label Your Stuff

Labeling is the last step in the organizing process. It happens after you've set aside time for dedicated de-cluttering, after going through all your things and getting rid of the stuff you don't want or use, after you're left only with the things you need, use and love. The label goes on after your trip to The Container Store for a stylish upgraded storage solution, and after every item in the process has been nestled in a location that is intuitive to your lifestyle. Now. Now is the time. All you have to do is label.

As a professional organizer in LA, I know that if you label your stuff, it will save you time and aggravation. Here are some ways to get you started with the final step in organizing, labeling: 

Easily the least-tedious and hand-touched way to label is to utilize containers with blank labels already on them. I love using these Jars (above) in the pantry; they have a clean look and they're air-tight to keep your food fresh. Tip - Cut out the directions from your favorite pantry items and place it in the jar with the expiration date on it.

Sticker labels are another way to go. I like using the chalkboard type for easy re-purposing, and I use them just about everywhere: kitchen, bedroom closets, hallway closets, etc.

Hanging labels are great when you can't use labels with adhesives. I often use the chalkboard gift tags but there are tons of different types. I primarily use hanging labels for baskets, but they also come in handy at parties to label beverage servers, favors, etc.

Of course, I cannot get through this blog without talking about my organizing companion, the P-Touch. I got my first label maker over 10 years and I still use it. It's great for canisters in the pantry, folders for the filing cabinet, for craft bins and drawers. The P-Touch-80 is easy to use and it's light weight. And 10 years. That's longer than most of my relationships.

About a year ago I upgraded to Brother P-Touch D400AD - don't worry, P-Touch-80 is thankful for the shared workload. The P-Touch D400AD offers more personality then the P-Touch-80, boasting nifty boarders, basic clip-art-like pictures, and a variety of fonts. If my clients are game, I ask them to choose the pictures and boarders to personalize their space. 

Of course, if you don't want to get too fancy, you can just print on address labels and call it a day. I employ this method for larger jobs for efficiency and to avoid hand cramps, and to corporate clients for a more professional, less personal touch.

In the end it doesn't matter what method you choose, but take my word as a professional organizer; labeling your items will make your day-to-day life easier: imaging finding exactly what you are looking for in the first place you look for it, every time.

Find this helpful? 

I'm always looking for knew ways to label things. 

Have a great method? I'd love to hear it! Thoughts on labeling? Leave them below! 

Thanks for reading, and happy organizing!


4 Tools to Organize the Kids' Craft Closet

With the summer just around the corner and school letting out, it's a perfect time to get the kids' craft closet/area in order. There is nothing worse than knowing you have projects to entertain the kids for the afternoon, but can't find the things that go together: you located the paint but not the brushes, you have the glitter but no glue, you have all-the-beads-in-the-world but no string. 

I was helping a client get organized in Malibu this week, and came up with some tools to get organized that will work for any child's craft closet:  

  • Plastic Bins, with or without lids
  • Modular Drawers with inserts
  • Stackable Paper Drawers
  • White Dry Erase Clingboard

I'm always at The Container Store where there is a plethora of plastic bins. I picked these basketweave bins in white because the size and style worked for this project, and I needed vertical clearance in order to store larger craft items. I used the 6.5 qt bins with lids to house the sidewalk chalk and other outdoor toys. Bonus with these bins: if you leave them outside it's okay; they're waterproof...as long as the lid is put back on;)

The second tool, modular drawers, are fab because they are sturdy, they come in many different sizes, and can be arrange in a variety of ways. I added small and medium inserts to these drawers to better organize brushes, scissors, sticks etc. 

Stackable paper drawers make the list because they are perfect for craft paper, tape, glue, stamps and stickers. I like that the drawers easily come all the way out; you can take the whole drawer with you to the craft area! When crafting is complete, everything goes back in the drawer for easy clean-up. Another stackable version that click and stack are great for pens, pencils, crayon and markers.

The fourth item I added for fun...well maybe fun for me, because I like making lists.  How often, when it comes to craft time, you're not sure what you have?  You forgot what you bought and now the babysitter is here, and you need to rush off to an afternoon appointment, but can't remember what to tell the sitter? With the dry eraser board, you write down the fun craft projects as you buy them, before storing them. Creativity can be more impulsive when you know what you have and where to find it!

To finish up the Malibu craft area, I labeled all the drawers with a p-touch label maker...I'll talk about how to make labeling fun in my next blog.

Did you find this helpful? 

I'm passionate about organization! I'm always interested in new ideas; what do you do to keep the craft area in order?


3 Ways to Organize Baby Clothes

For new and expecting moms, it can be overwhelming with all the baby items that come into the home. Many of the items are baby clothes. You see cute outfits at the store, or there was a great sale and maybe they're four sizes too big, but you get them anyway because they'll eventually fit, right?! And it's not just you, friends and family give baby clothes as gifts or bags of hand-me-downs that can range from all different ages. But what do you do with the clothes in the meanwhile? For this blog we are going to concentrate on clothing storage solutions for newborn to two year olds. 

I've found the best way to get started is to make piles of clothes by size. We know the first two years are broken down into newborn and/or 0-3 months, 3-6 months, 6-12 months, 12-18 months and then 18-24 months. First we separate, then we decide what we want to keep. Even if that skull-and-crossbones onesie was a gift for your darling Penelope, or the threadbare hand-me-down was given by a cousin you don't see enough, it doesn't mean you have to keep it. Focus on what serves you, and what will be right for your child.

Now that we have our "keep" piles, separated by size, we can decide how we want to organize the clothes. You can use one or a combination of these ideas, but I like incorporating all three.

  • Baskets with chalkboard labels.

  • Dividers for hanging clothes.

  • Clear airtight plastic storage bins with labels.

The baskets with chalkboard label method is great if you have a lot of shelf space; I encourage storing the baskets on the shelves in a closet or bookshelf. Pro Tip: Don't forget to measure your shelves before buying any baskets to make sure they will fit properly. Adhere chalkboard labels on them if they don't already come with them.

This method is great because as your child grows, you can easily swap the sizes. The baskets in the picture below did not come with labels, so I purchased chalkboard gift tags from The Container Store, trimmed them to the shape I wanted, and used this double sided tape to attach them. Personalize it: there are oodles of baskets and labels to choose from, so you can add your own style to your organization endeavors.

The hanging clothes with dividers method is terrific if you have lots of hanging space. You can use clothes dividers, pre-labeled by month/size, or use plain ones. With the latter of the two, using a label maker or chalkboard labels for each divider, allowing an easy change of the sizes as your child gets older.

The third method works for the months to come. The labeled, airtight storage allows for long term keeping, and knowing your baby's clothes are staying clean, and bug and dust free, is especially great if you are storing in an attic, basement or shed. This is also wonderful if you plan on having more children. When you are done with one size, replace it with the next size up, and the first size goes into storage.


The picture of the shed is from a client that has four boys. We wanted to keep all the hand-me-downs organized, so when she is ready for the next size up, she knows exactly where everything is. We also did bins for shoes for the kids by size. 

Did you find this helpful? Comment below with your thoughts, and I would love to hear how you organized your children's clothes! For more useful tips check out Momlovesbest