Post Prom Dress Problems

Hi, Christel here from Space to Love! I was organizing recently and found myself in a bit of a dilemma—one that so many of my clients can relate to. It all started when I came across a piece of my past that I’d completely forgotten about: my prom dress.

Now, I’m a little older, and let’s just say the dress doesn’t fit anymore. It’s a lovely reminder of a special time, though. My mother made it for me, which gives it a lot of sentimental value. But what’s funny is that, as an organizer, I’ve learned how sentimental attachments can lead us to hold onto things we might not actually need or use.

When I first decided I didn't want to keep the dress, I passed it on to my best friend. I didn’t want to donate it because of the sentimental attachment, but I also wasn’t sure what to do with it. So, I thought, Hey, why not let her daughter use it for dress-up? That way, the dress could have another life. Little did I know, my friend was thinking, “It’s too nice for that; I’ll just hold onto it for her.”

Fast forward a few decades, and when I visited New York to pick up some winter clothes, my friend handed me a surprise—my prom dress! She never got rid of it after all. Suddenly, I was faced with the very dilemma that many of my clients face: the attachment is now stronger than before, and I still don’t know what to do with it!

So, here I am, a professional organizer who coaches people through letting go, but now holding onto my prom dress because it feels even more special. My friend cared for it for all these years, and it’s now a little piece of our shared history. But realistically, I know I’ll never wear it again, and it's taking up space that I could use for something more practical.

This experience made me realize that even as organizers, we’re not immune to the emotional pull of items with personal history. So now, I’d love to hear your thoughts! Should I donate it and let it start a new chapter in someone else’s life, or should I keep it as a memento of my youth and friendship?

Let me know in the comments below. And remember, whether you’re holding onto an item or letting it go, what matters is that it reflects the life you want now, not the memories of the past.

How to Create More Space in Upper Kitchen Cabinets

As a professional organizer, I know that most people don’t have a lot of time. So I created some quick tip videos to help you get the information you need in just under a few minutes. Here is one on how to create more space in upper kitchen cabinets.

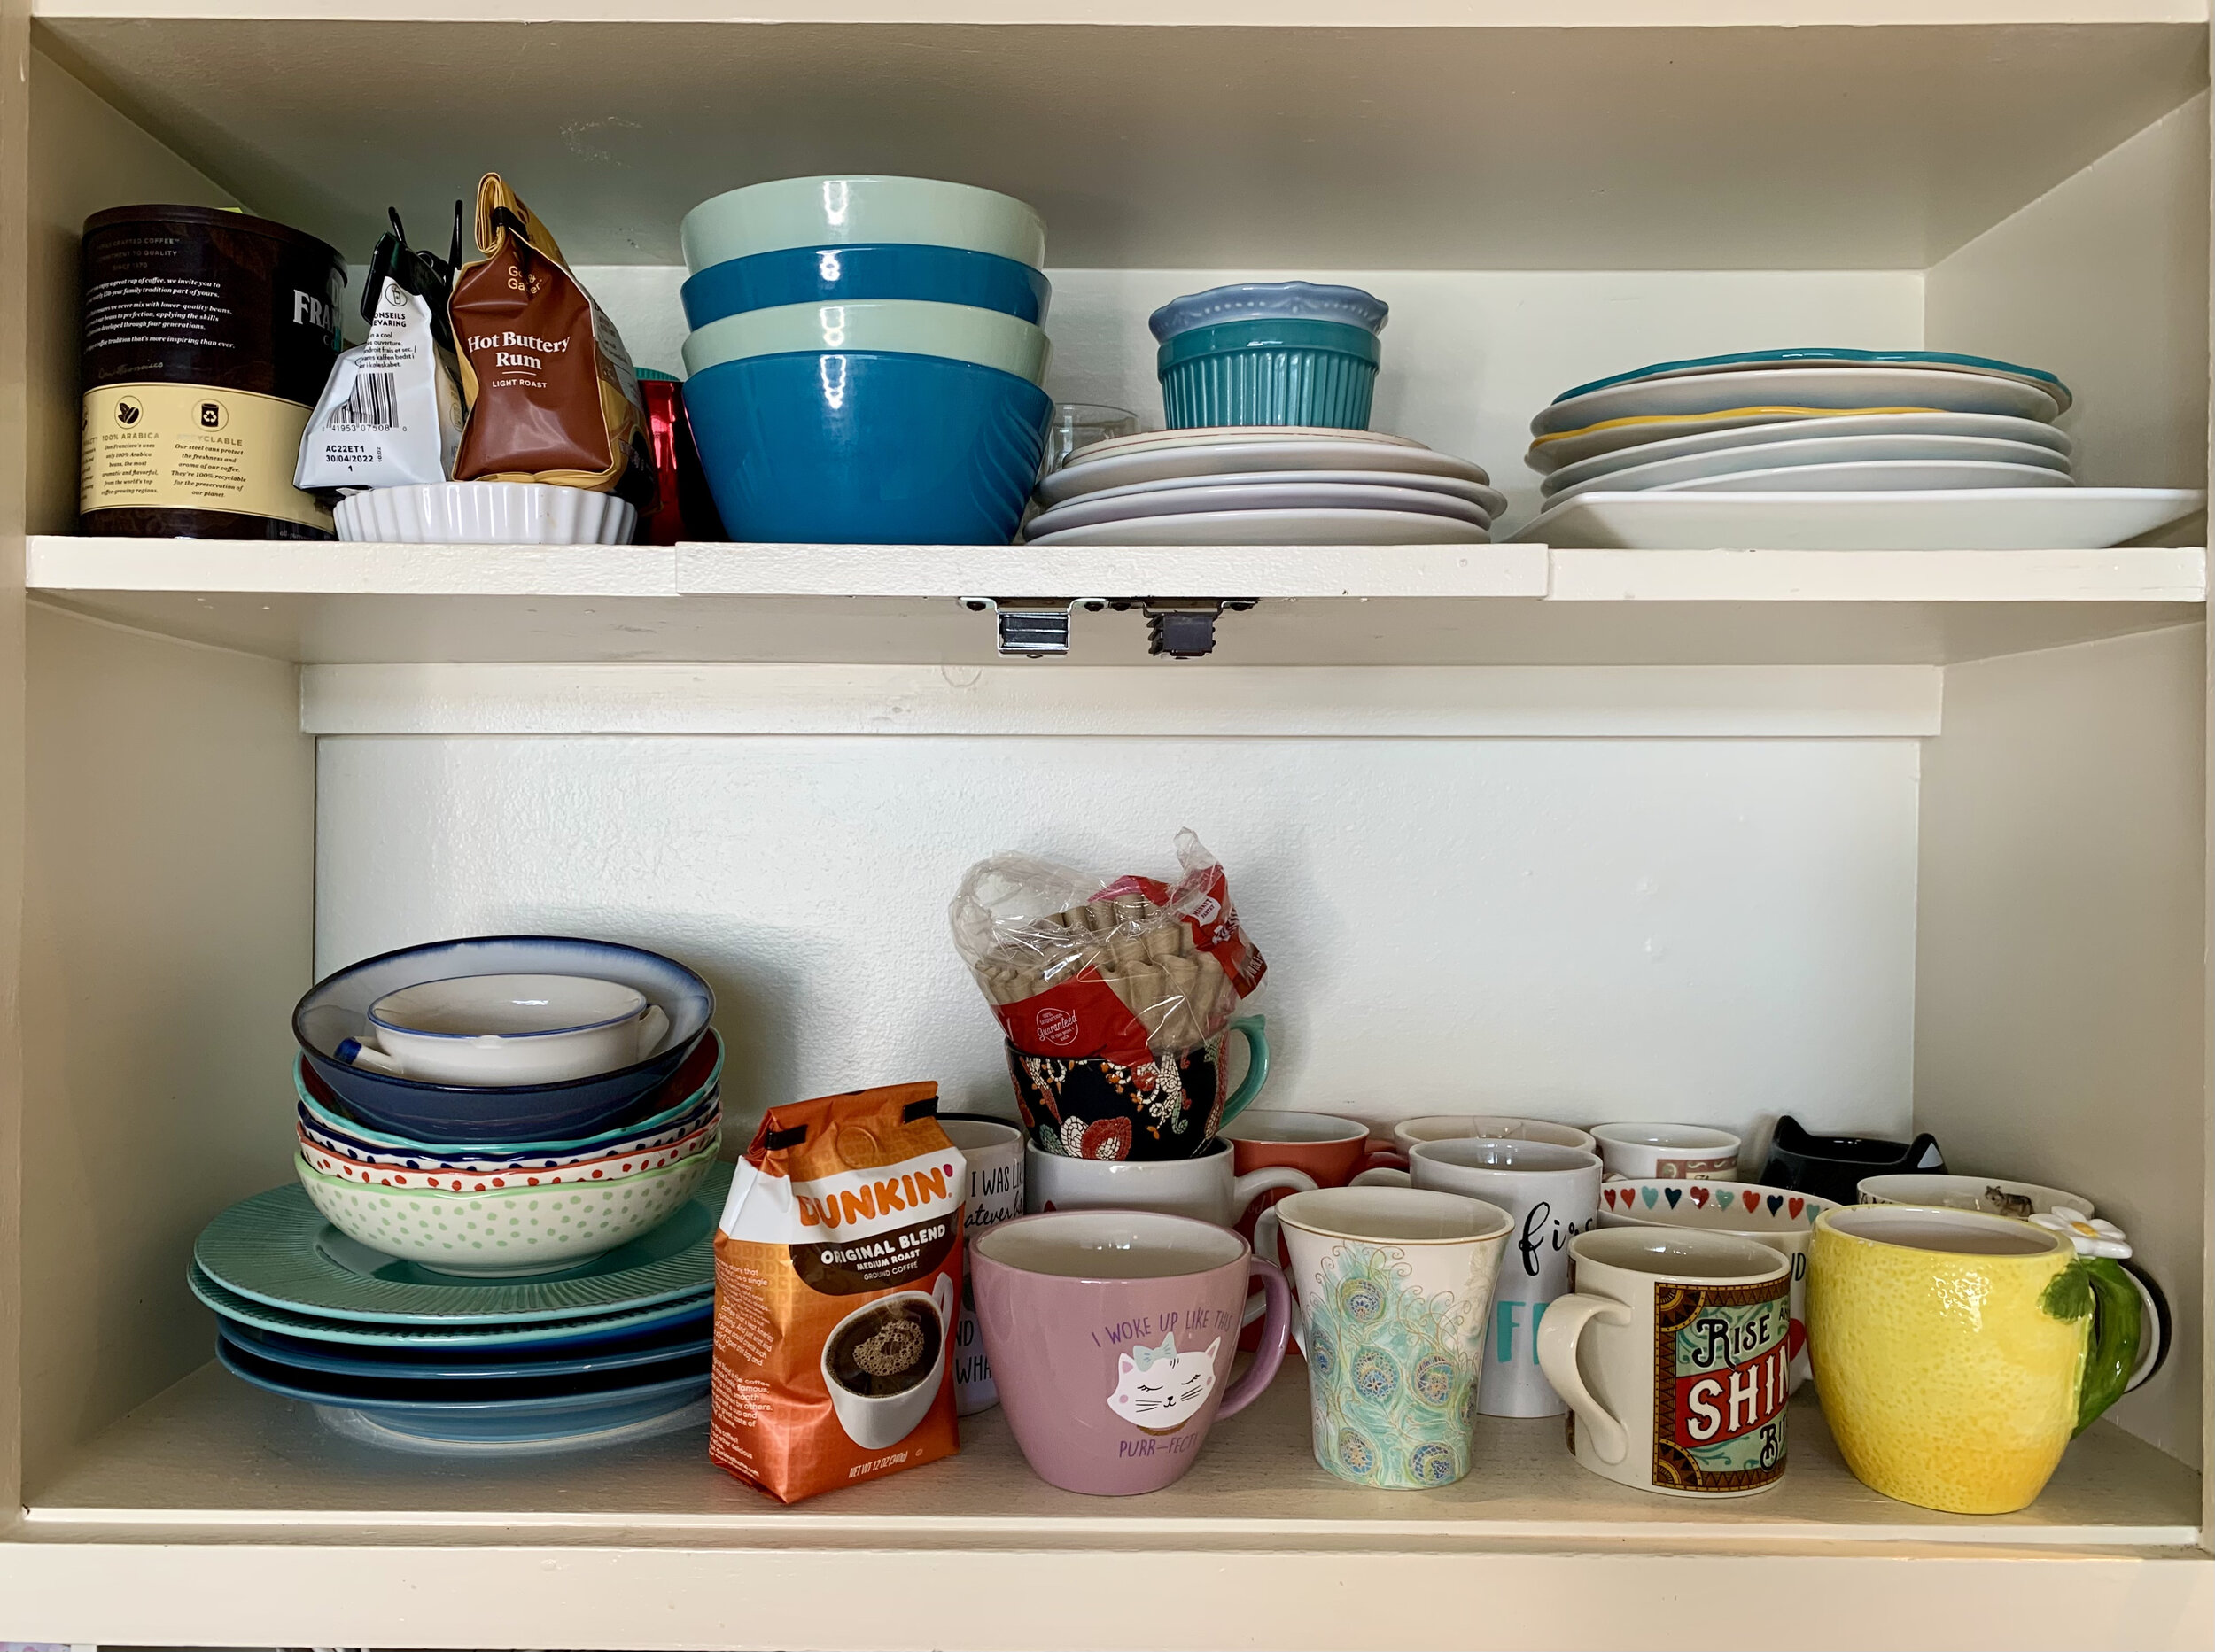
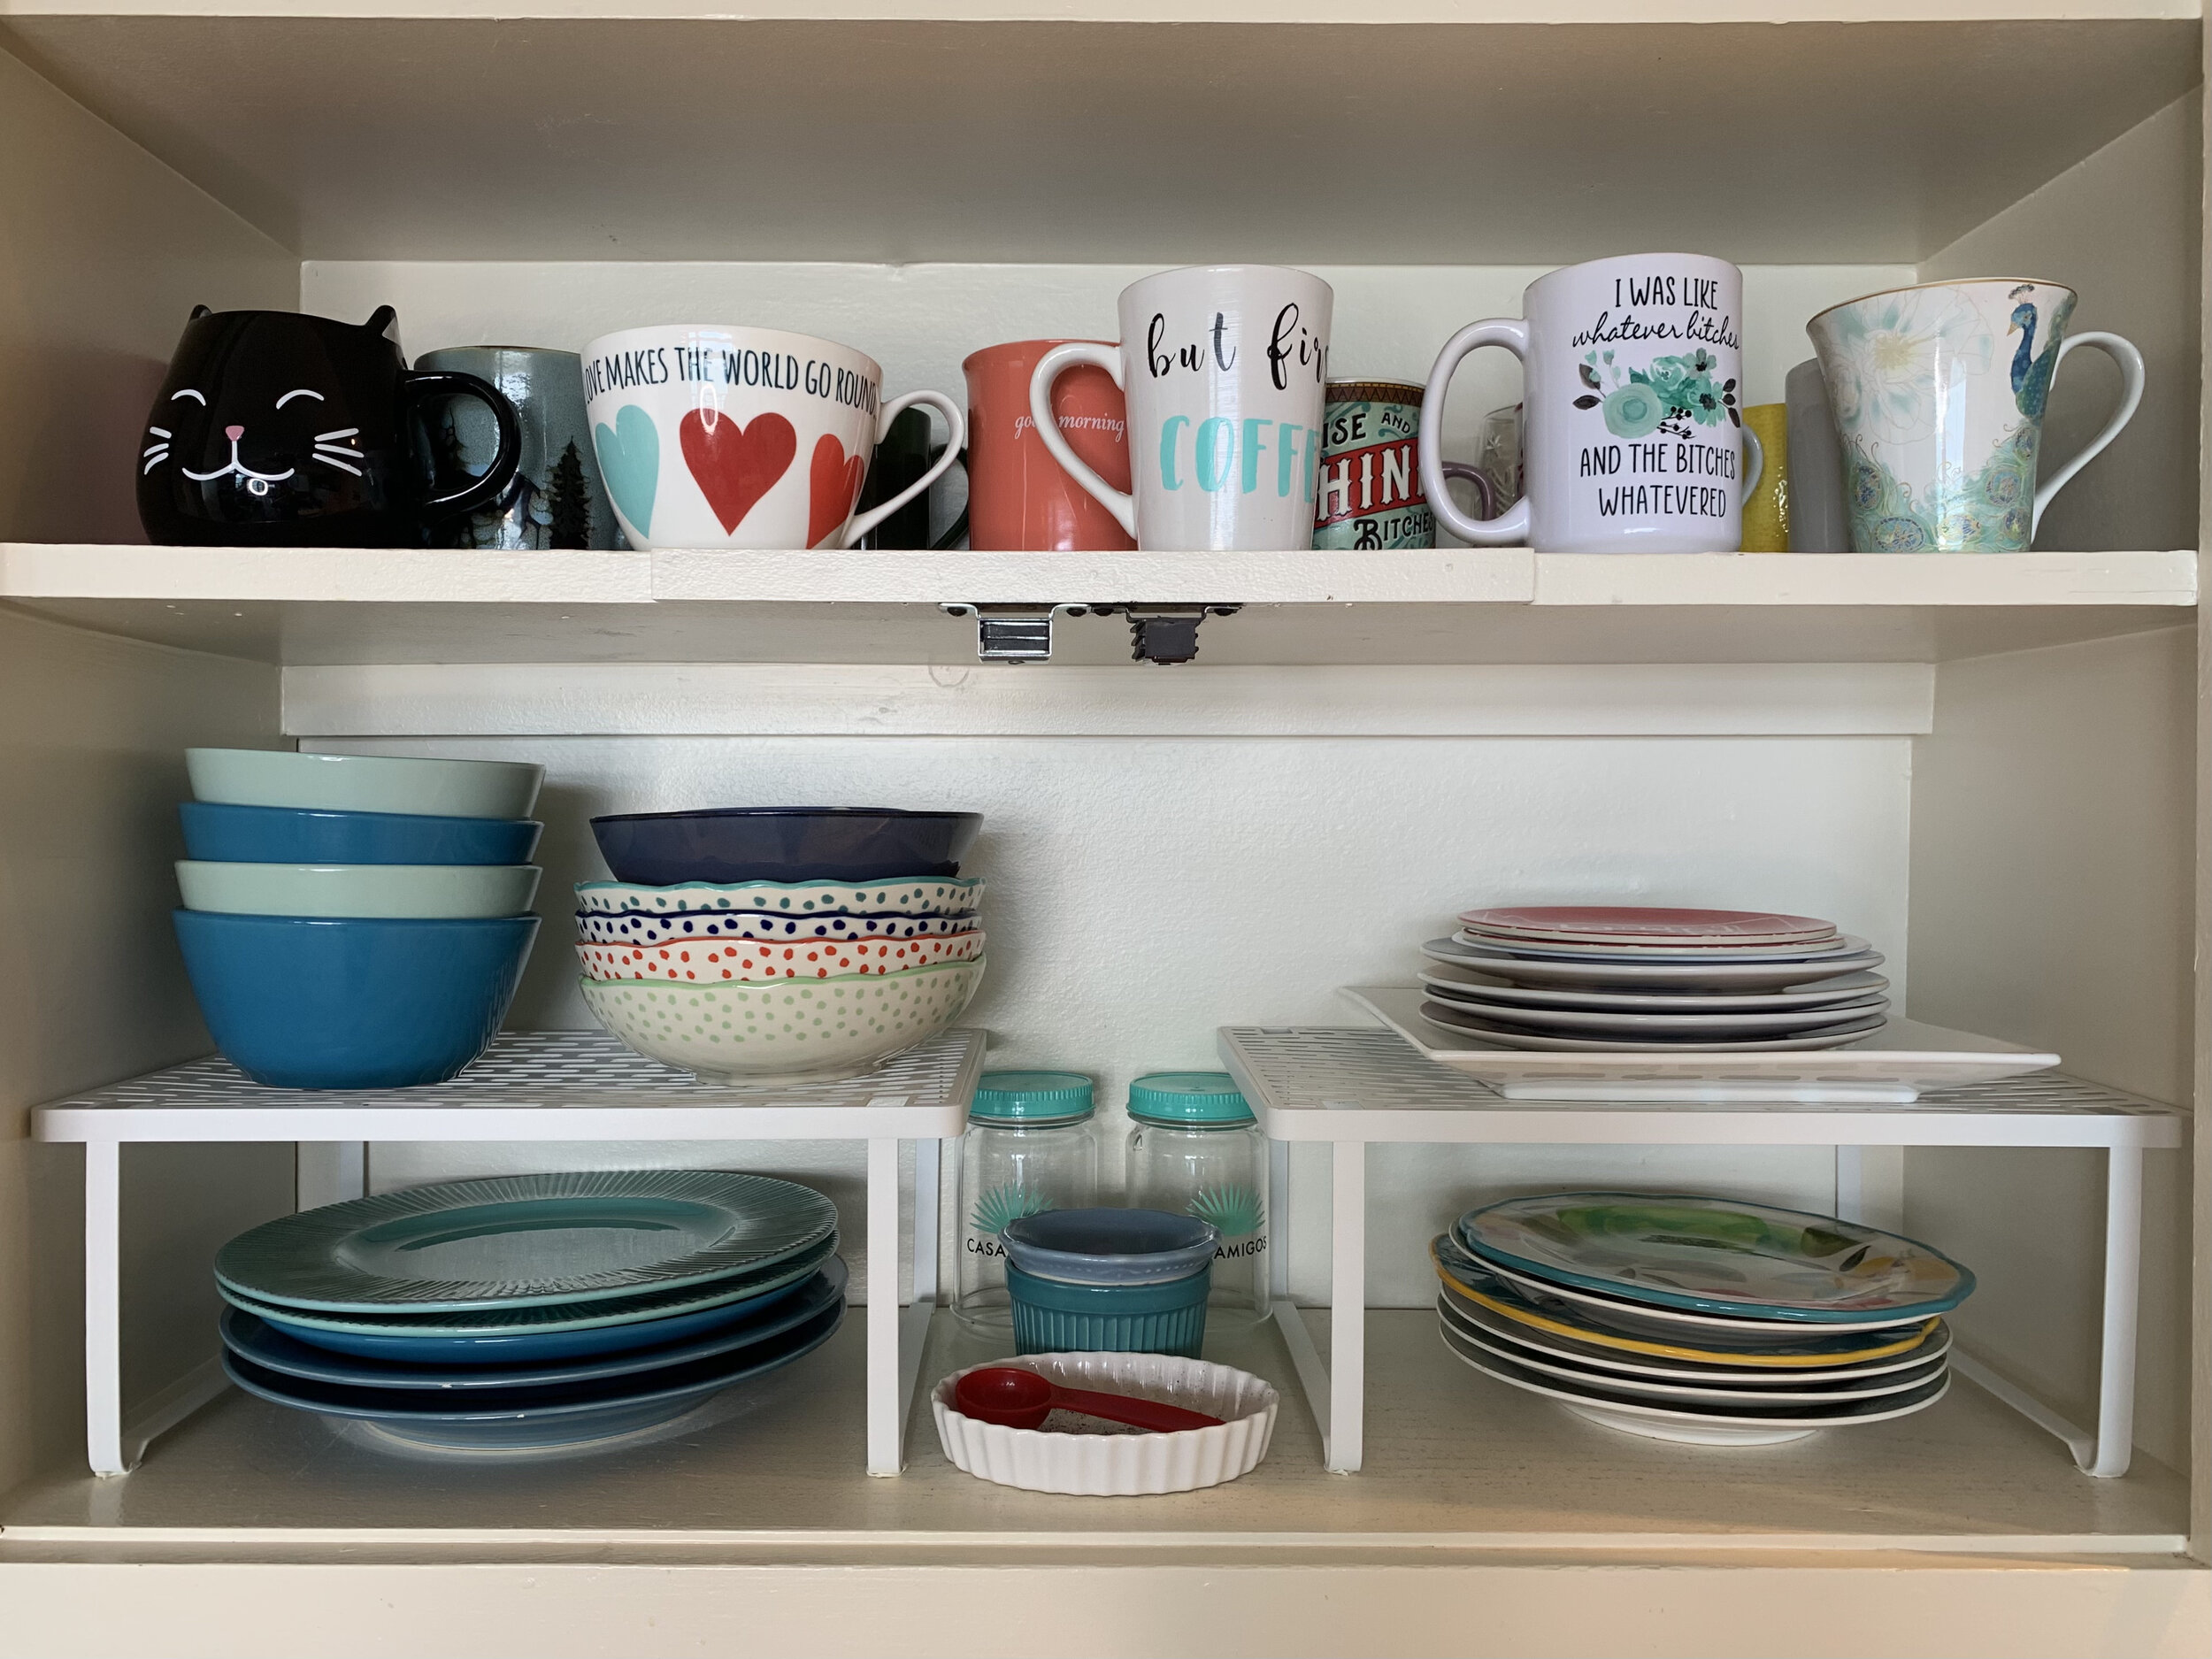
Below are the before and after pictures and links to the products. All you need to do is take everything out of your cabinet, wipe down the shelves, add the museum putty (from Amazon) on all four corners of the base of the riser shelves (I got the shelves at target) and then place the risers in the cabinet and secure in place. Start putting all your items back, with the extra space you will have more room to add items and get to things easier.

Hope you found this helpful. Let us know what you think:)

How To Organize Your Pantry

I love organizing and I love to travel. As a professional organizer, I sometimes get to do both. This pantry was in Malibu, CA. In this video, you may actually be able to hear the ocean in the background.

Pantries are one of the most satisfying areas of the kitchen to organize. It’s amazing how once you declutter and create categories, then put them back into the pantry, what a big difference it makes. It helps you save time, money and be less stressed. When it’s time to cook, shop, or just look for a quick snack you are fully supported by a well-organized panty.

In this video, I go through the Space to Love® 5 Step Method on how to organize your pantry.

Setup, Sort, Select, Sanitize, Style™

4 Quick tips from the video I want to share.

1 - Take everything out.

2 - Create categories for all your items and group them together.

3 - Get rid of everything that is expired.

4 - When putting food into airtight bins cut out the directions, write the expiration date on it and keep it in the bin.

Watch this short video below for the full process.

This is not the first video I have done on organizing a pantry and it probably won’t be my last:) I really can’t help myself!

I hope you found this helpful and we’re always looking for new ways to improve. What organizing tips do you have for the panty that you would like to share? Leave a comment below. We would love to hear from you.

How to Organize Paperwork

Ugh! Paperwork is the worst. This is my least favorite thing to organize but somebody has to do it. If you have paper clutter, I’m sorry and here is a simple way to get that mess off of your desk and into the proper place.

Most of the time I’m showing you examples of client homes but since I would be spending more time on the east coast and I had to set up another office there, I thought I would show you the system I created for myself. I will walk you through how to set up a filing system for yourself using the Space to Love® 5 Step Method to getting and staying organized.

Step 1 - Set up, you will need Post-it notes, a marker, cleaning supplies, file folders (left), trash, recycle, shred pile and a label maker.

Step 2 - Sort, Bring all your paperwork together to start forming your macro categories. Some examples of your macro categories could be House, Work and Personal. Once you figure out what the big categories are then you break them down into micro categories. Let’s say for your House category, you will separate the Water bill, Electric bill, House Repairs etc. Then with your Personal category, smaller categories might be Health Insurance, Car Insurance, Kids, Vital Records. I added a Work Category because I lot of us are working from home and it is good to keep personal and work separate.

Step 3 - Select, for paperwork the selection process is different then clothes or other house hold objects. Some of the papers or notebooks you are going through could be from old classes or seminars that you took. I know your will feel like you need to keep them and reference them but if you haven’ t looked at them in a couple of months or even years chances are you will not need them. When selecting keep in mind what you can access on-line, whether it be with bills and statements or info that Siri can tell you in a few seconds that would take you hours to find in your old notes. This is where you really try to see how much paperwork you can let go of.

Step 4 - Sanitize, get out your cleaning supplies and wipe down the desk and your computer. It always feels good the clean and it’s easier when everything is out of your way.

Step 5 - Style, this is personal and you have to see how many files you are left with and how much space you have and need. I used this filing system from The Container Store because I do like the way it looks and I wanted it open so I can see all my folders. If you wanted a closed option this is one of my go-to’s for my clients. However, you may need a bigger option like this if you have more paperwork. With any option you will need to have hanging folders, to be used for you macro categories.

I hope you found this useful and we would love to hear what you think.

If you are struggling to get organized don’t hesitate to reach out. We’re here to help:)

How to Be More Efficient in The Kitchen

When you think about organizing your kitchen drawers what comes to mind? How would you make improvements? Some might say get better drawer organizers and/or get rid of stuff. This is true but did you think about the items that were in the drawers and where they should be placed within the kitchen?

The drawers were a small part of this overall kitchen organization project but it really made a big impact for this New York client. It’s amazing how many times I am organizing kitchen drawers and see the cooking utensil far from the stove or the junk drawer having the prime real estate and I ask “What made you set it up this way?” nine times out of ten, I hear “We moved in and just put things away and that’s where they stayed.”

I can’t tell you the joy that I get, as a professional organizer, when I rearrange and organize a few things and then my client is like “I wish we had you here sooner or had you here to help us when we moved in!”

Check out this short video where I show you how things can be placed in the kitchen to be more efficient while prepping and cooking your meals.

I hope you found this helpful. Do you have some kitchen hacks that make your life easier? We would love to hear about them. Share in the comments below.

Happy organizing:)

Want to Lose Weight? Start by Organizing Your Fridge:)

Happy New Year!! I’m so happy to see 2020 in the the rear view. While it has been a tough year for most of us I want to stay positive and look to the future.

We all have new year’s resolutions, what’s yours? lose weight? Exercise more? Get out of debt? How about getting organized? I can help you with the last one and combine it with the first.

They say one of the best things you can do when starting a new diet or cleanse is to clear out your fridge and pantry. It gives you the opportunity to get rid of all the unhealthy food items and make room for the good ones. In the video below I help my client clear out her fridge by using the Space to Love® 5 Step Method. Through the process we take everything out, sort “like with like” items and get rid of all unwanted and expired food. This client was not going on a diet but the process is the same. Just by following these simple steps you can created more room for a healthier more organized life.

In the video I show a few things to use to help you stay organized but I want to add on to Step 5 - Style, here are some more items to help keep your refrigerator organized.

Long Bins - Container Store, Target, BedBath&Beyond, and Amazon.

Stackable Drawers & Containers - Container Store, Target, BedBath&Beyond, and Amazon.

Stackable Containers for Leftovers - Container Store, Target, BedBath&Beyond, and Amazon.

Lazy Susan - Container Store, Target, BedBath&Beyond, and Amazon.

Drinks & bottle Holders - Container Store, Target, BedBath&Beyond, and Amazon.

Thanks for reading and watching the video. I hope you found this helpful.

How to Organize Kitchen Cabinets

I love it when my friends hire me to help them get organized. This friend of mine was going to use her crockpot but couldn’t find the lid…so she called me and said, “Ok, let’s do this organizing thing, the holidays are coming and it’s now or never.” I made a quick video of the process. I hope you find this helpful:)

This video goes through the Space to Love® 5 Step Method on how to organize your kitchen cabinets.

5 Steps to Organizing Your Pantry

It was such a treat to help this organizing client in Los Angeles get their pantry clutter-free and in order. I’m so grateful that they let me film it, and that I get to share it with all of you. By using the Space to Love® 5 step method: Setup, Sort, Select, Sanitize, Style, it makes it easy to breakdown the process so you can get and stay organized. Check out the video below.

As an alternative to watching the video, below is a quick breakdown of the steps to follow so you can get and stay organized.

Step 1, Setup. Before you go to the store to buy bins or start pulling everything out of the pantry it’s important to take a few preparation steps prior to getting started. You want to make sure you have enough room to work and the proper tools are on hand. You will probably need markers, post-its, garbage bags, donations bags, a recycle bin, scissors, and a box cutter. This will make it easier to stay on track.

Step 2, Sort. Start pulling everything out of the pantry and sort items into like categories. Some common category examples are baking, sides and pasta, snacks, canned goods, etc. Use your post-it notes to label your categories for a quicker sorting process. Pro-tip, check all expiration dates before putting into categories.

Step 3, Select. Now that all the items are sorted into like piles it is easier to make decisions on which items you want to keep. You can donate your unwanted items that are not open or expired to your local church or food bank.

Step 4, Sanitize. Before returning all your selected items back into the panty, it’s so important to give those shelves a good scrub down because these areas rarely get the chance to be properly cleaned. Feng Shui tip, all dirt and dust is sha chi (negative energy) and should be removed to promote more positive energy in your home.

Step 5, Style. Most of my clients want to purchase containers and decorative items for the pantry before they even start step 1. However, it’s important to wait until after the sort and selection process because you will have a better understanding of what is going back into your cabinet. Step 5 is the time to take measurements and purchase organizing products such as bins, baskets, etc. Once you’ve bought the bins and baskets for the pantry you’ll want to label them with the different categories. Place your items back in the proper categories and this will help you stay organized.

What do you think? By using these steps will it make it easier to get and stay organized? Comment below.

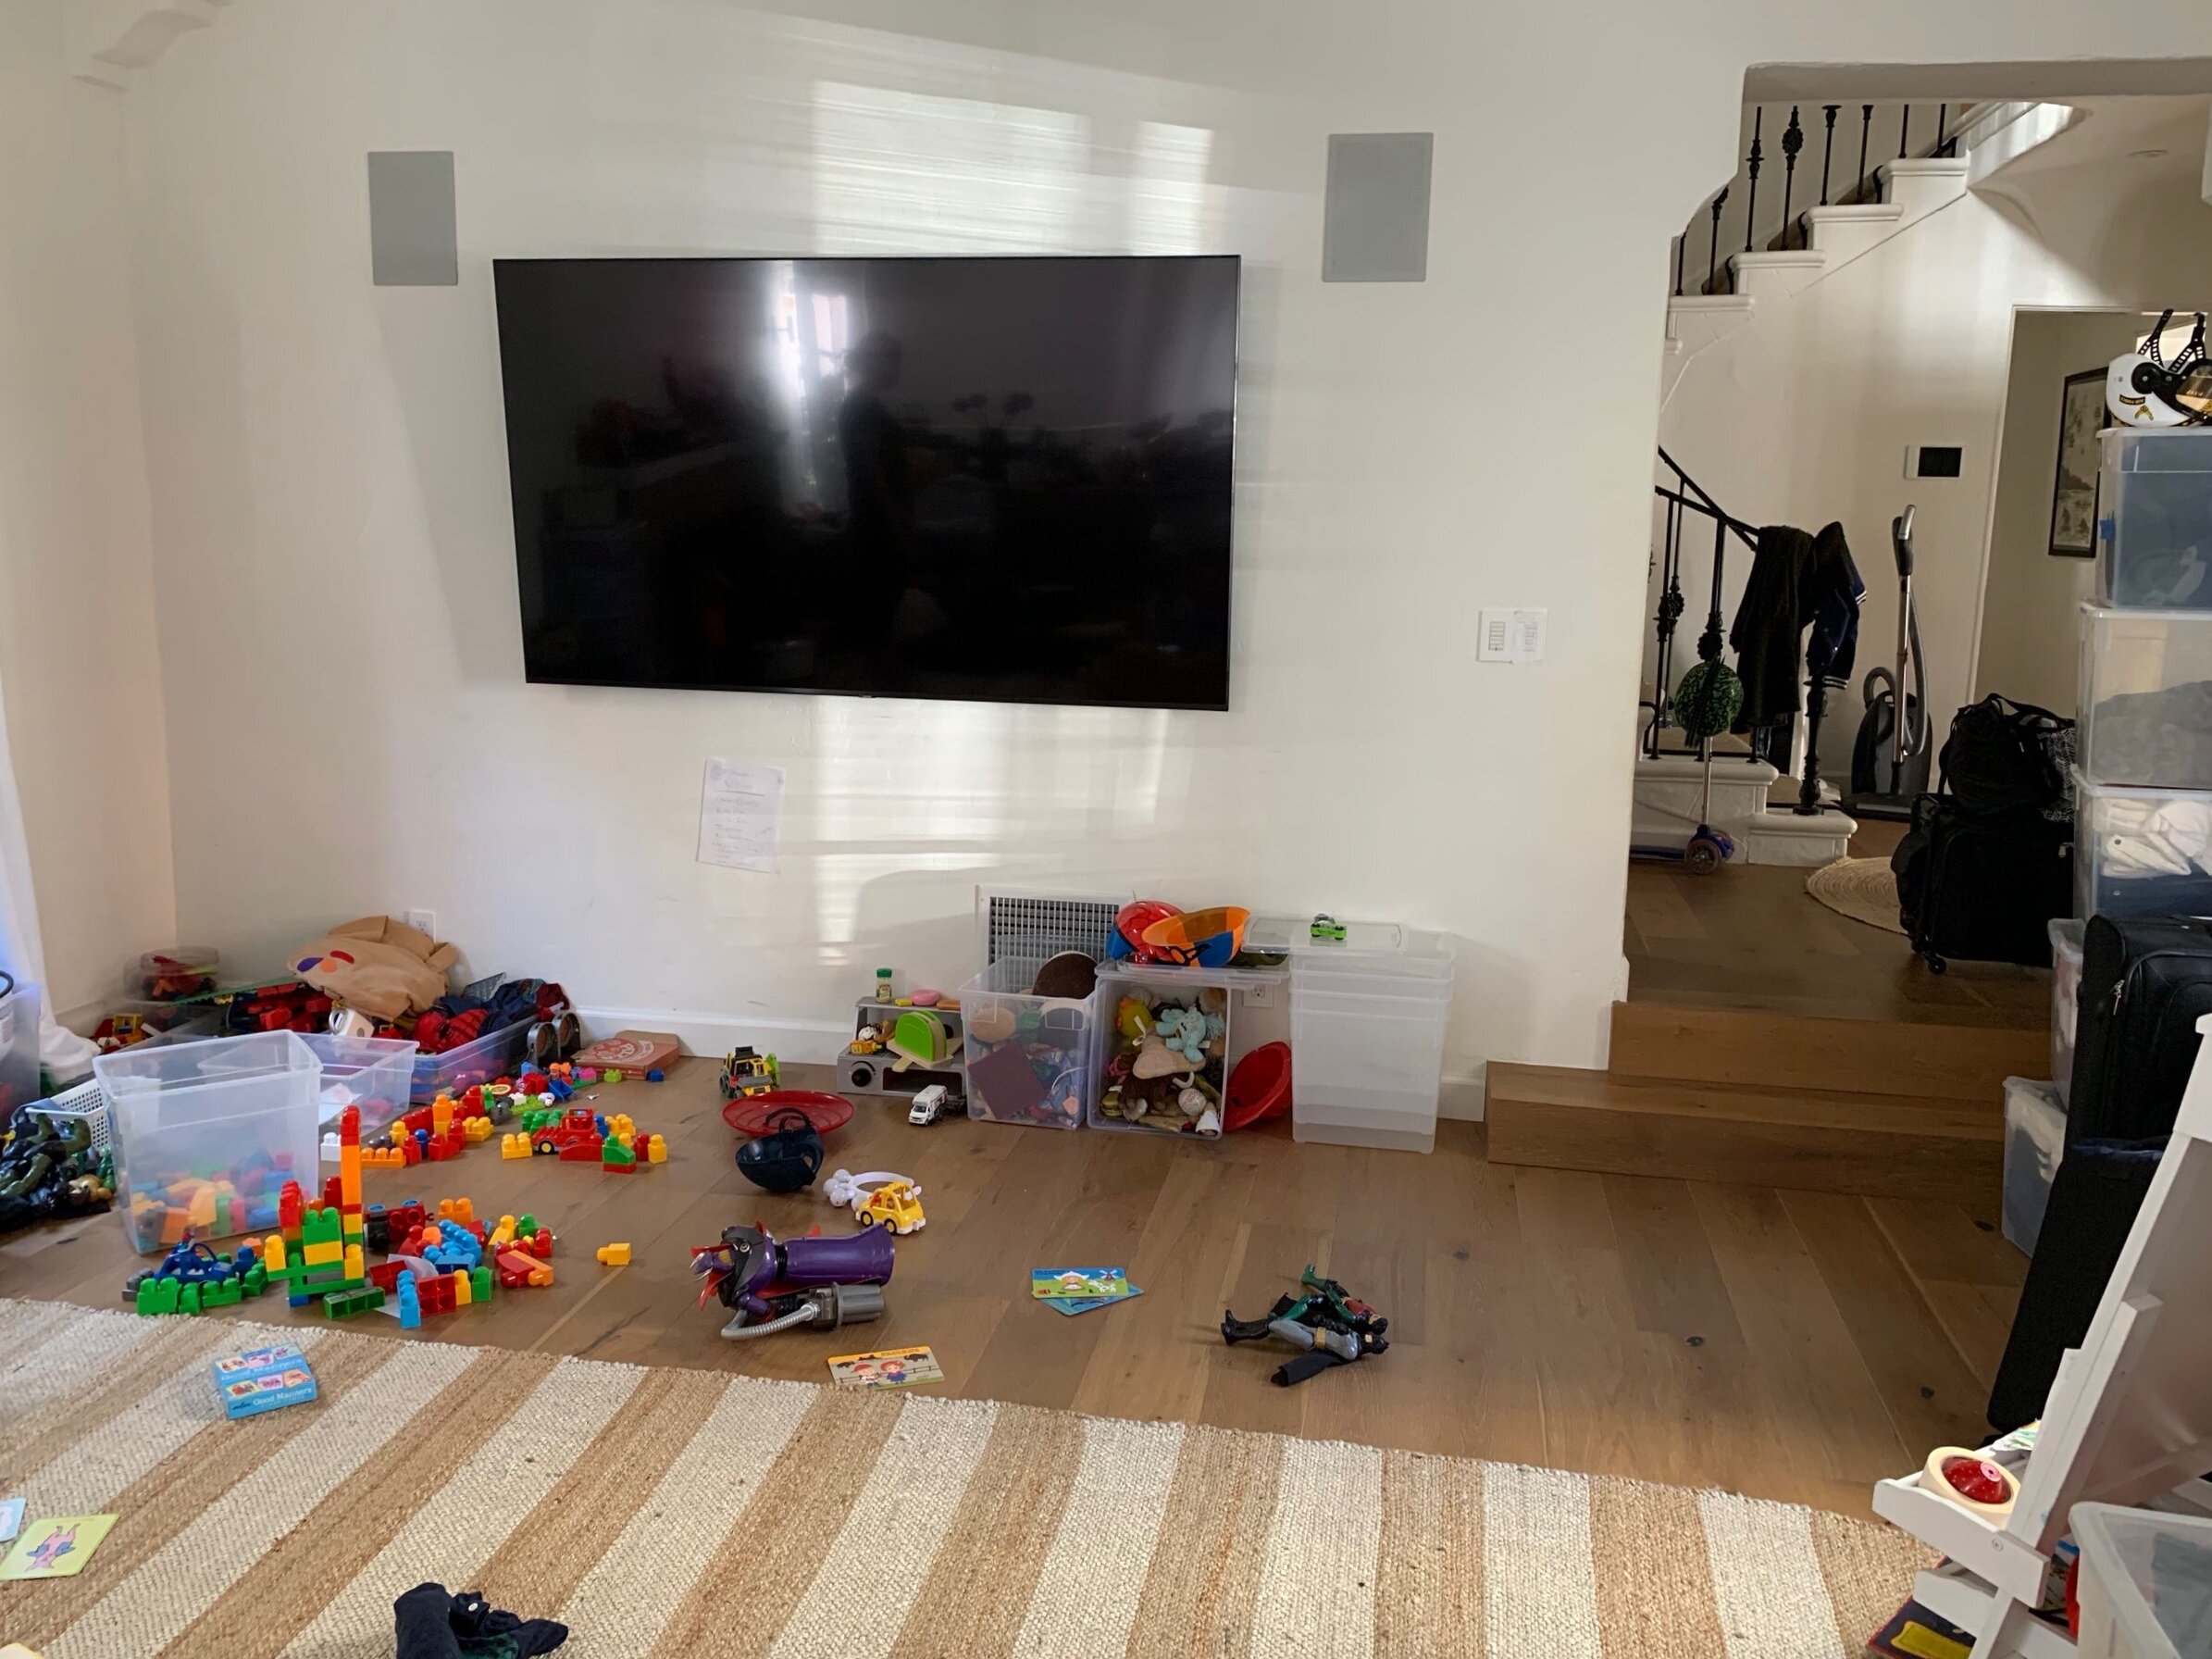
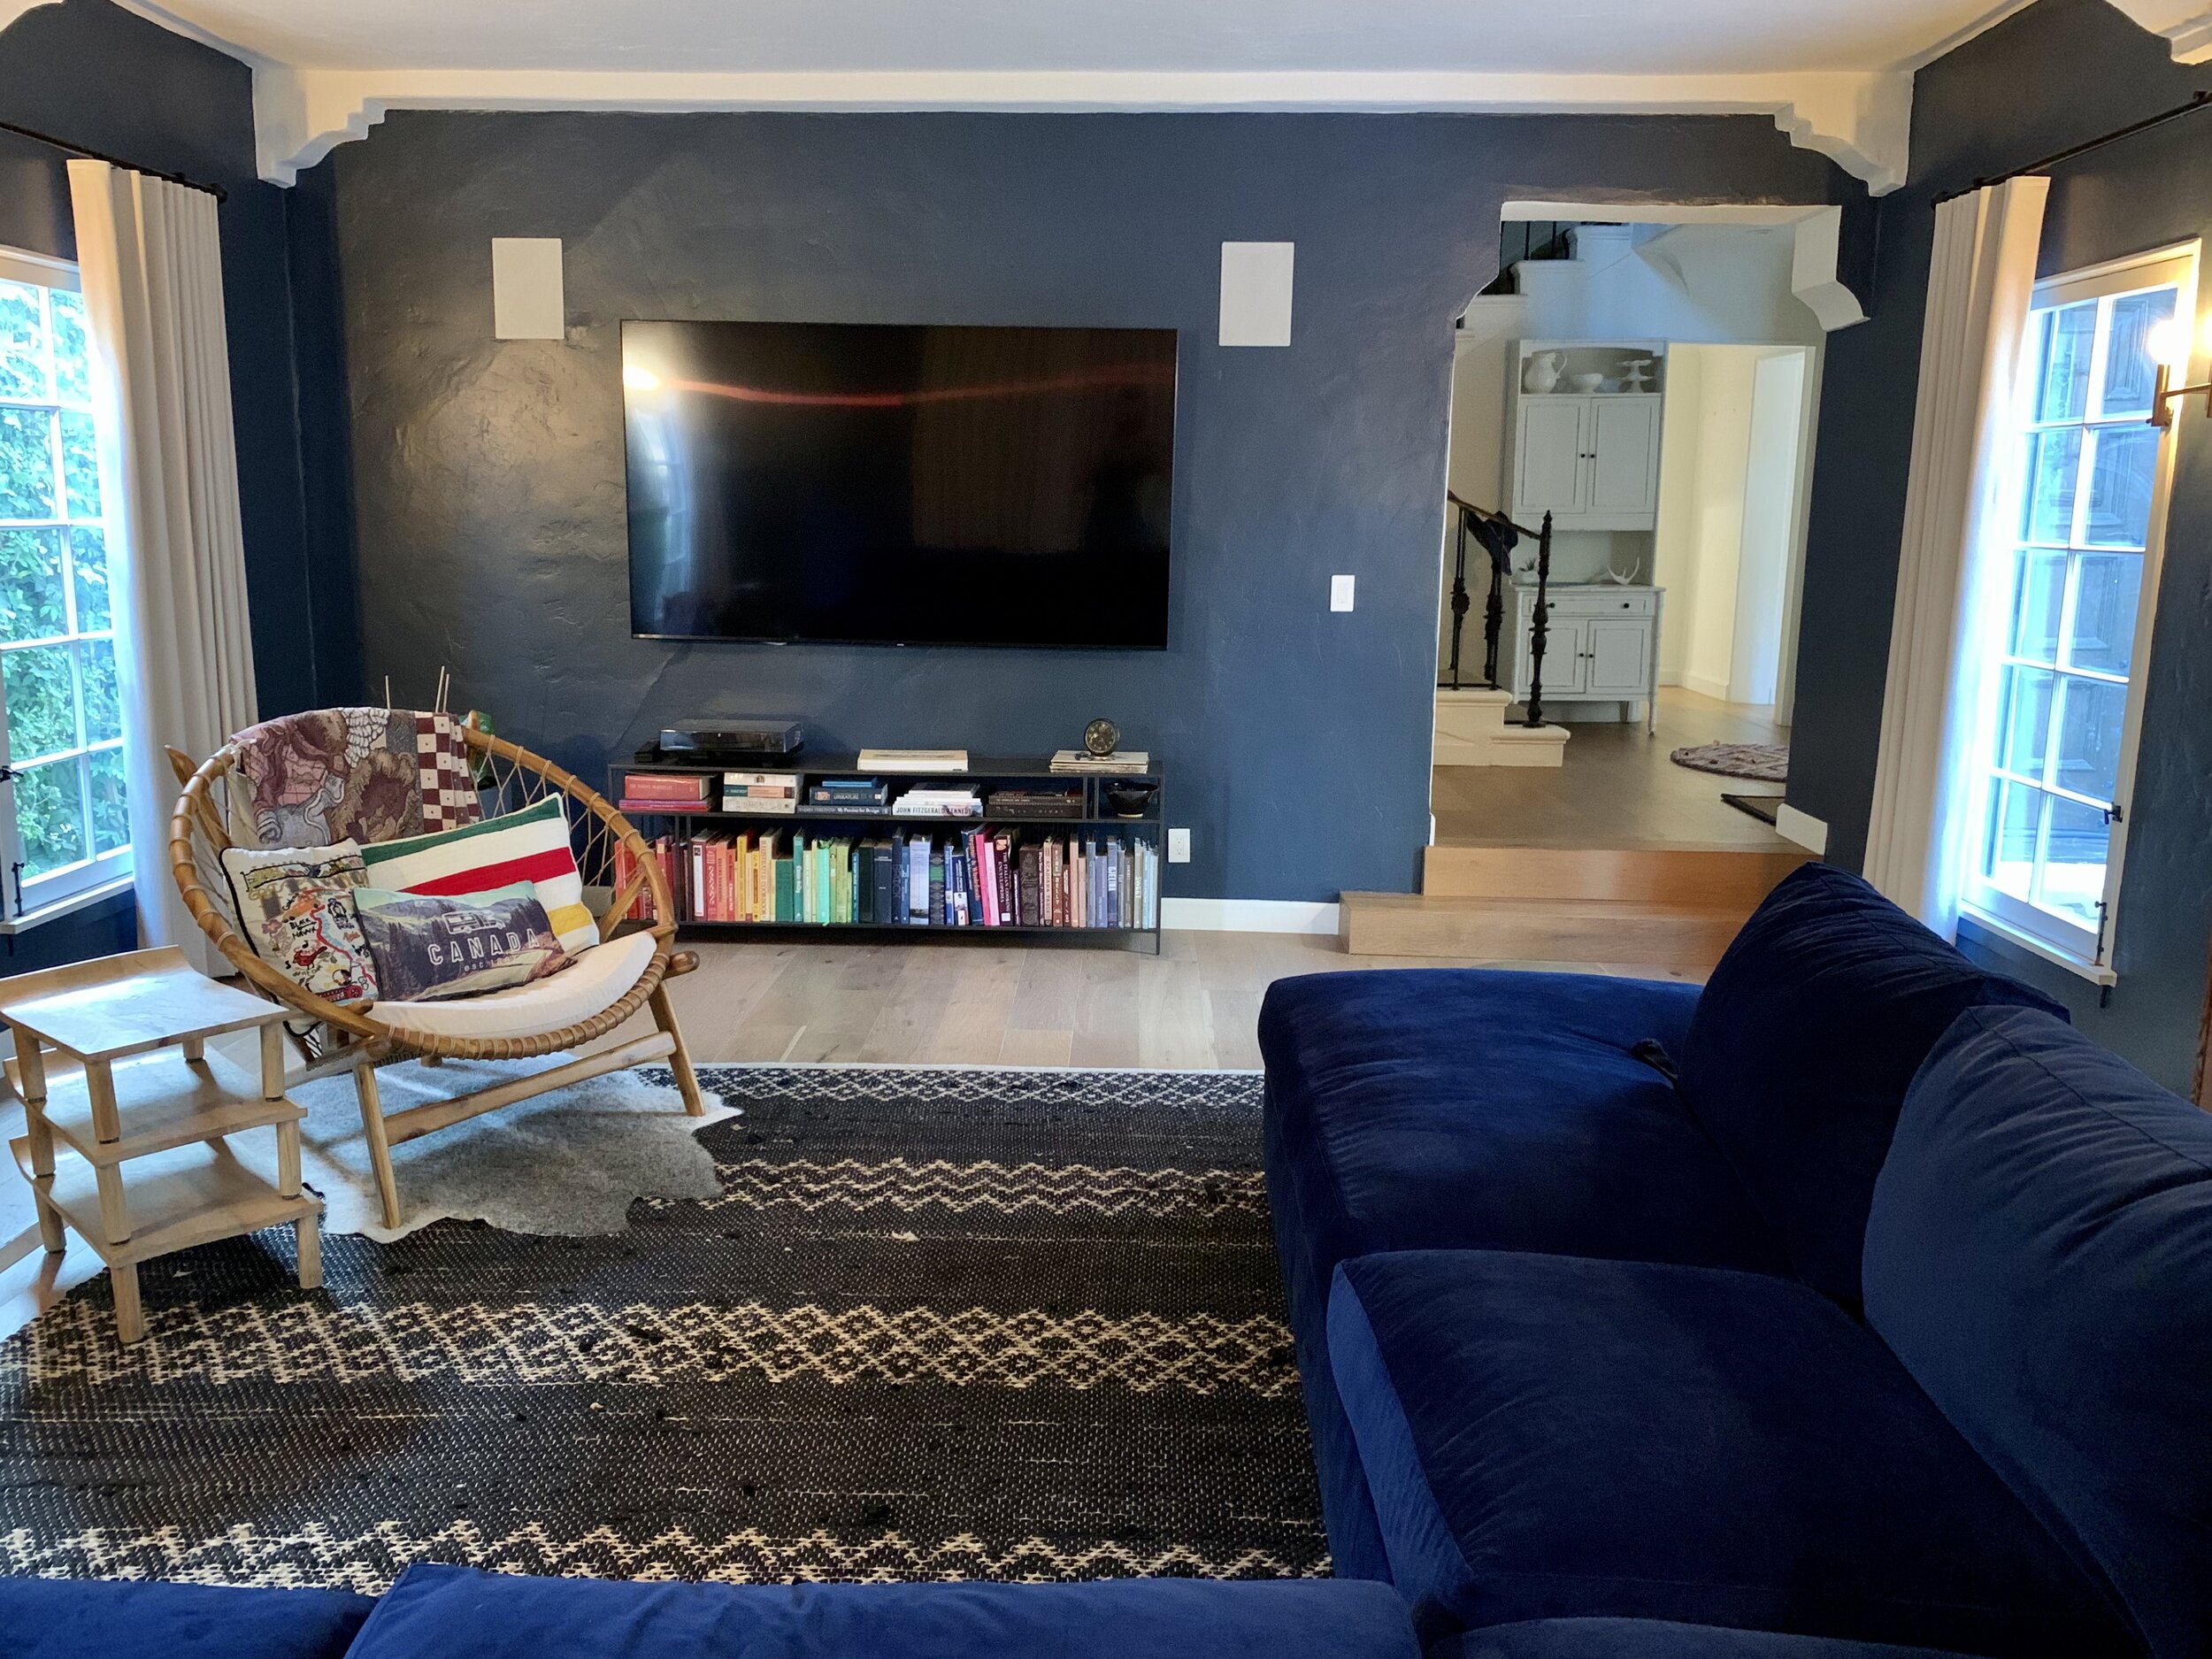
From Chaos to Comfort: A Living Room Transformation

How many of you have a room in your house that is being used as a storage unit? If you could remove the chaos, what would that room be used for? Now more than ever with the ongoing COVID crisis, I can think of many ideas for extra space: mini gym, meditation, homeschooling, zoom meetings, or a functioning living room for future movie nights.

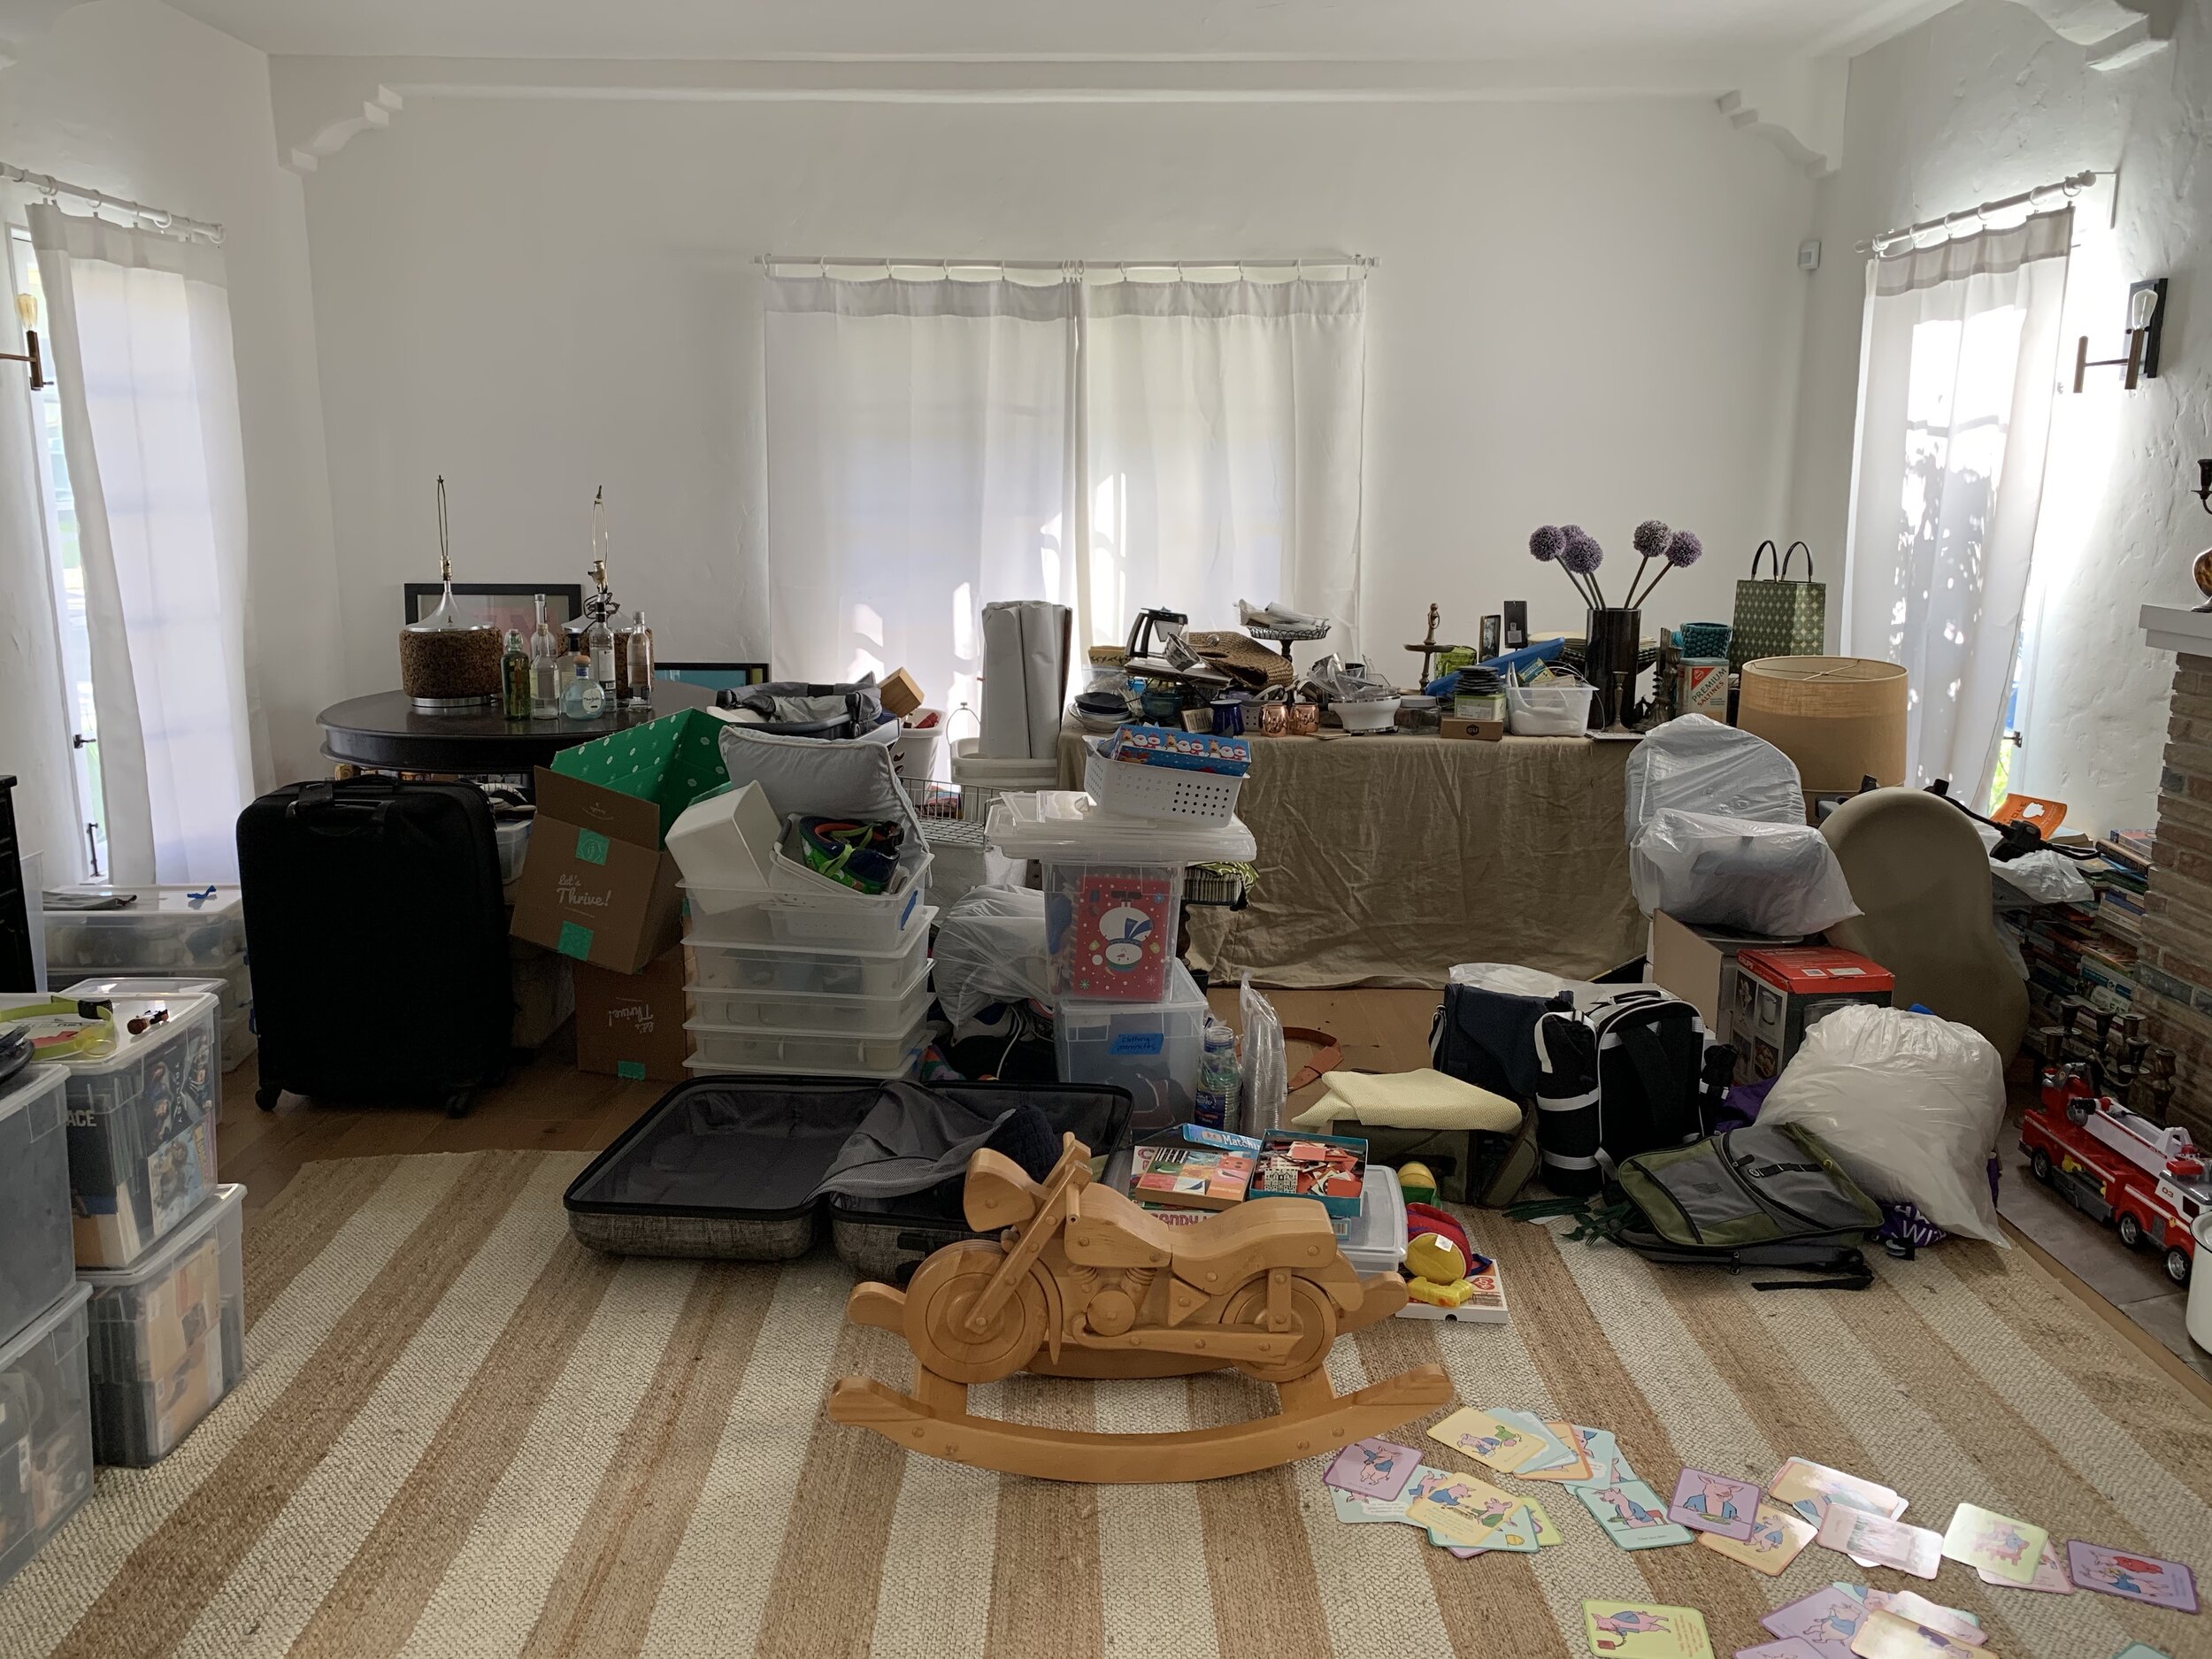
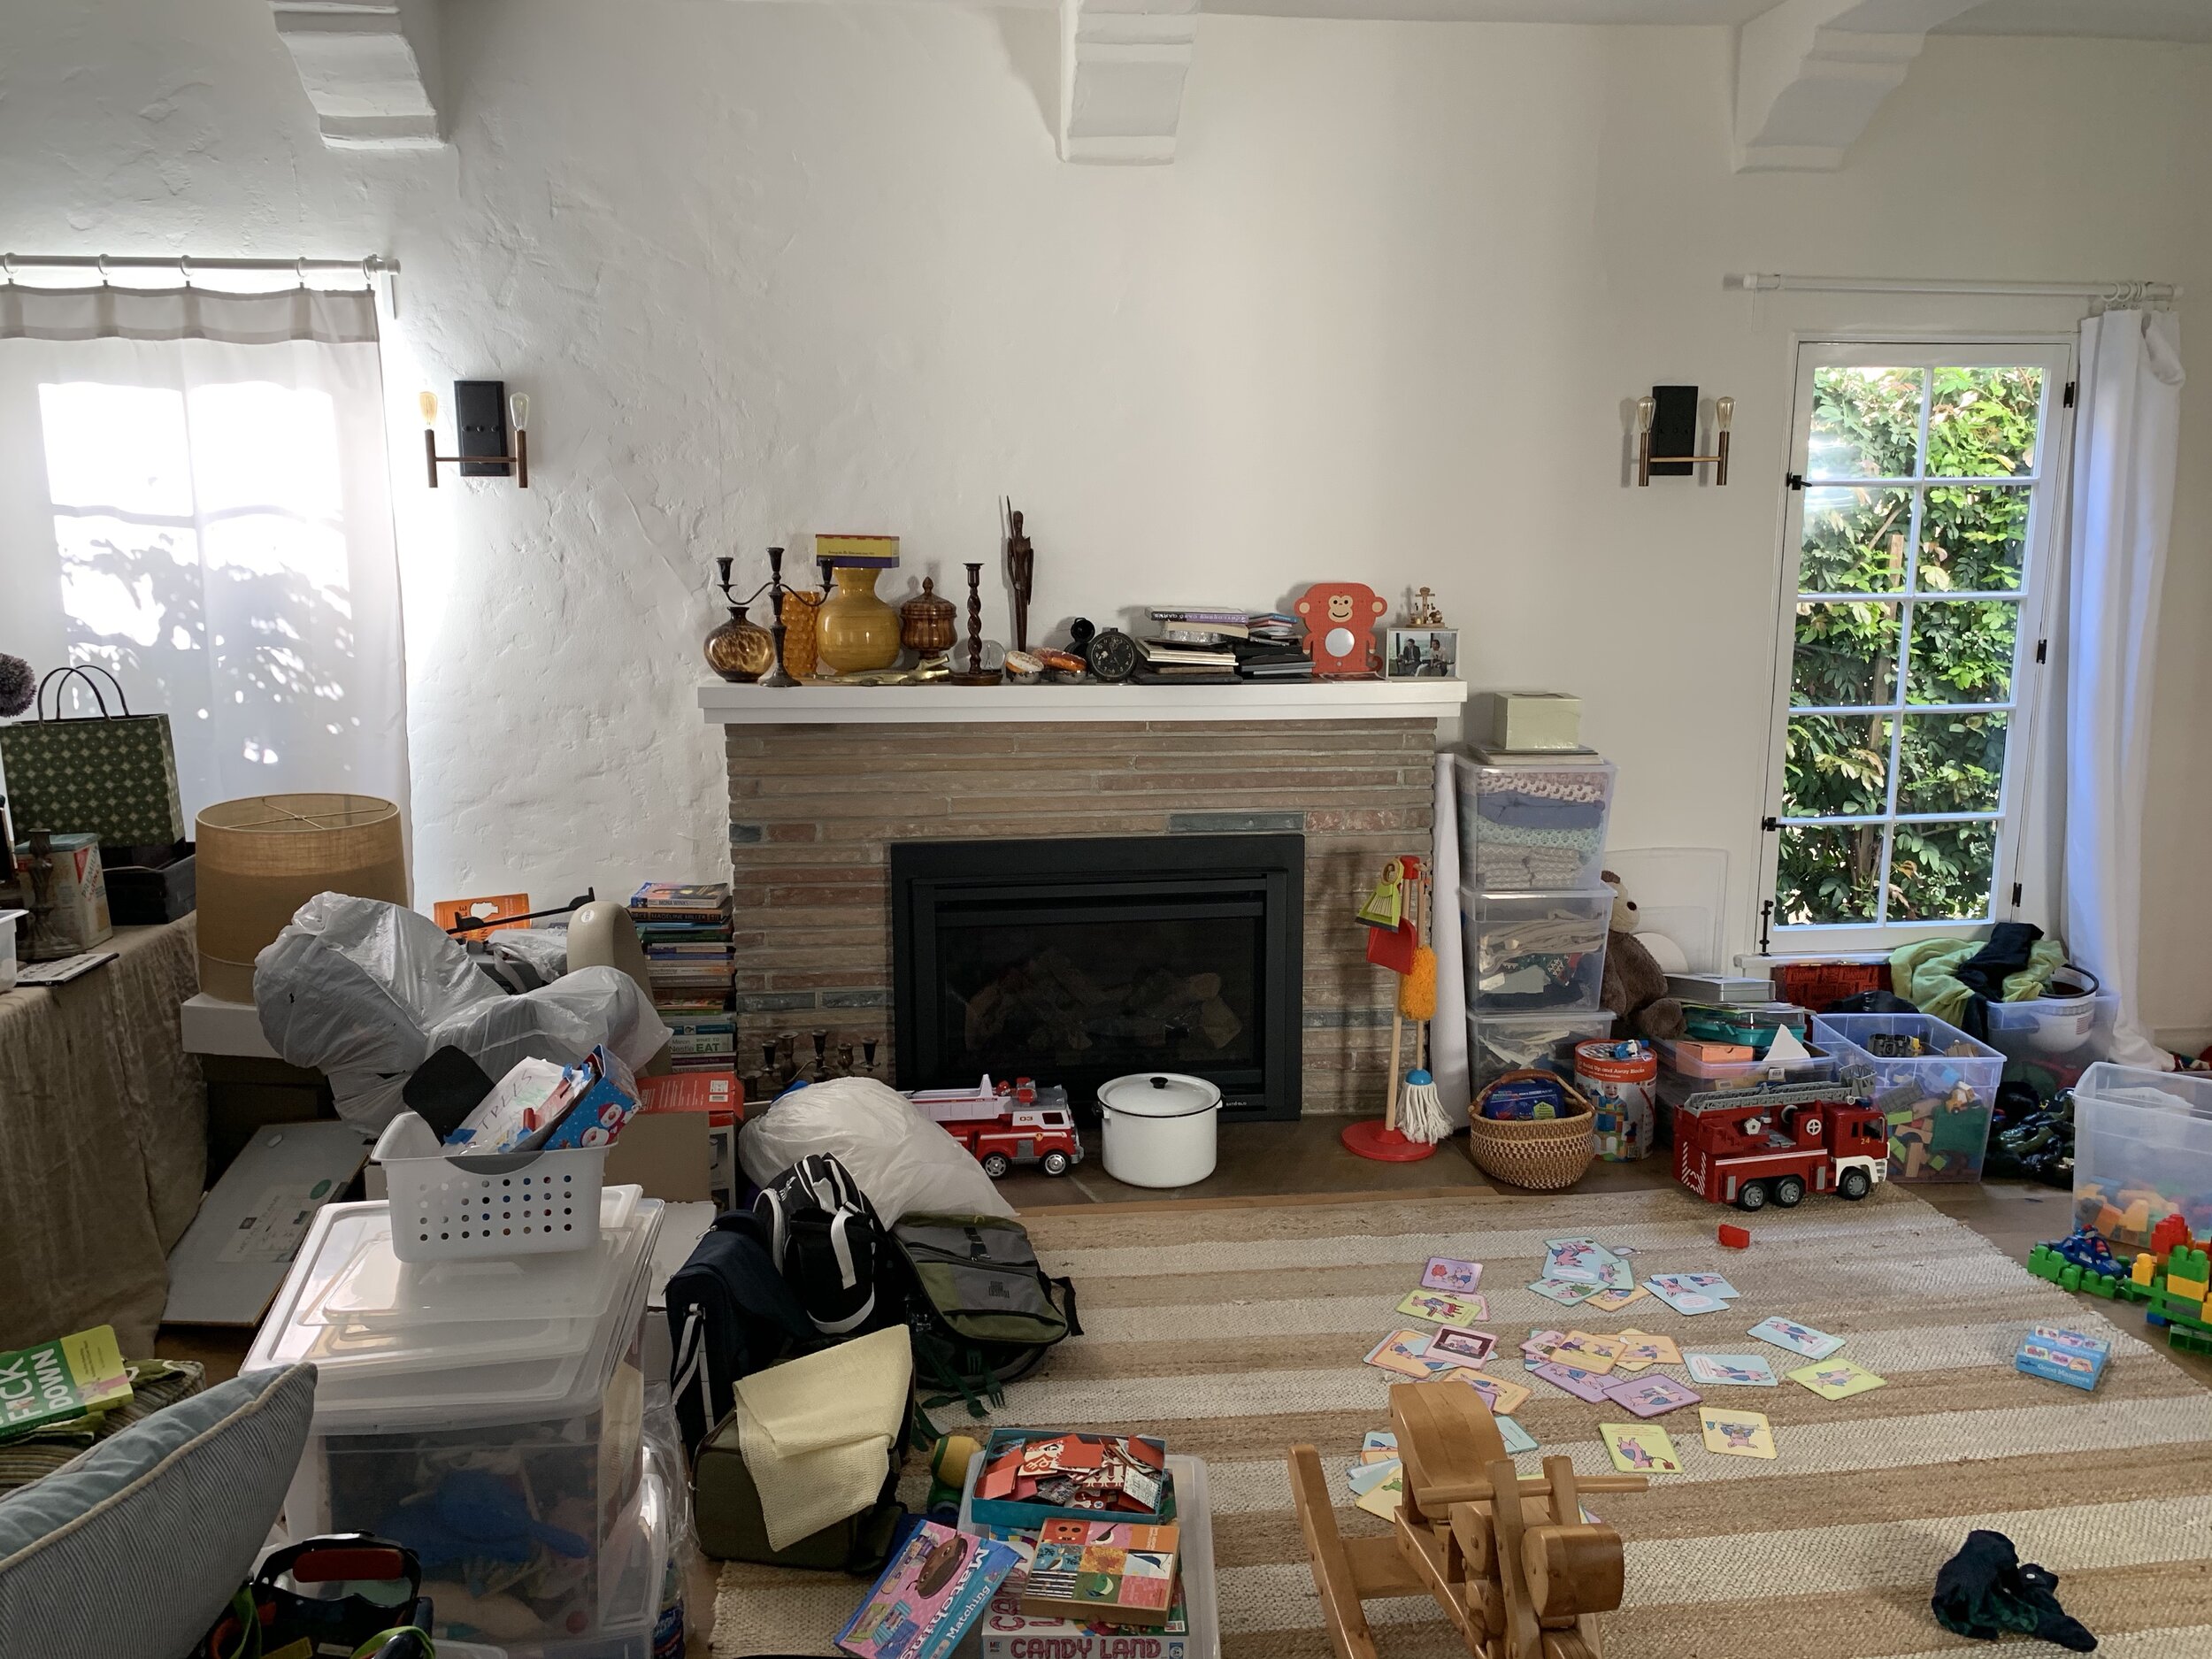
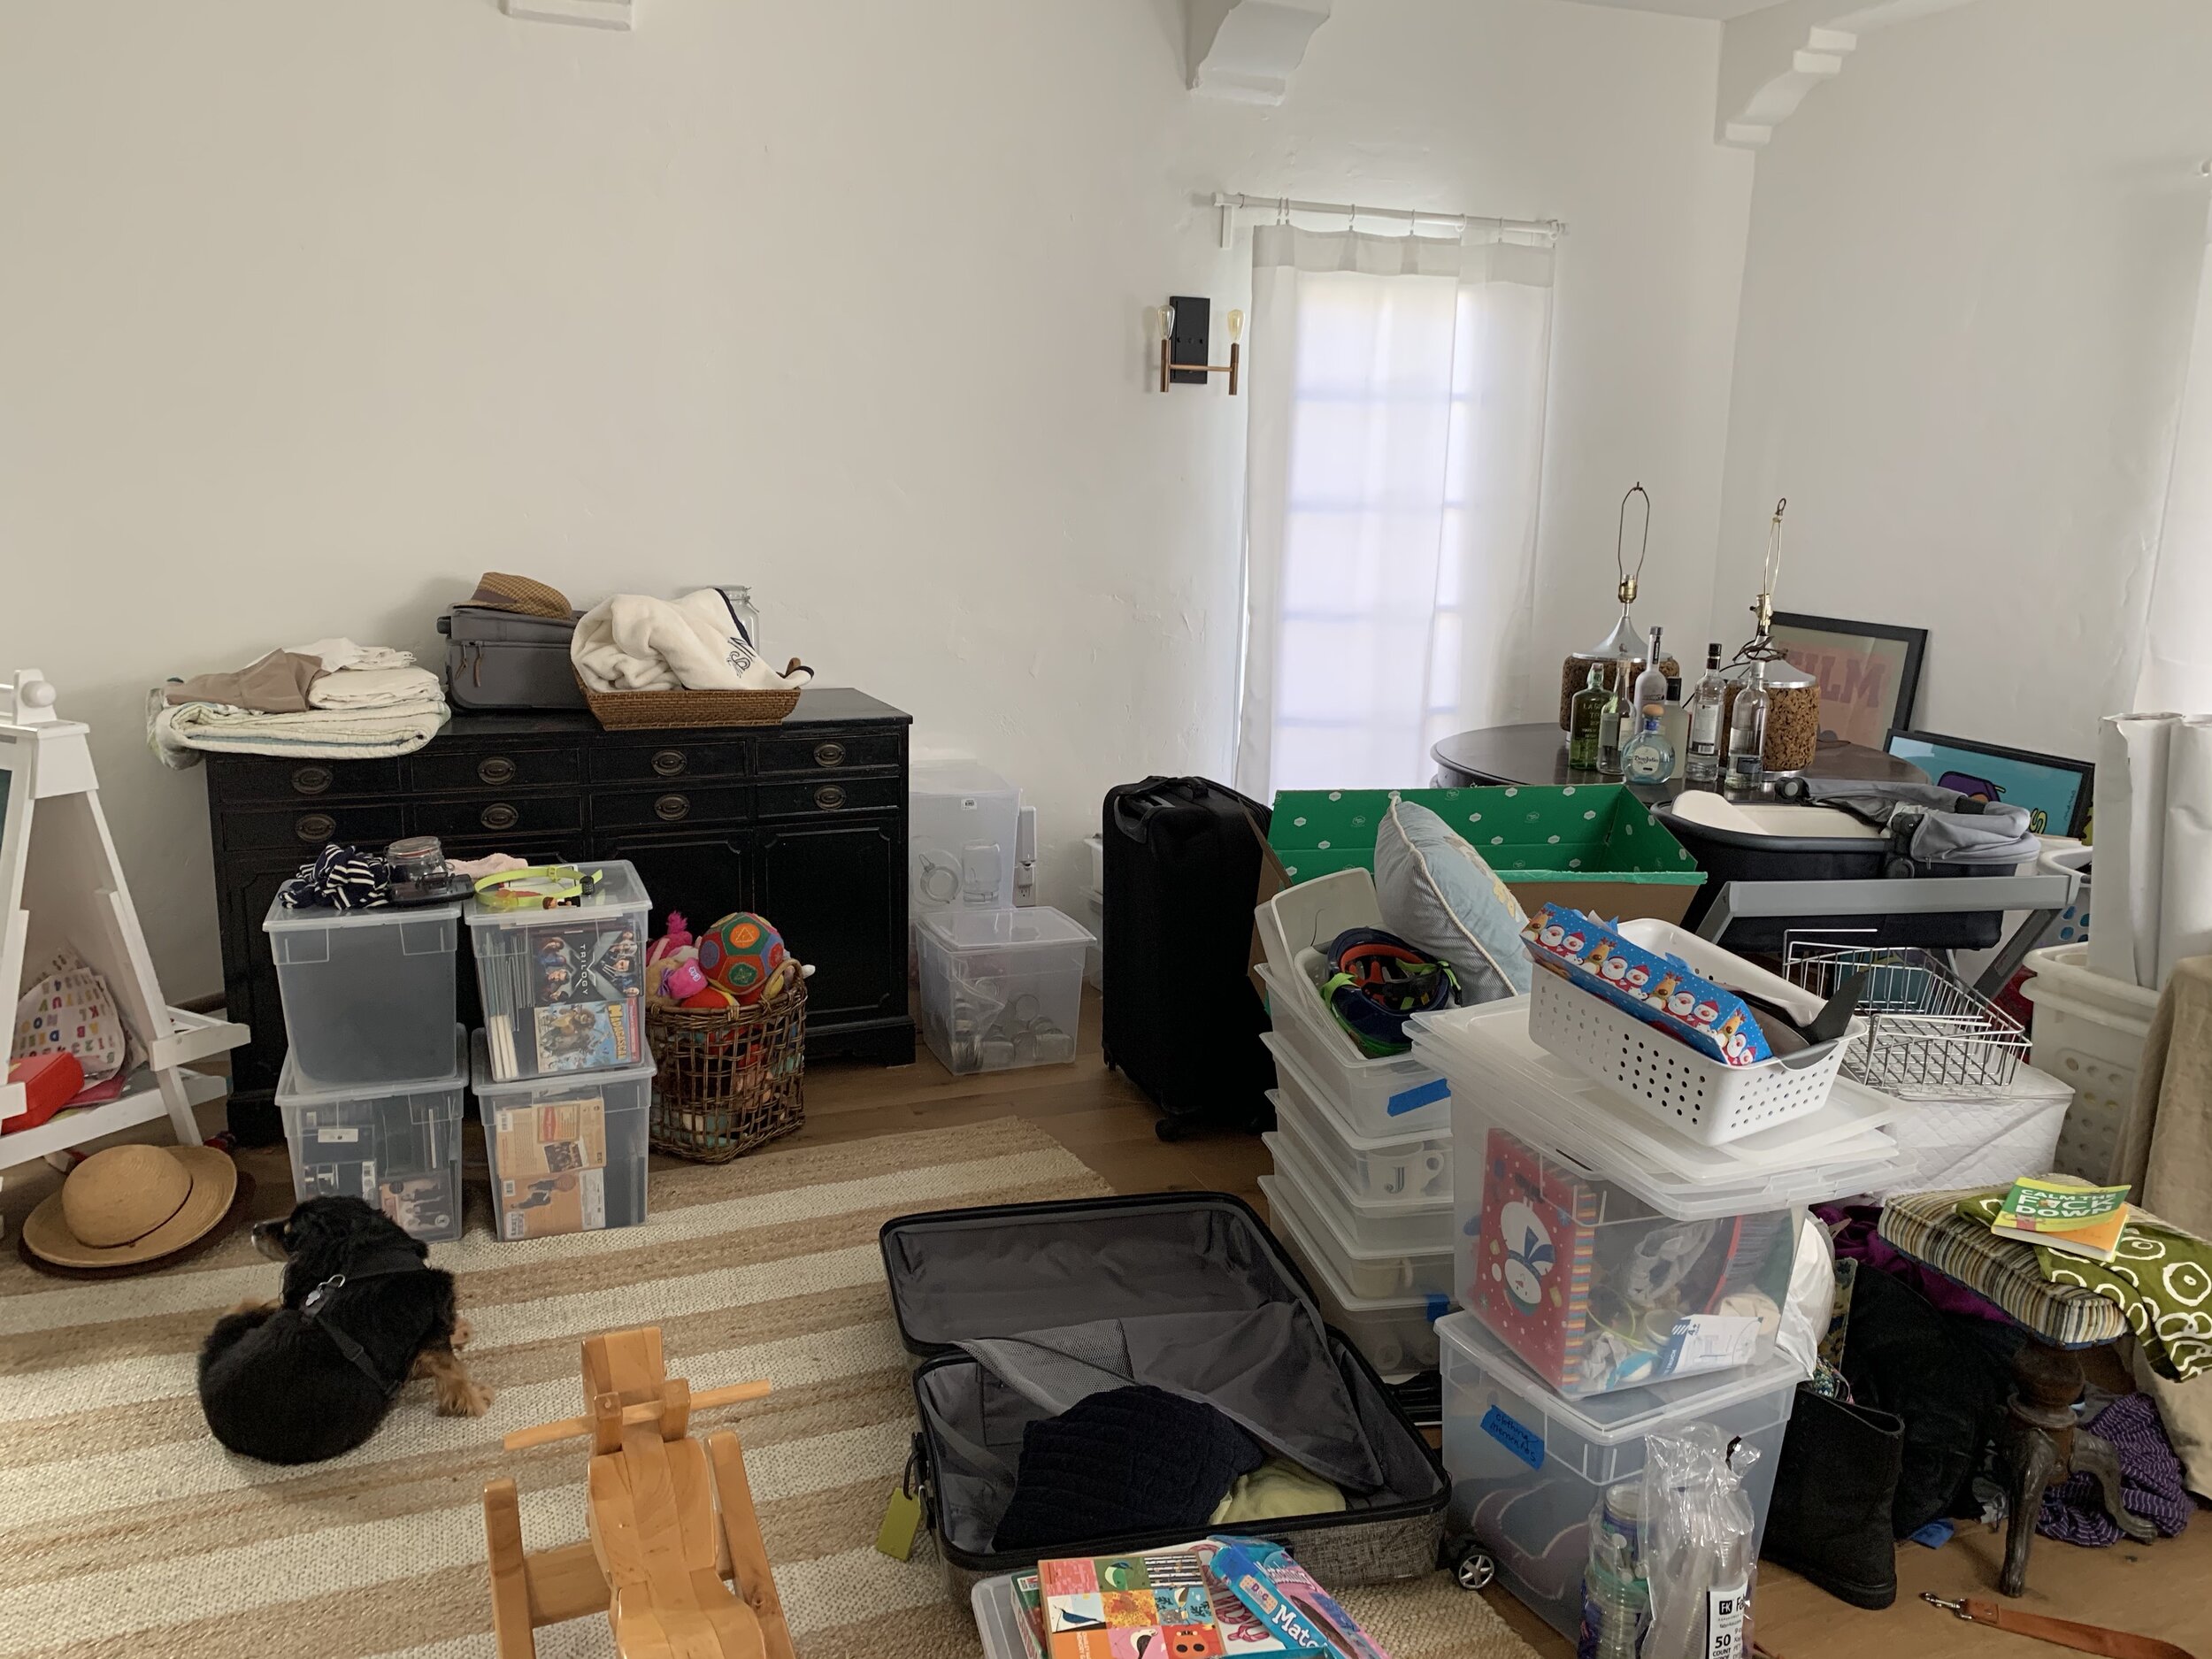
A recent client of mine in Los Angeles had just moved into their dream home but shortly after was stressed out with the lack of storage. The house was a beautiful Spanish revival that had limitations for their belongings and it was imperative to come up with storage solutions that didn’t involve acquiring a storage unit. That is why their clutter ended up in the living room.

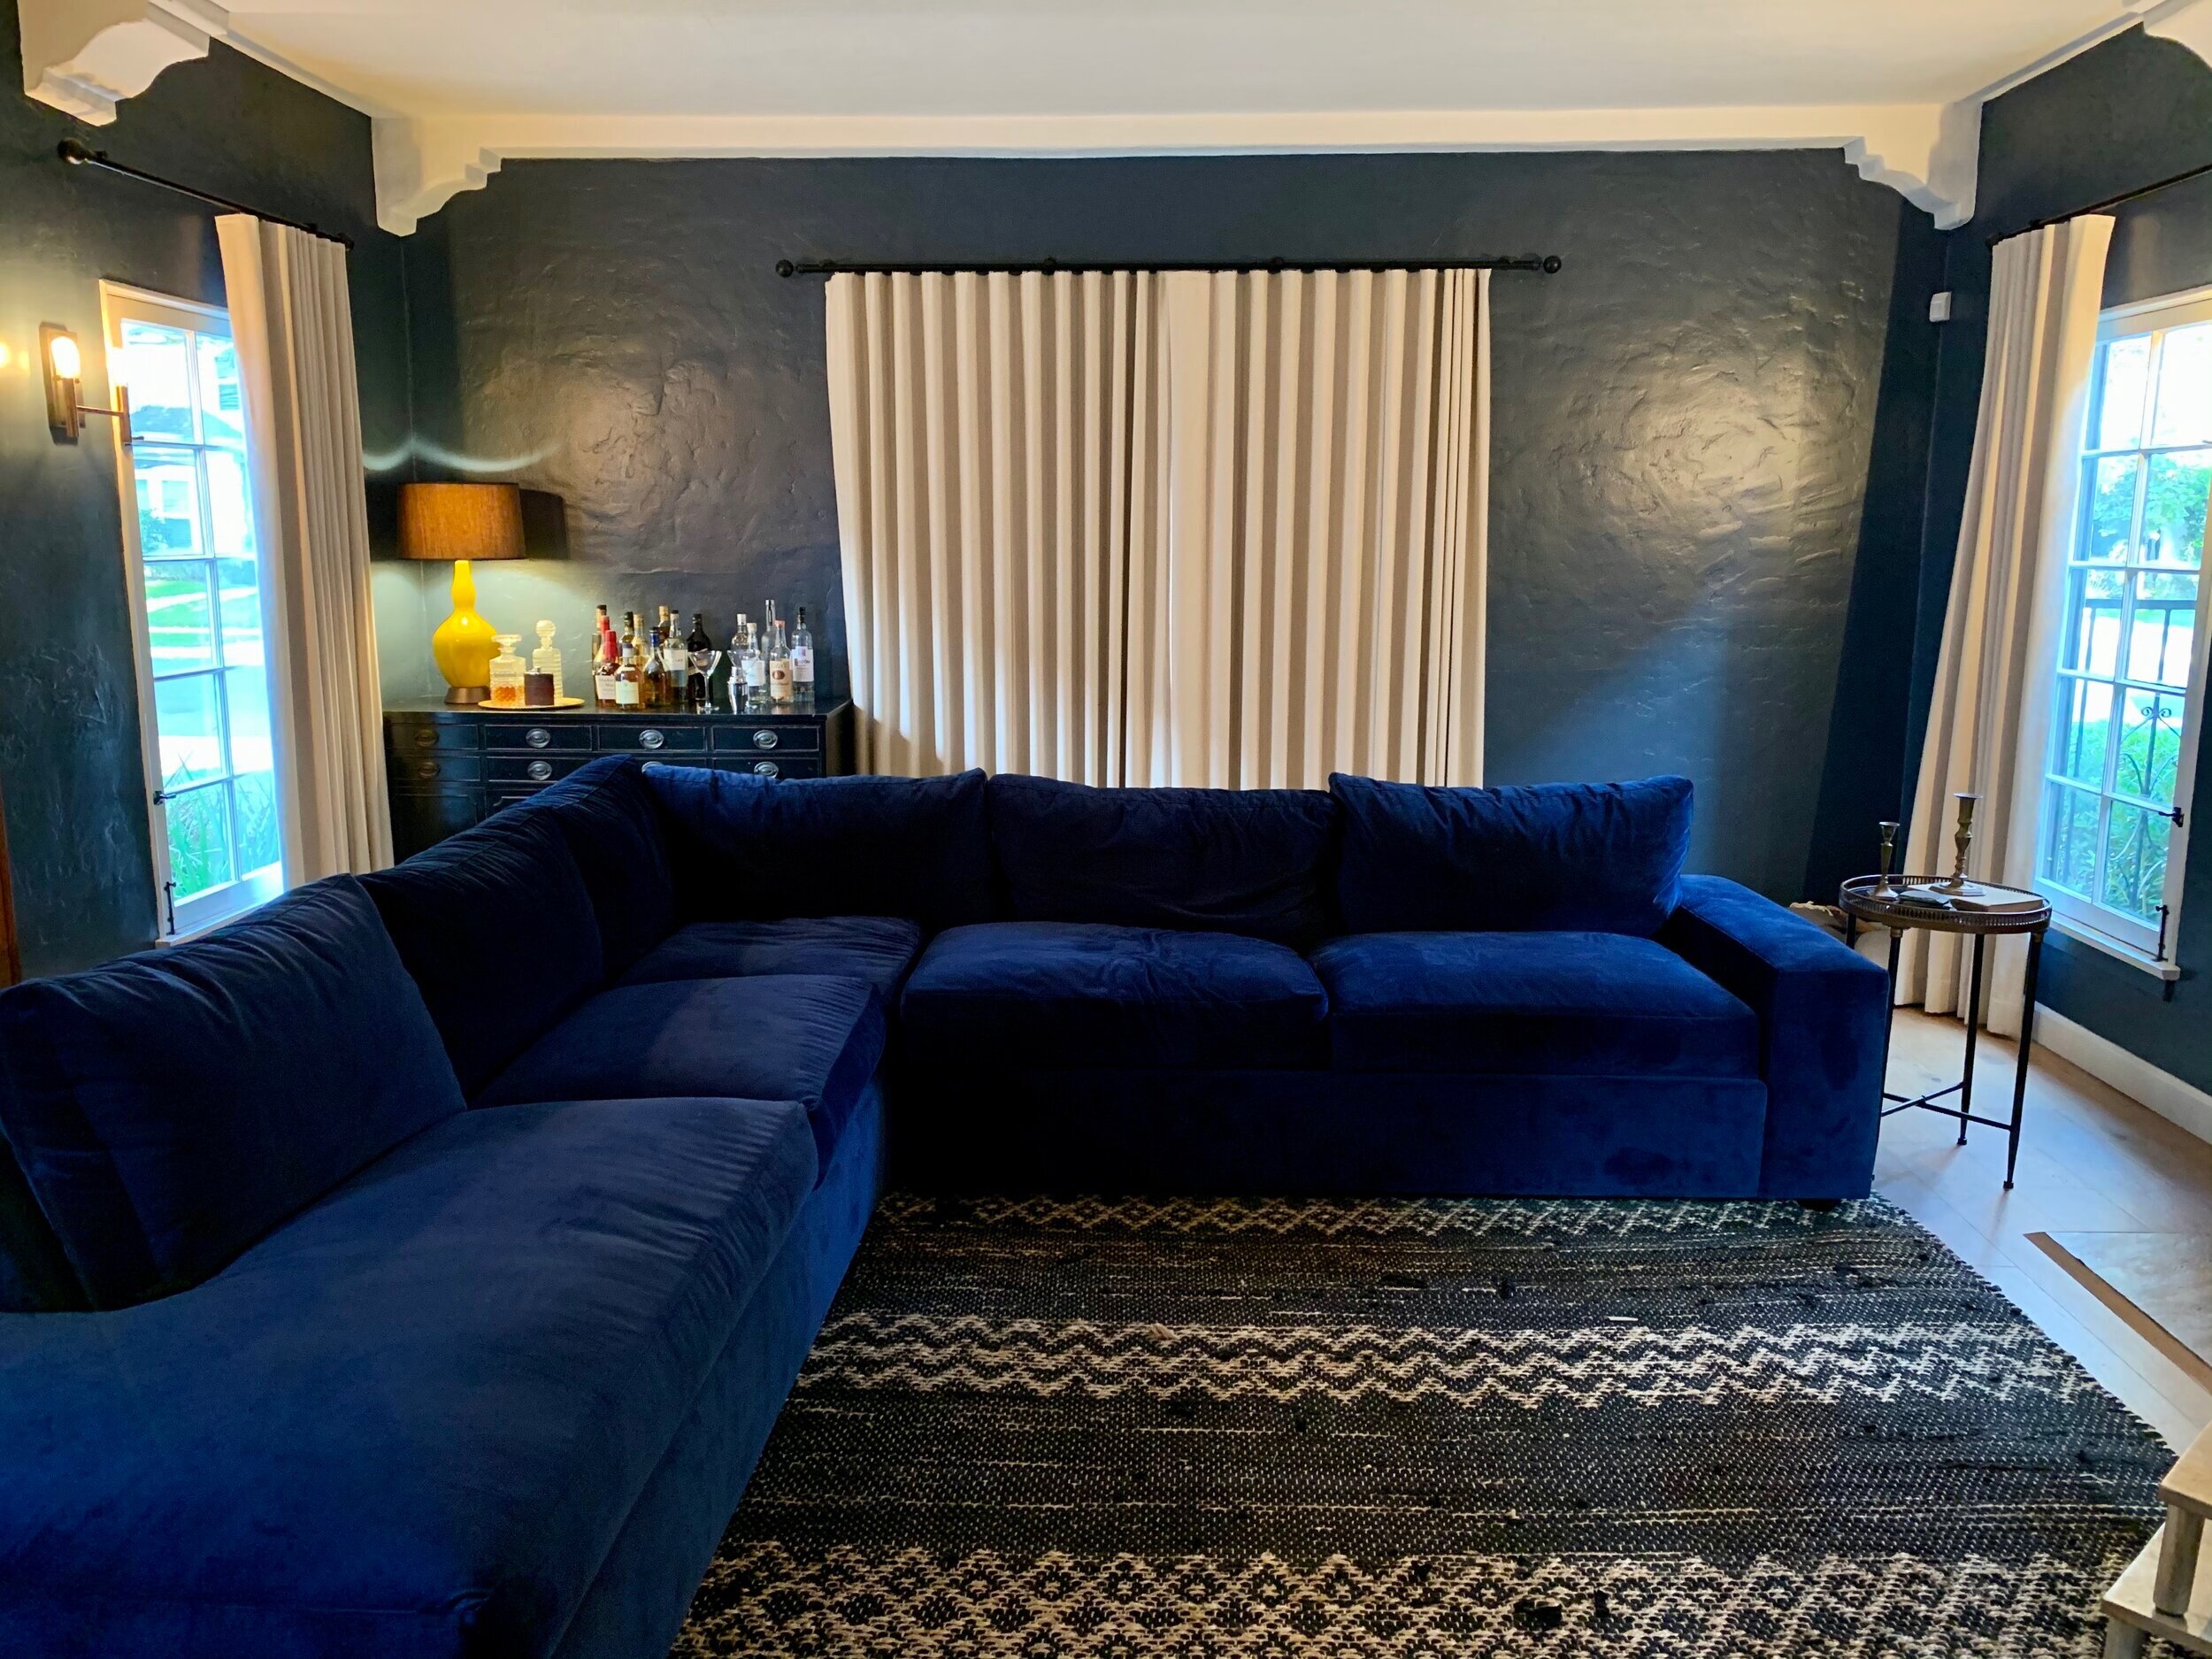
As with all projects, big or small, it is important to visualize what you want to use the space for, how you want it to look, and how it makes you feel. Before we jumped into the 5 step Space to Love® method to getting organized I wanted my client to convey to me what their vision was for the cluttered living room. They envisioned kid sleepovers, out of town family members staying for the weekend, having drinks with friends during game night and movie night with the family. This translated into a large and comfy sectional couch that opened up to a bed. The couch would have a dark-colored fabric that would be more forgiving of kids and pets. This layout also needed to include space for a bar and comfortable seating with side tables. This visualization process allows you to know what you need and is always a big motivator to get started on any project.

After visualizing we went on to assess and prioritize. We did a walkthrough of the entire house and outdoor space to see where, if any, would be an accessible and functional place for storage. I was pleased to learn that they had an unutilized basement. A basement in LA is a rare thing, and this one had ample space to add additional shelving. They had a garage that was being used as an extension of the outdoor space, not for a car. We decided to use one of the walls to build storage cabinets (that will be for another blog). Now, I was able to see where all the items that they wanted to keep would go.

After that, we were ready for the Space to Love® method. For the first step, Setup, we used foldout tables where we could group the like items together and see everything. We created areas in the room for the common categories, such as donations, trash, and recycle. With our post-its and markers ready we moved on to step two, Sorting.

While working through the sorting process I was able to learn a lot about my client. For instance, I could tell what they did for a living and what their hobbies were. This allowed me to come up with an organizational system that would be tailored to their individual needs.

As we continued sorting, everything made their way into specific categories. This allowed them to see which items they had duplicates of, what they forgot they had, and what they weren’t using. I love watching as my clients go through this process because they start to understand what they need, what they want for the future, and what is holding them back. It becomes clear to them how they have changed over the years and what was once important doesn’t have much hold over them anymore. This leads right into step three, Select.

Now that everything is sorted it makes it easier to “pick the best and get rid of the rest”. Here is where they see what is no longer serving or supporting them. This is also an opportunity for them to realize how they have been spending their money and their time. Sometimes feelings like guilt, shame, and regret may come up and bring the process to a halt. This is where having a professional organizer there with you is so important, we help ease the feelings that arise and get you through it. Real change starts to happen during this time. Many ah-ha moments.

After sorting and selecting, the items they decided to keep could be stored in the basement. Which brings us to step four, Sanitize.

We started with the basement. Before we added shelving from Home Depot we made sure we cleaned the area well. Then we put the shelving in place and organized them with items that were not going to be used on a regular basis. We transported the other items that were needed more often out to the garage on temporary shelving until the storage cabinets were built.

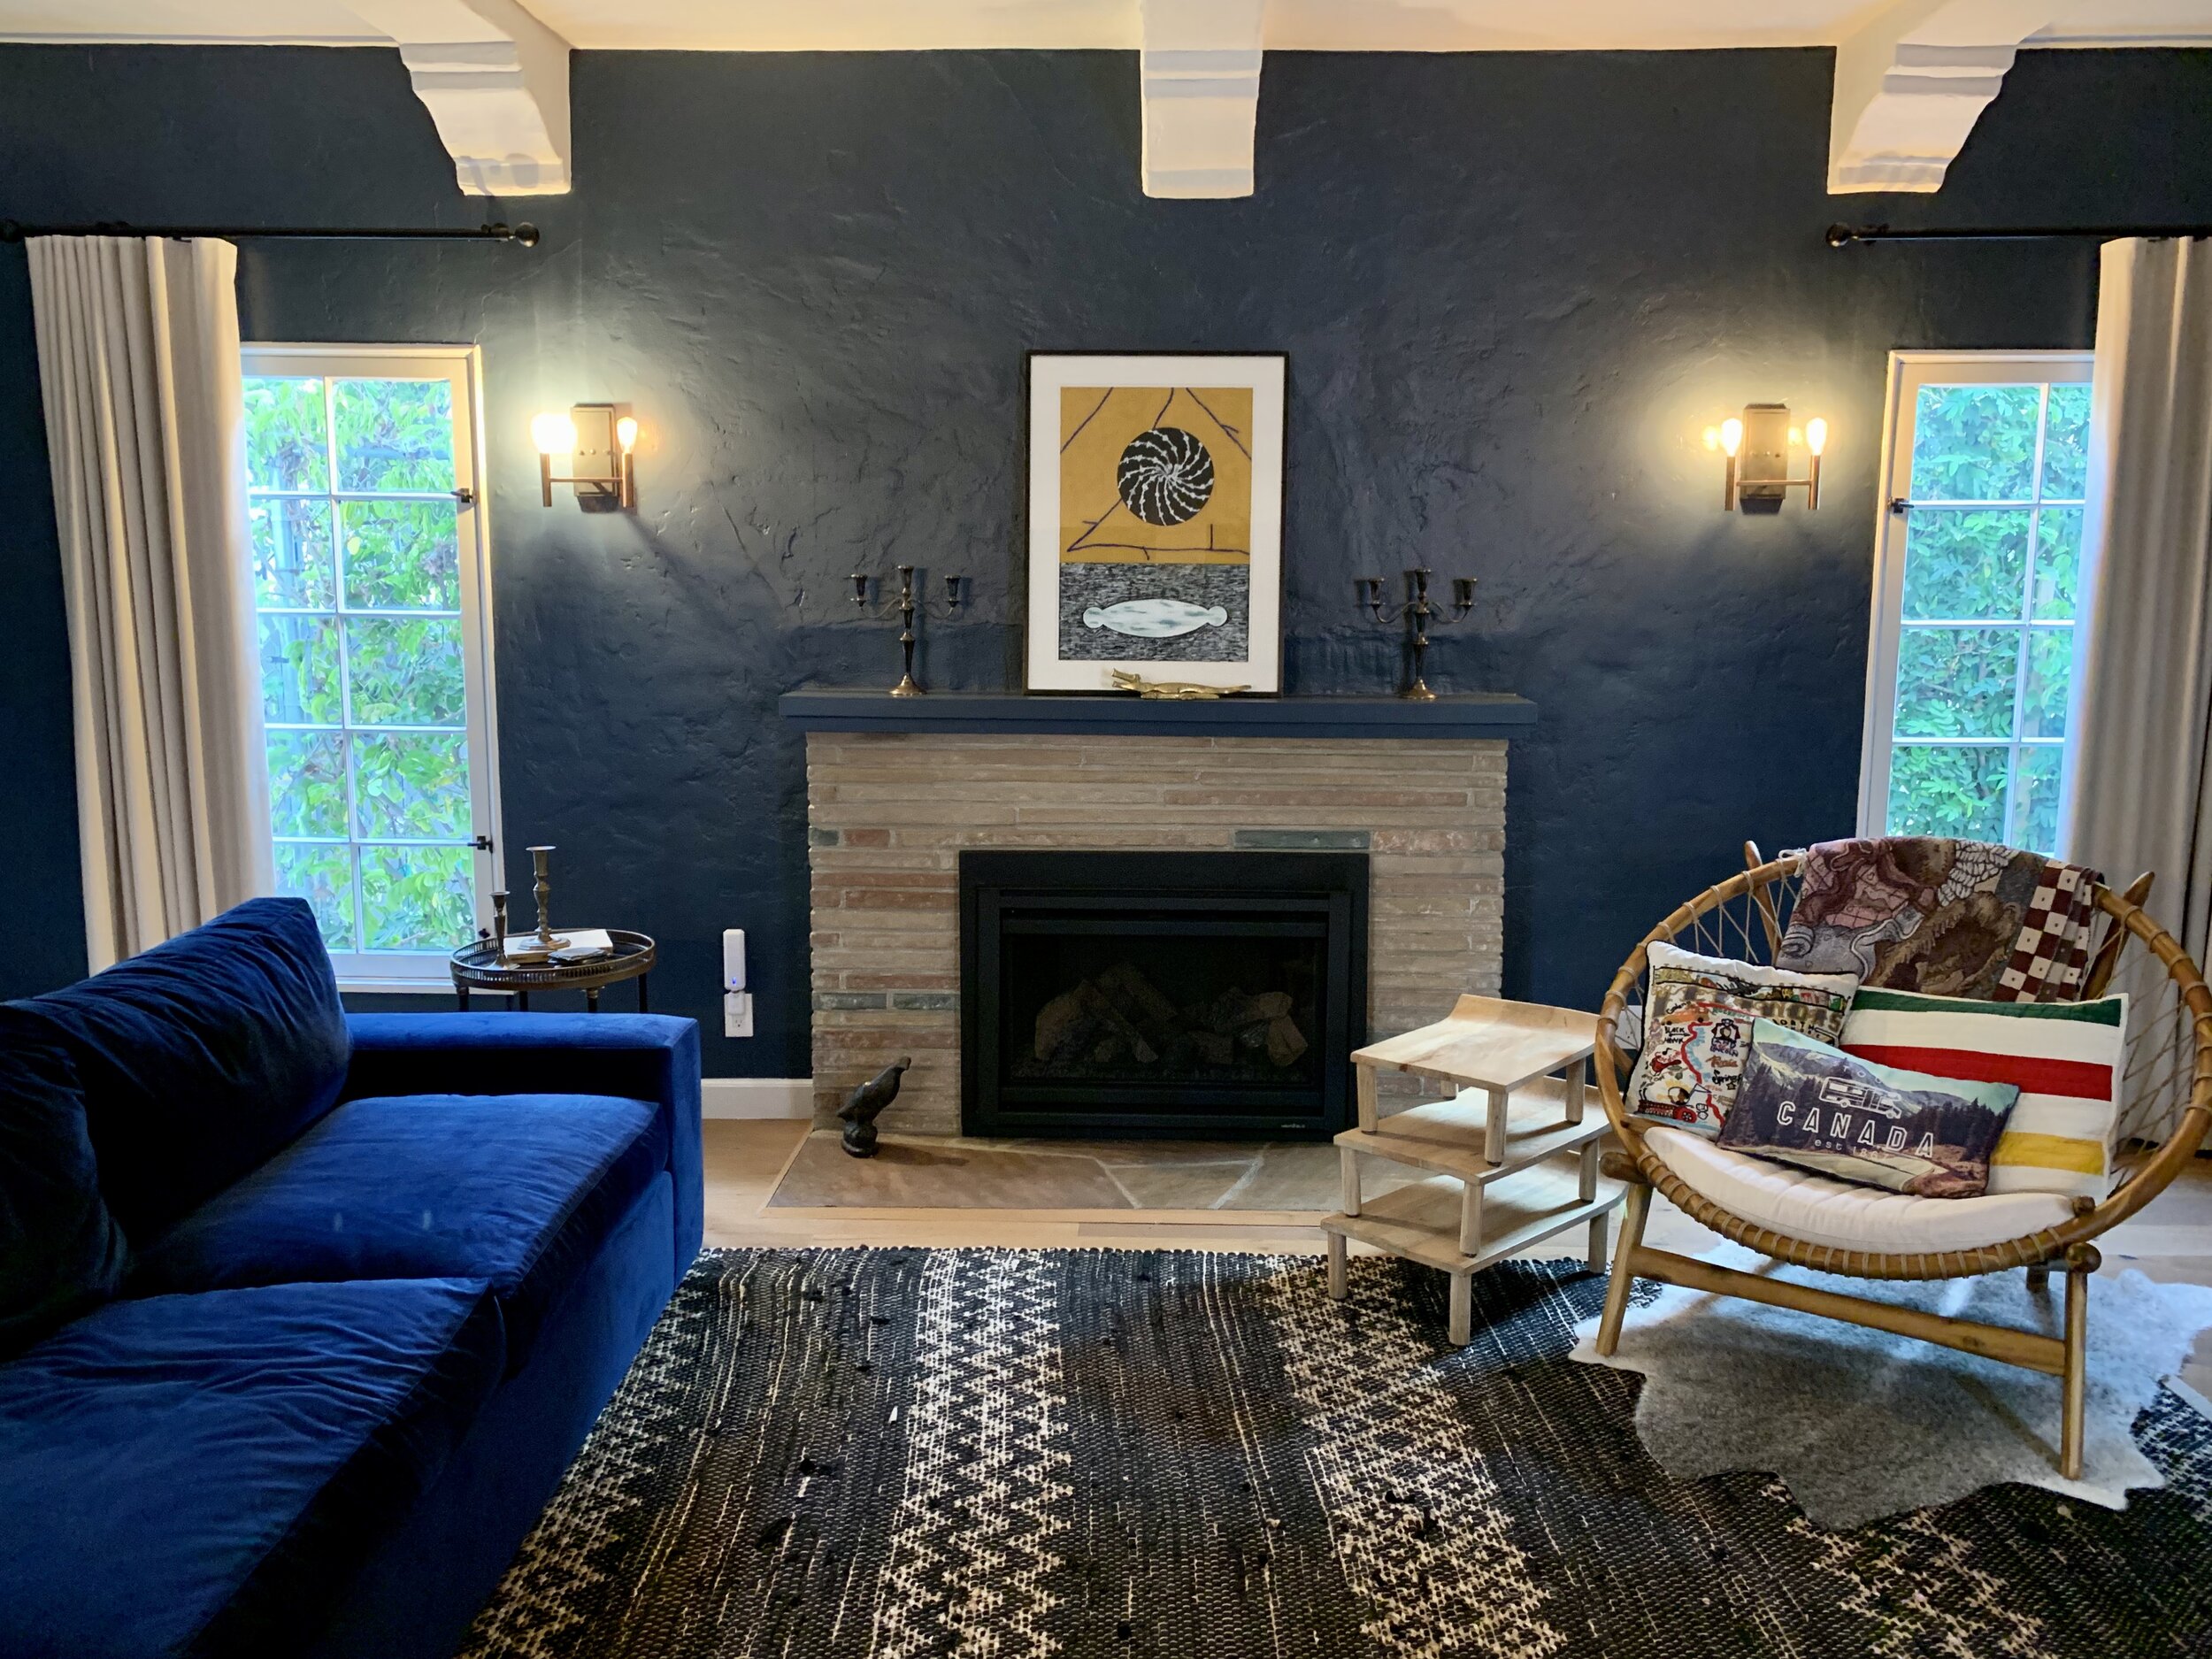
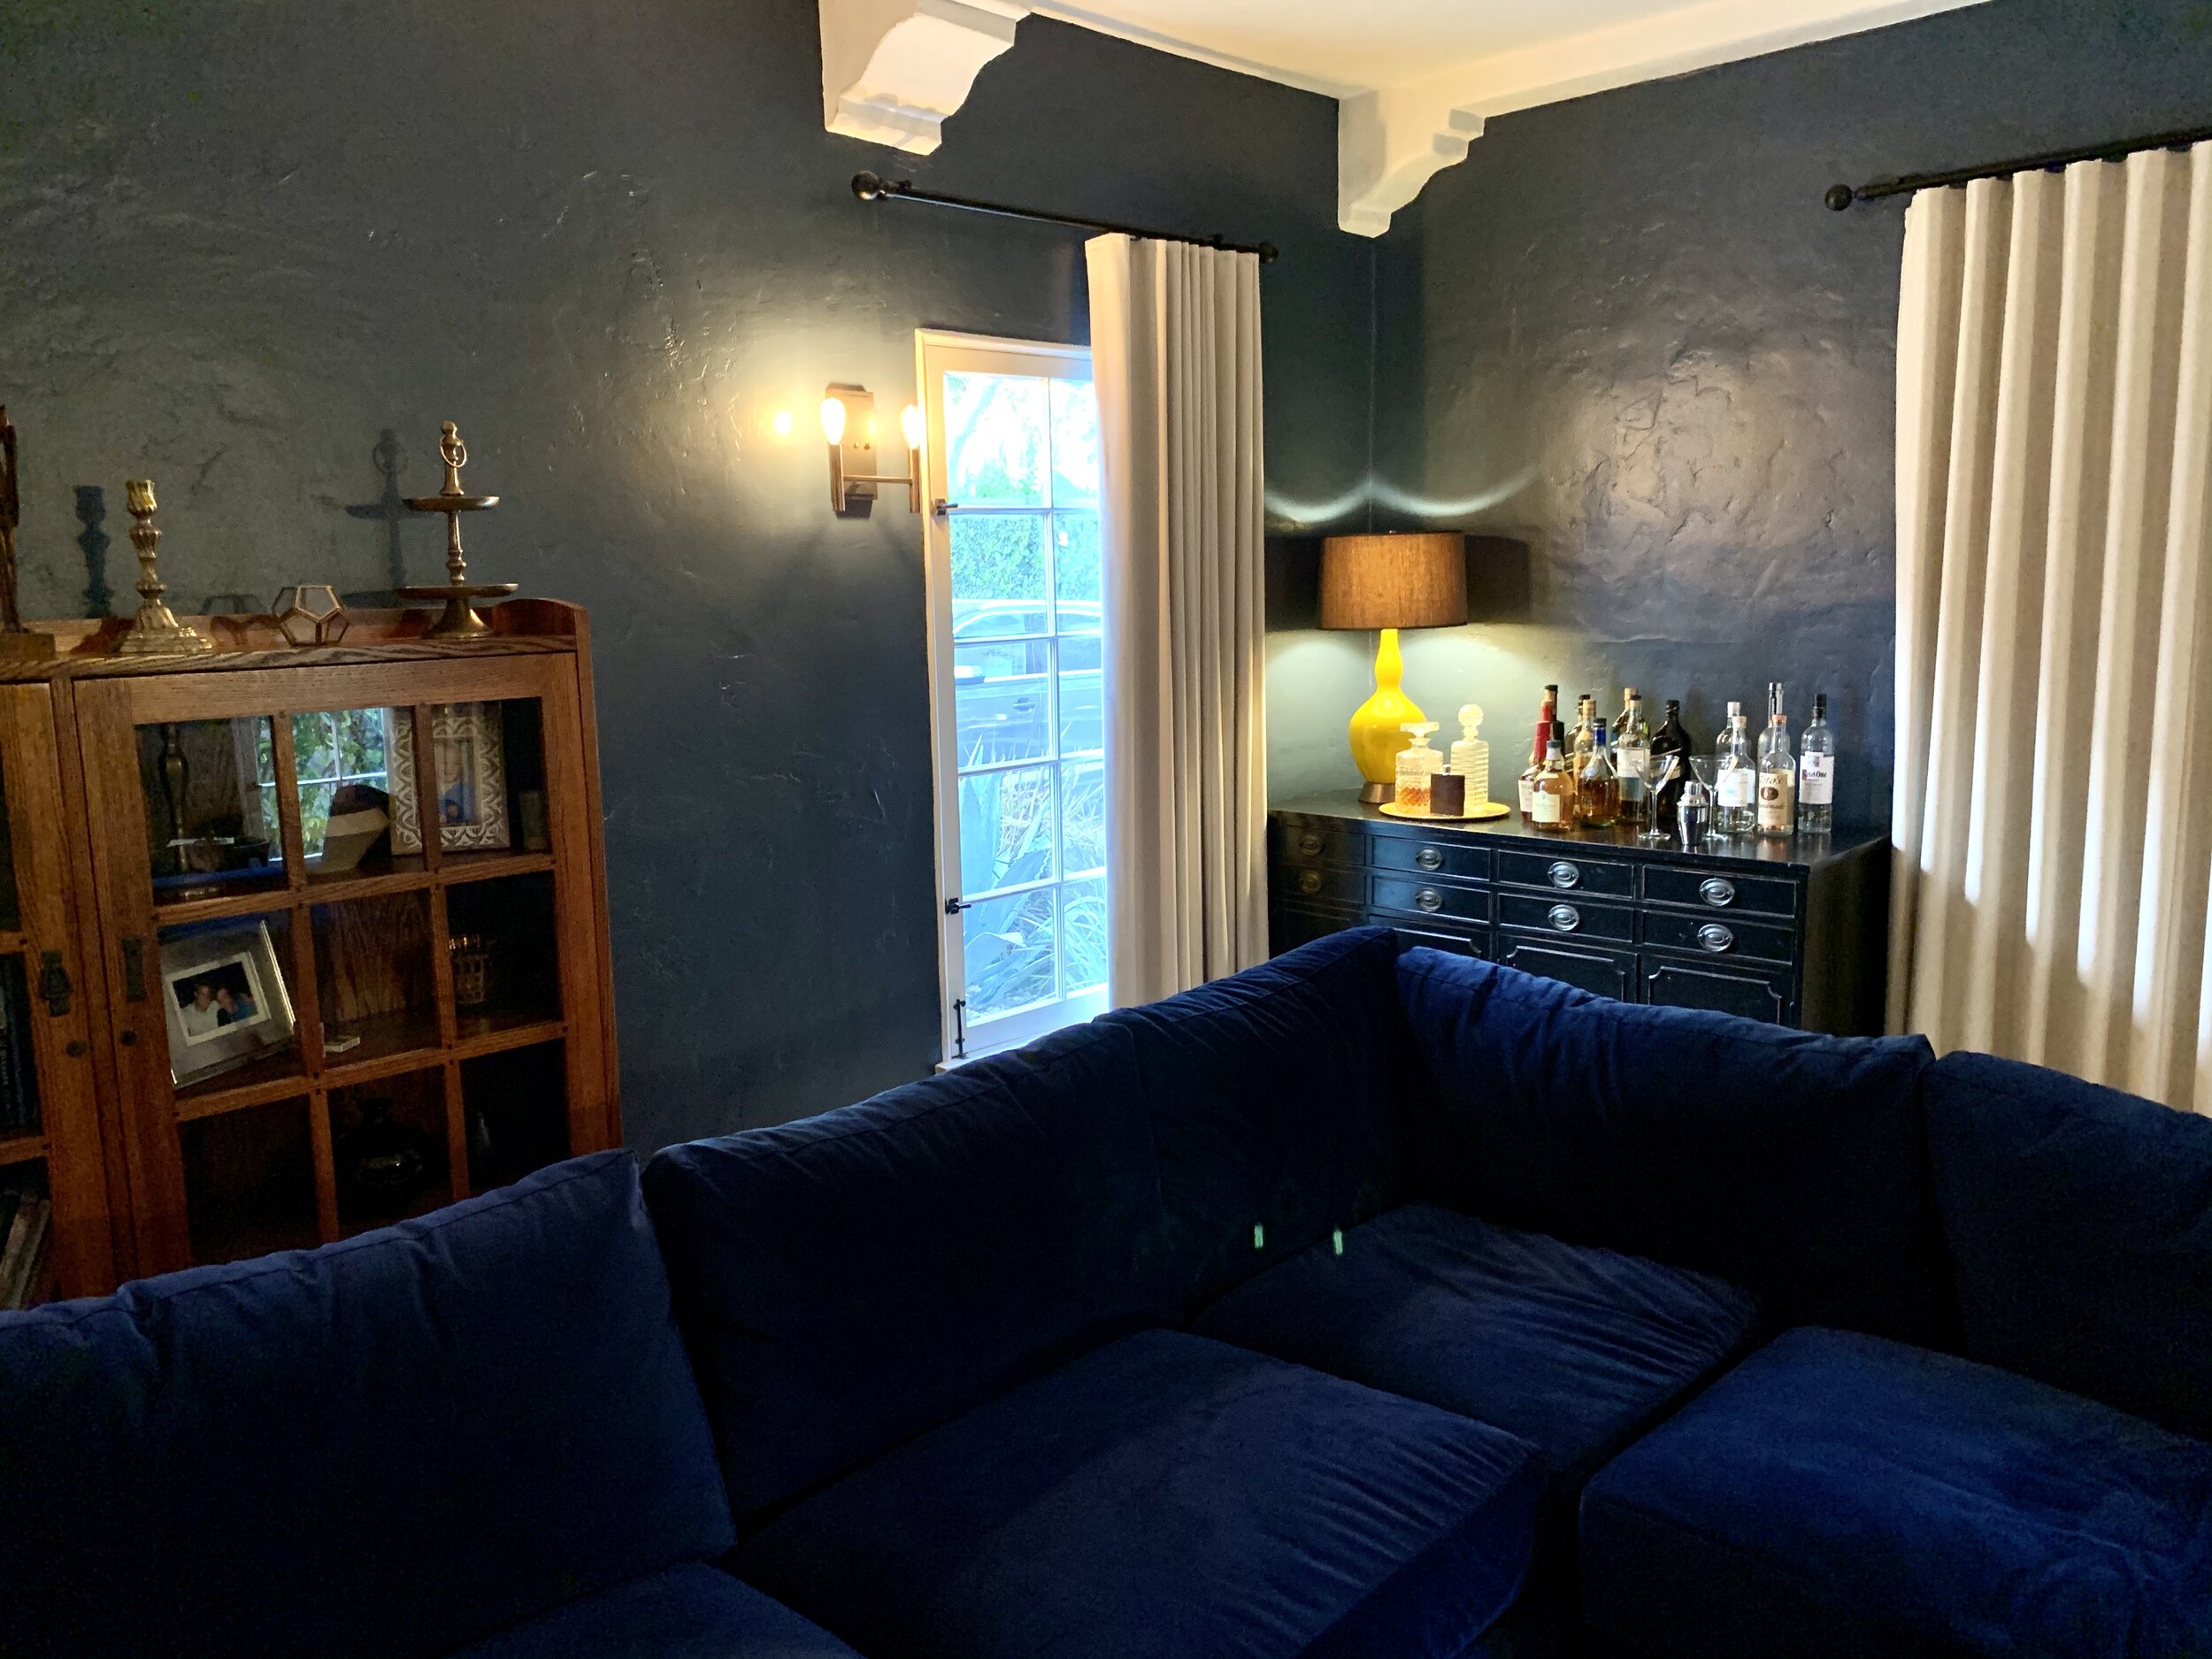
Once everything was moved out of the living room we were able to move onto the fifth step, Style. When it comes to living rooms the best place to start is with the couch. We went to The Joneses LA one of my favorite furniture stores in Los Angeles. We brought the measurements with us and presented them to the salesperson and from there we explored various ideas for the couch. We decided on a left side sectional with a chaise lounge that opened up to a kingsize bed. We were able to go through books of swatches to pick the perfect dark-colored fabric. As we perused the showroom we were able to see the different styles of couches and pick the one they liked the best.

Next, we chose to use a console they already owned that worked perfectly for the bar area. As for the window treatments, we went with The Shade Store on Melrose Ave. It was a treat to be able to view all the fabrics and look at the hardware to see how they worked.

We needed to paint the room and ended up choosing this rich dark blue. This color really made a bold statement in this living room and my client fell in love with it. No more boring here.

I love the transformation of this living room. What do you think? Is there a room you would like to transform?


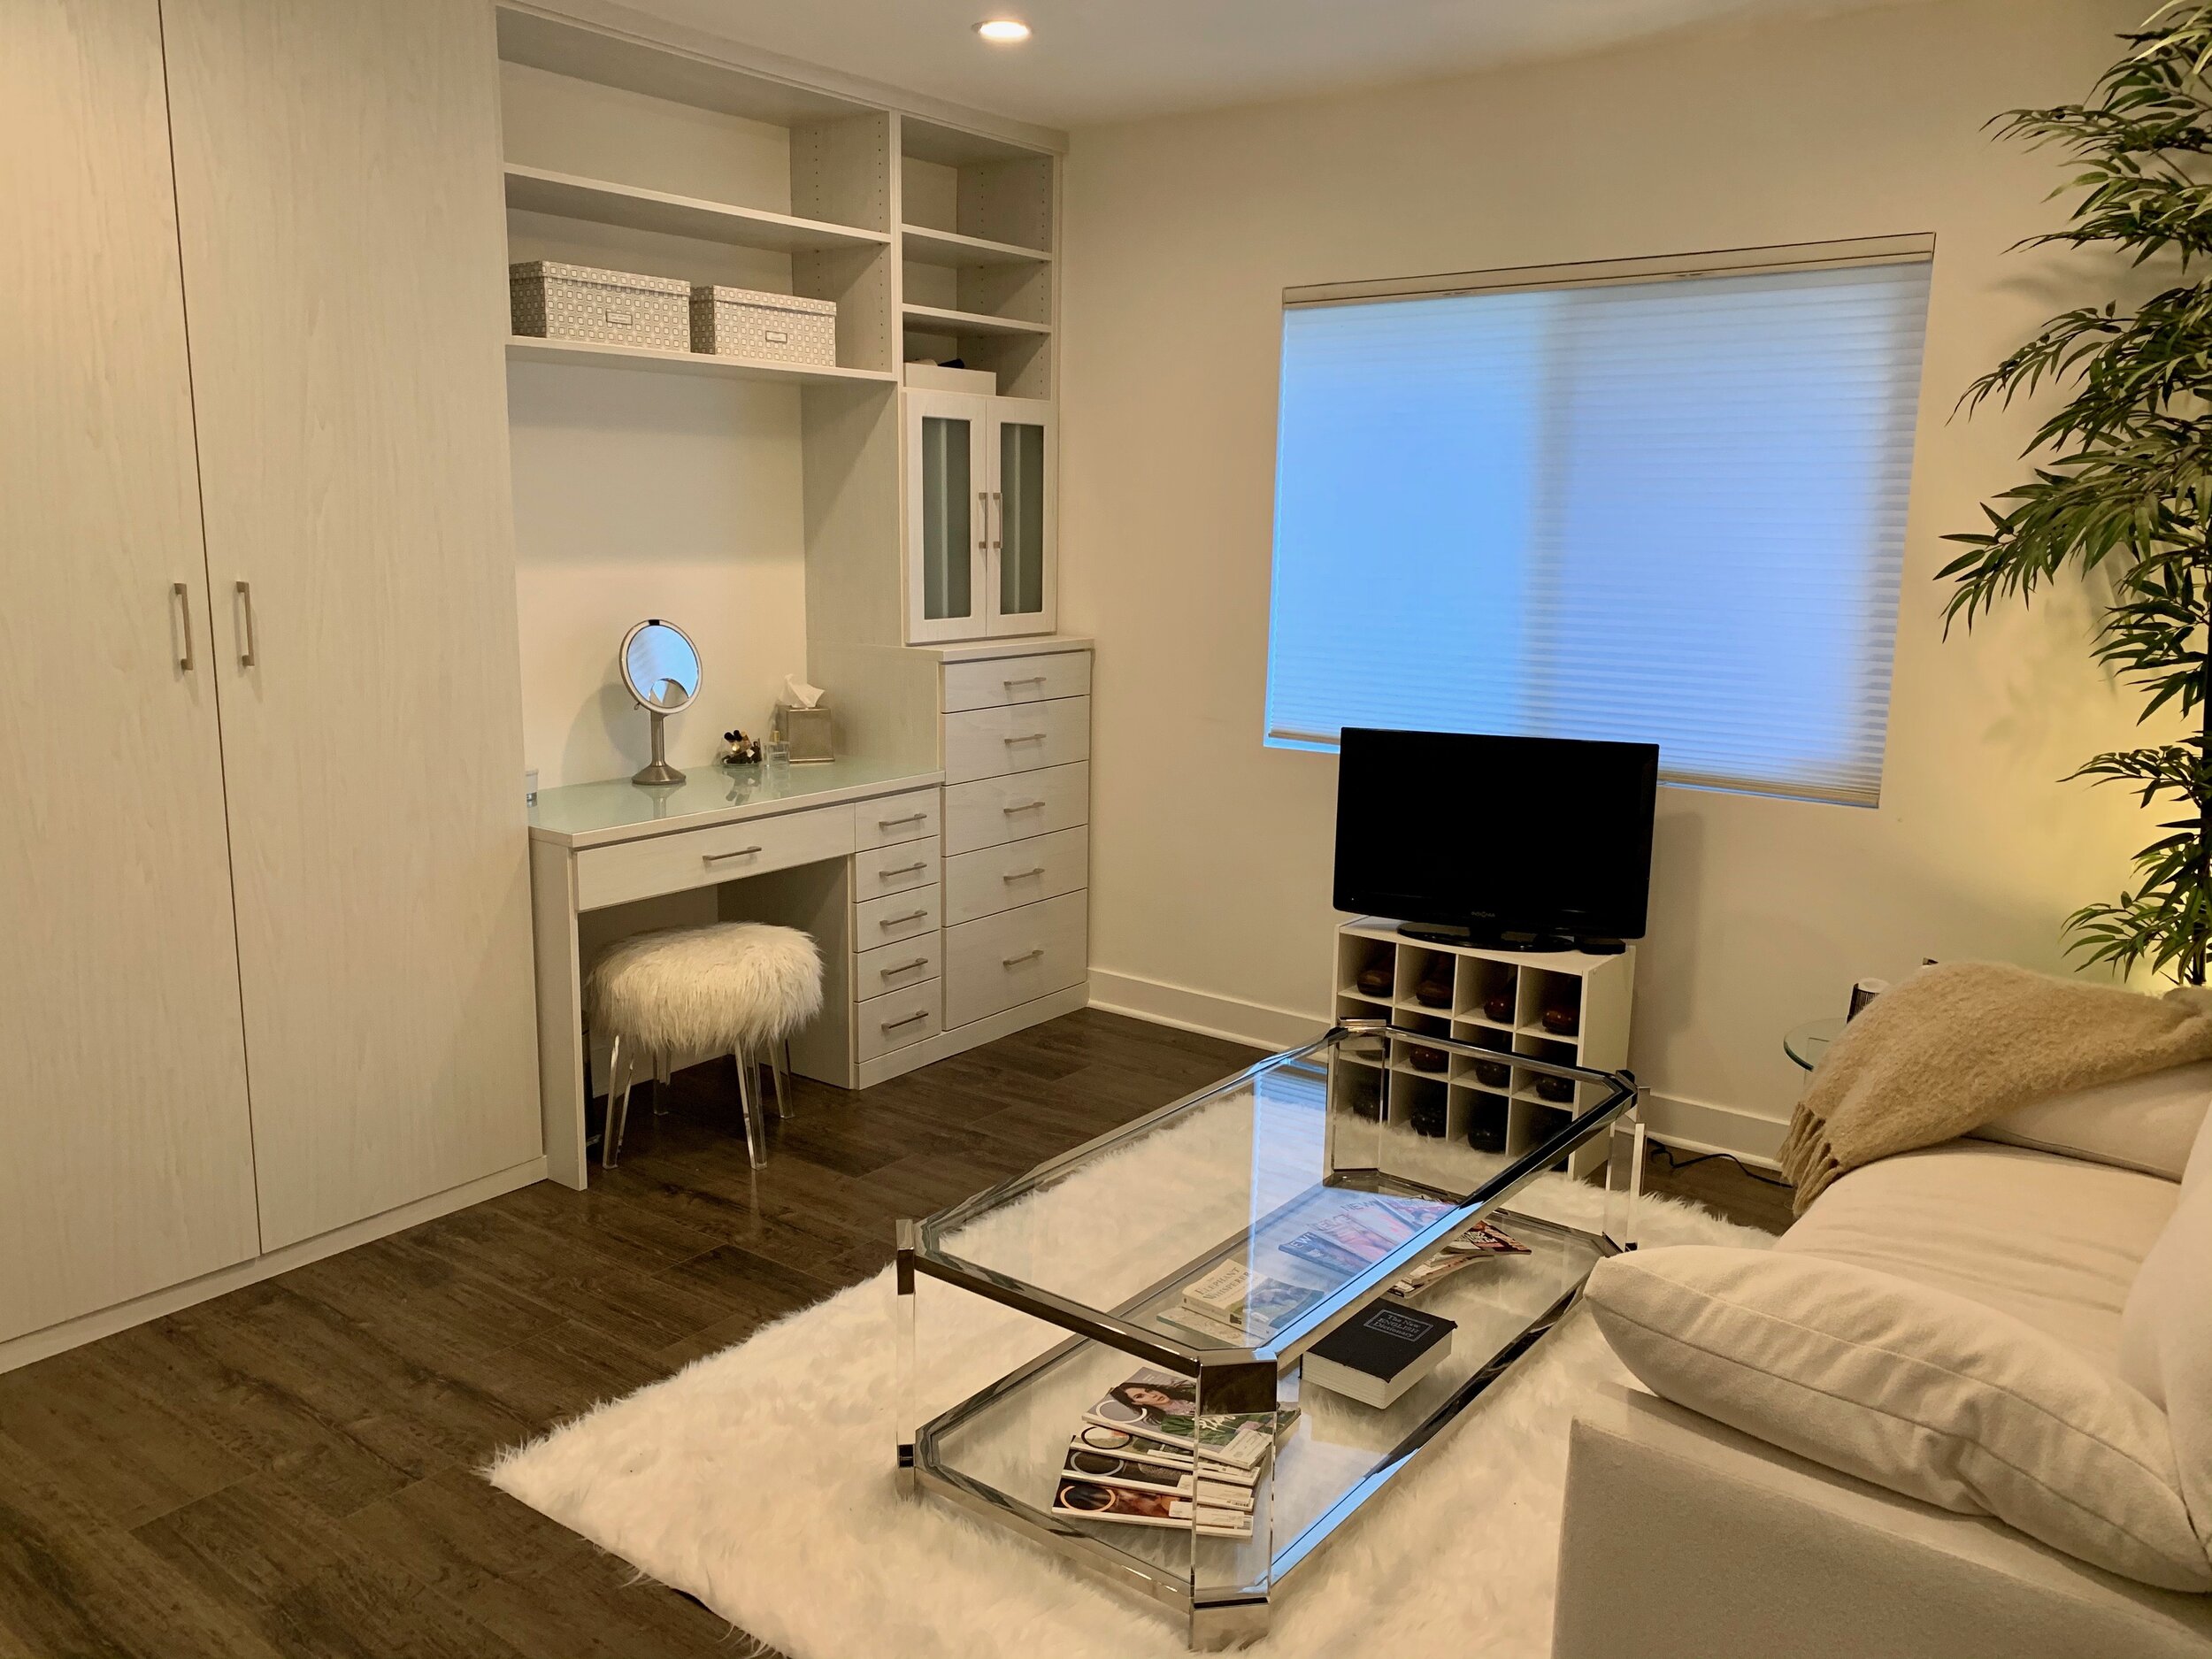
3 Steps to Creating the Dressing Room of Your Dreams

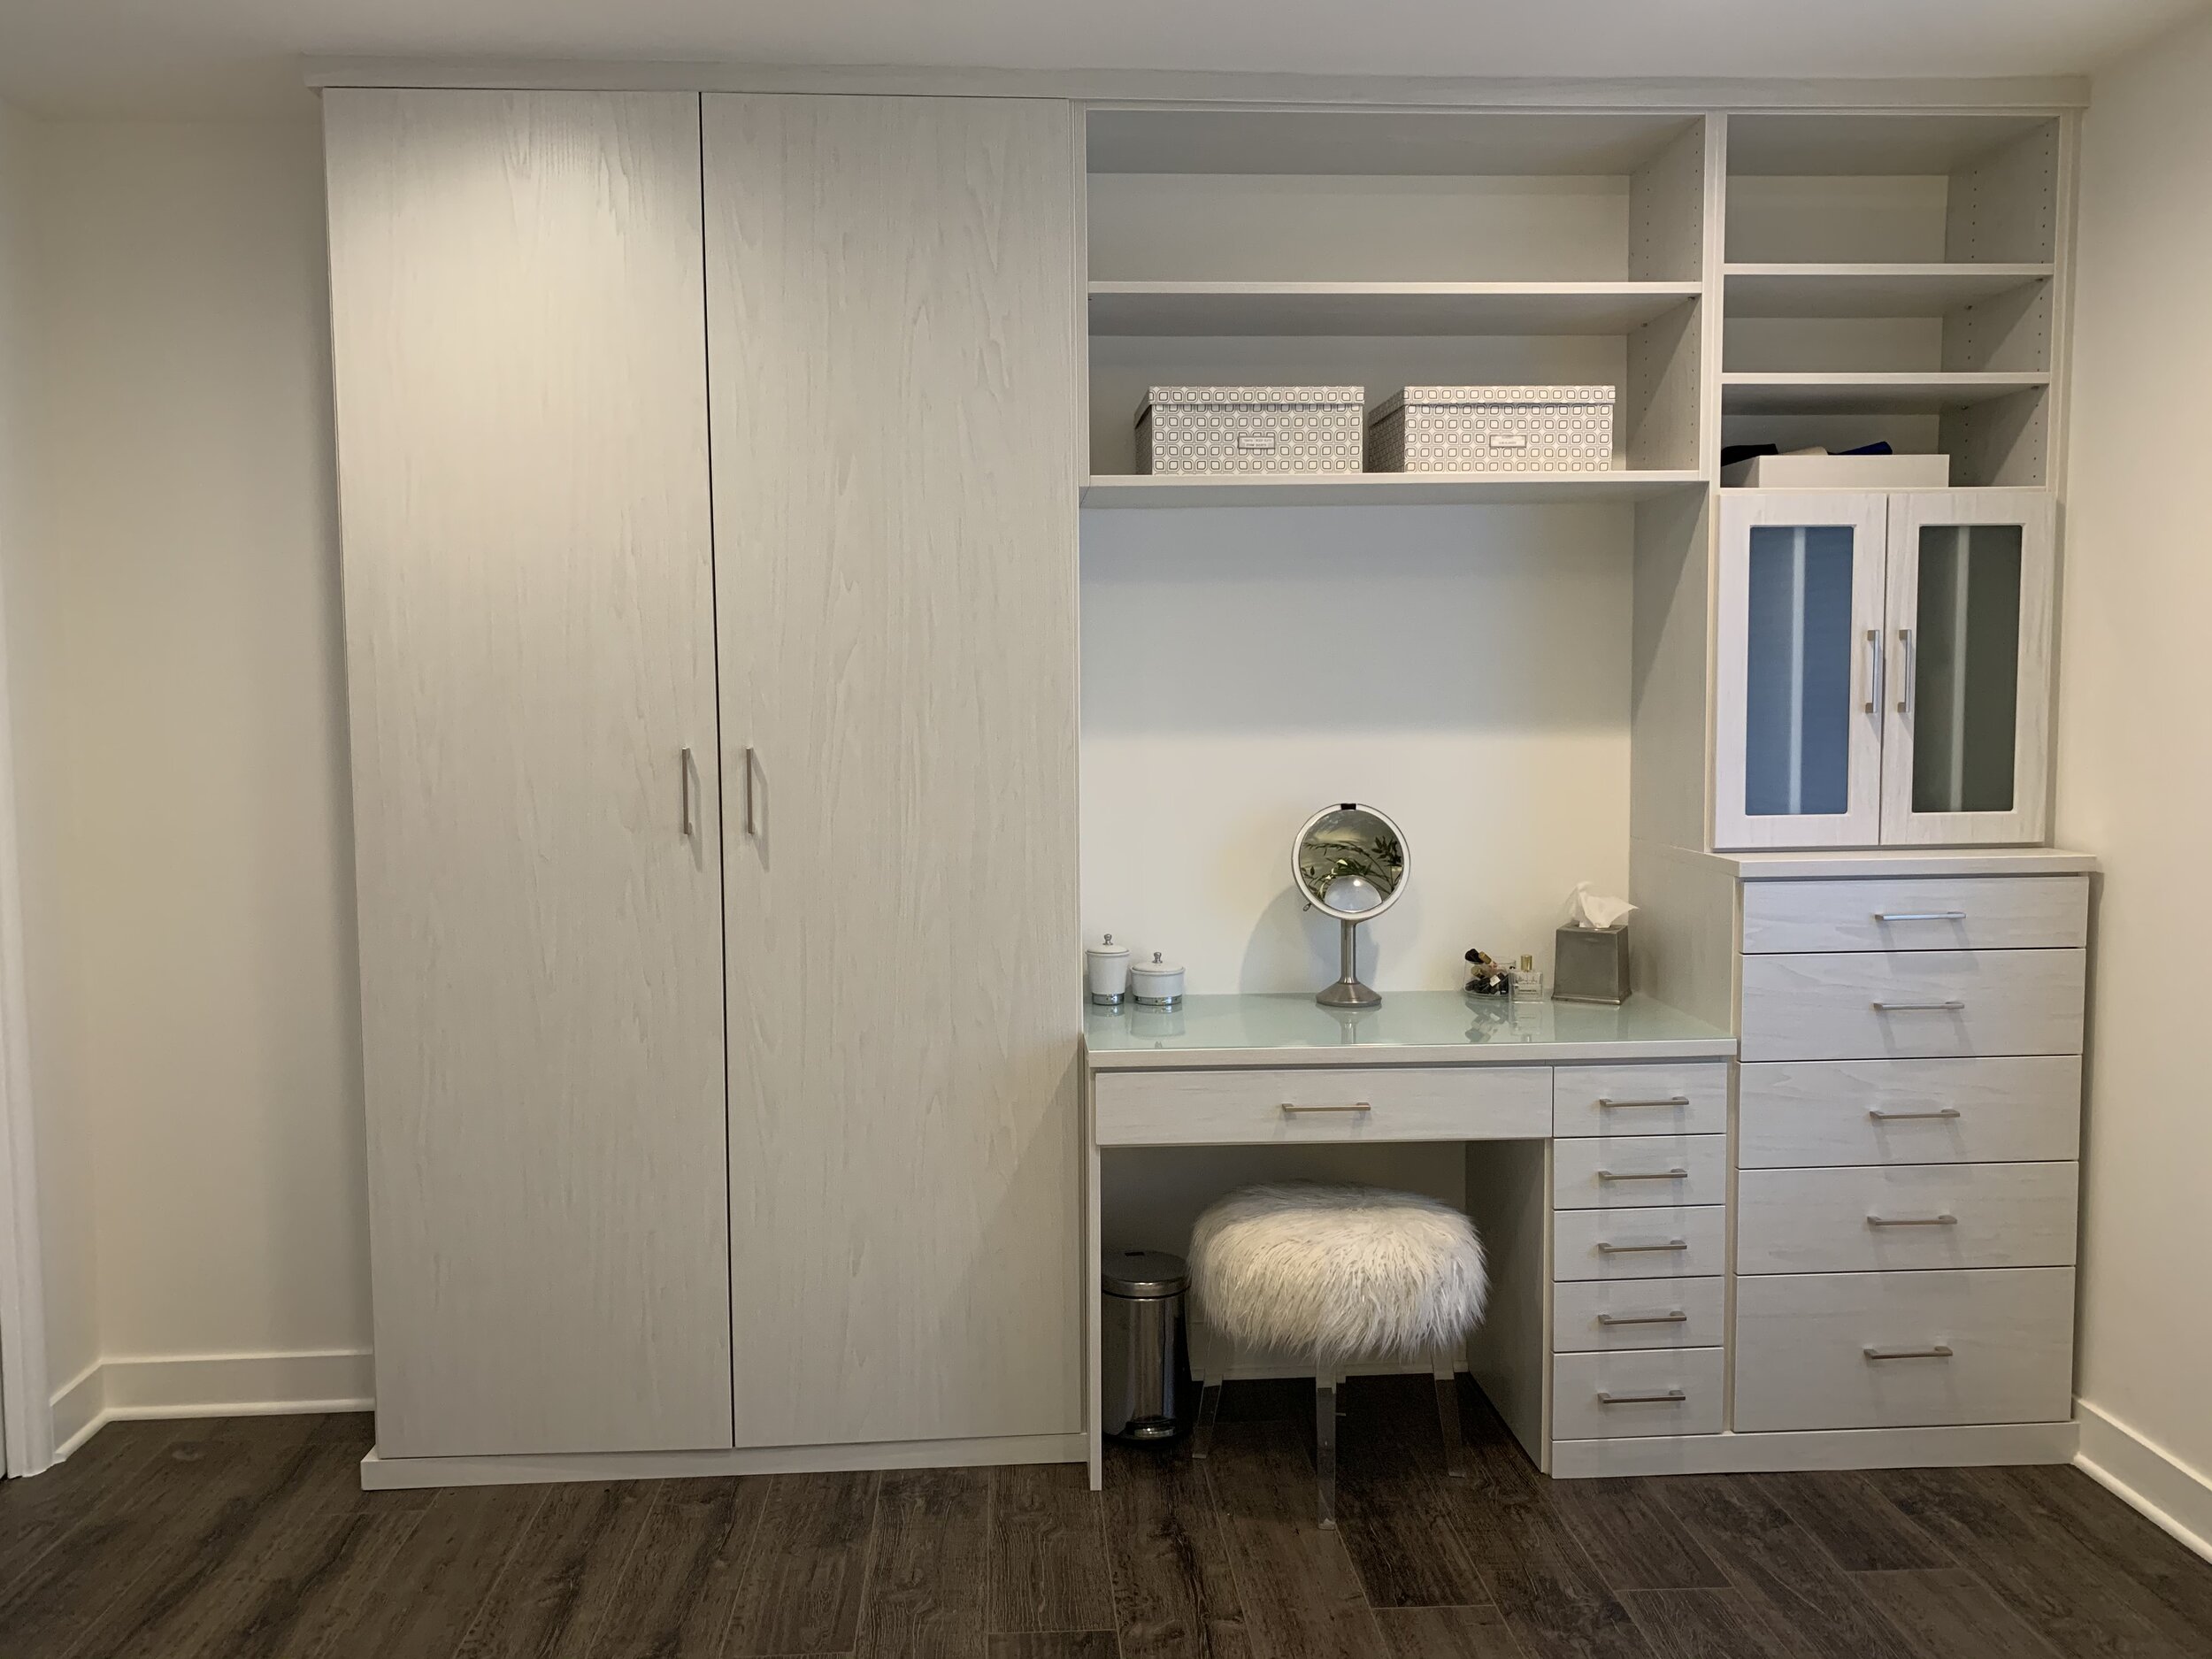
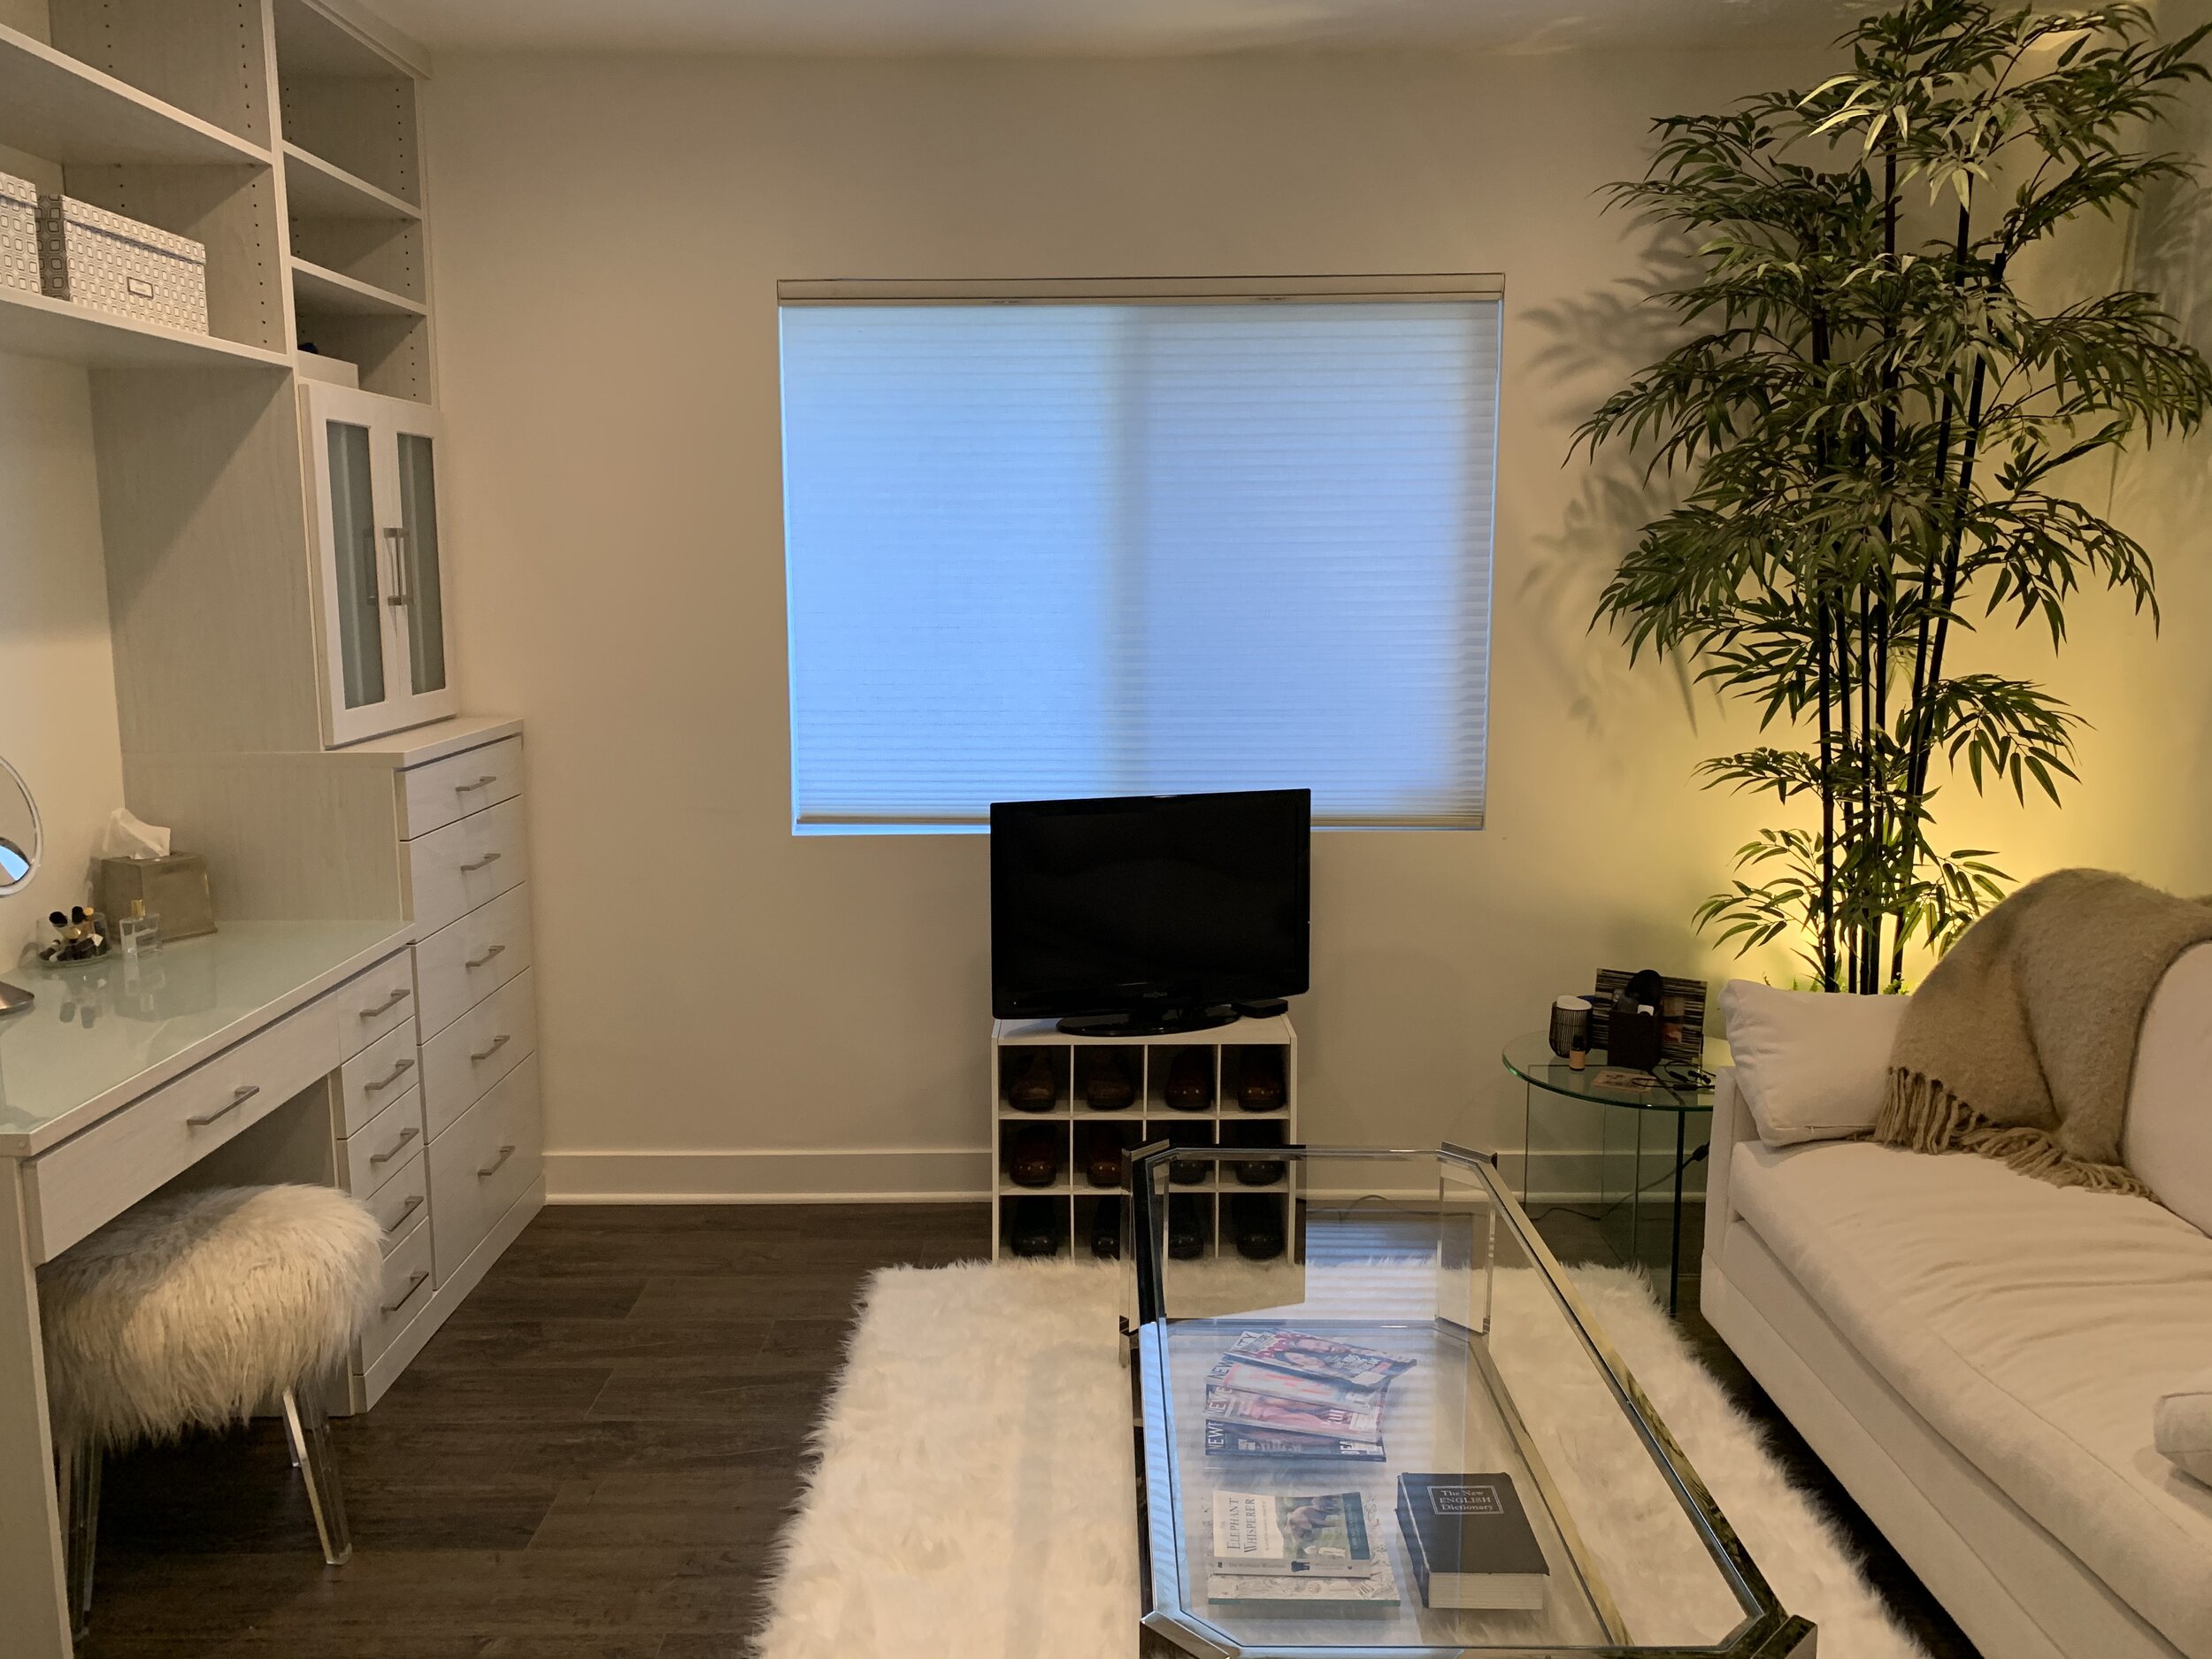
As a professional organizer in Los Angeles, I get to work with some amazing people and spaces. I couldn’t wait to design this dressing room for my client. I’ve been working with her for years and she was moving into a bigger home and we were able to use one of the rooms as a dressing room. At first, we were initially thinking of a stand-alone vanity and armoire but, as I thought it over, I had a vision of a kind of walk-in closet. I was familiar with all of her stuff and knew she would need more space for her accessories and shoes.

Here are the 3 steps I used to create the dressing room of her dreams.

First, you want to declutter. I sound like a broken record because I say this all the time but it is so important to have only what you need, use, and love. Everything else will get in the way of your vision. Start by sorting like with like and then pick the best and get rid of the rest.

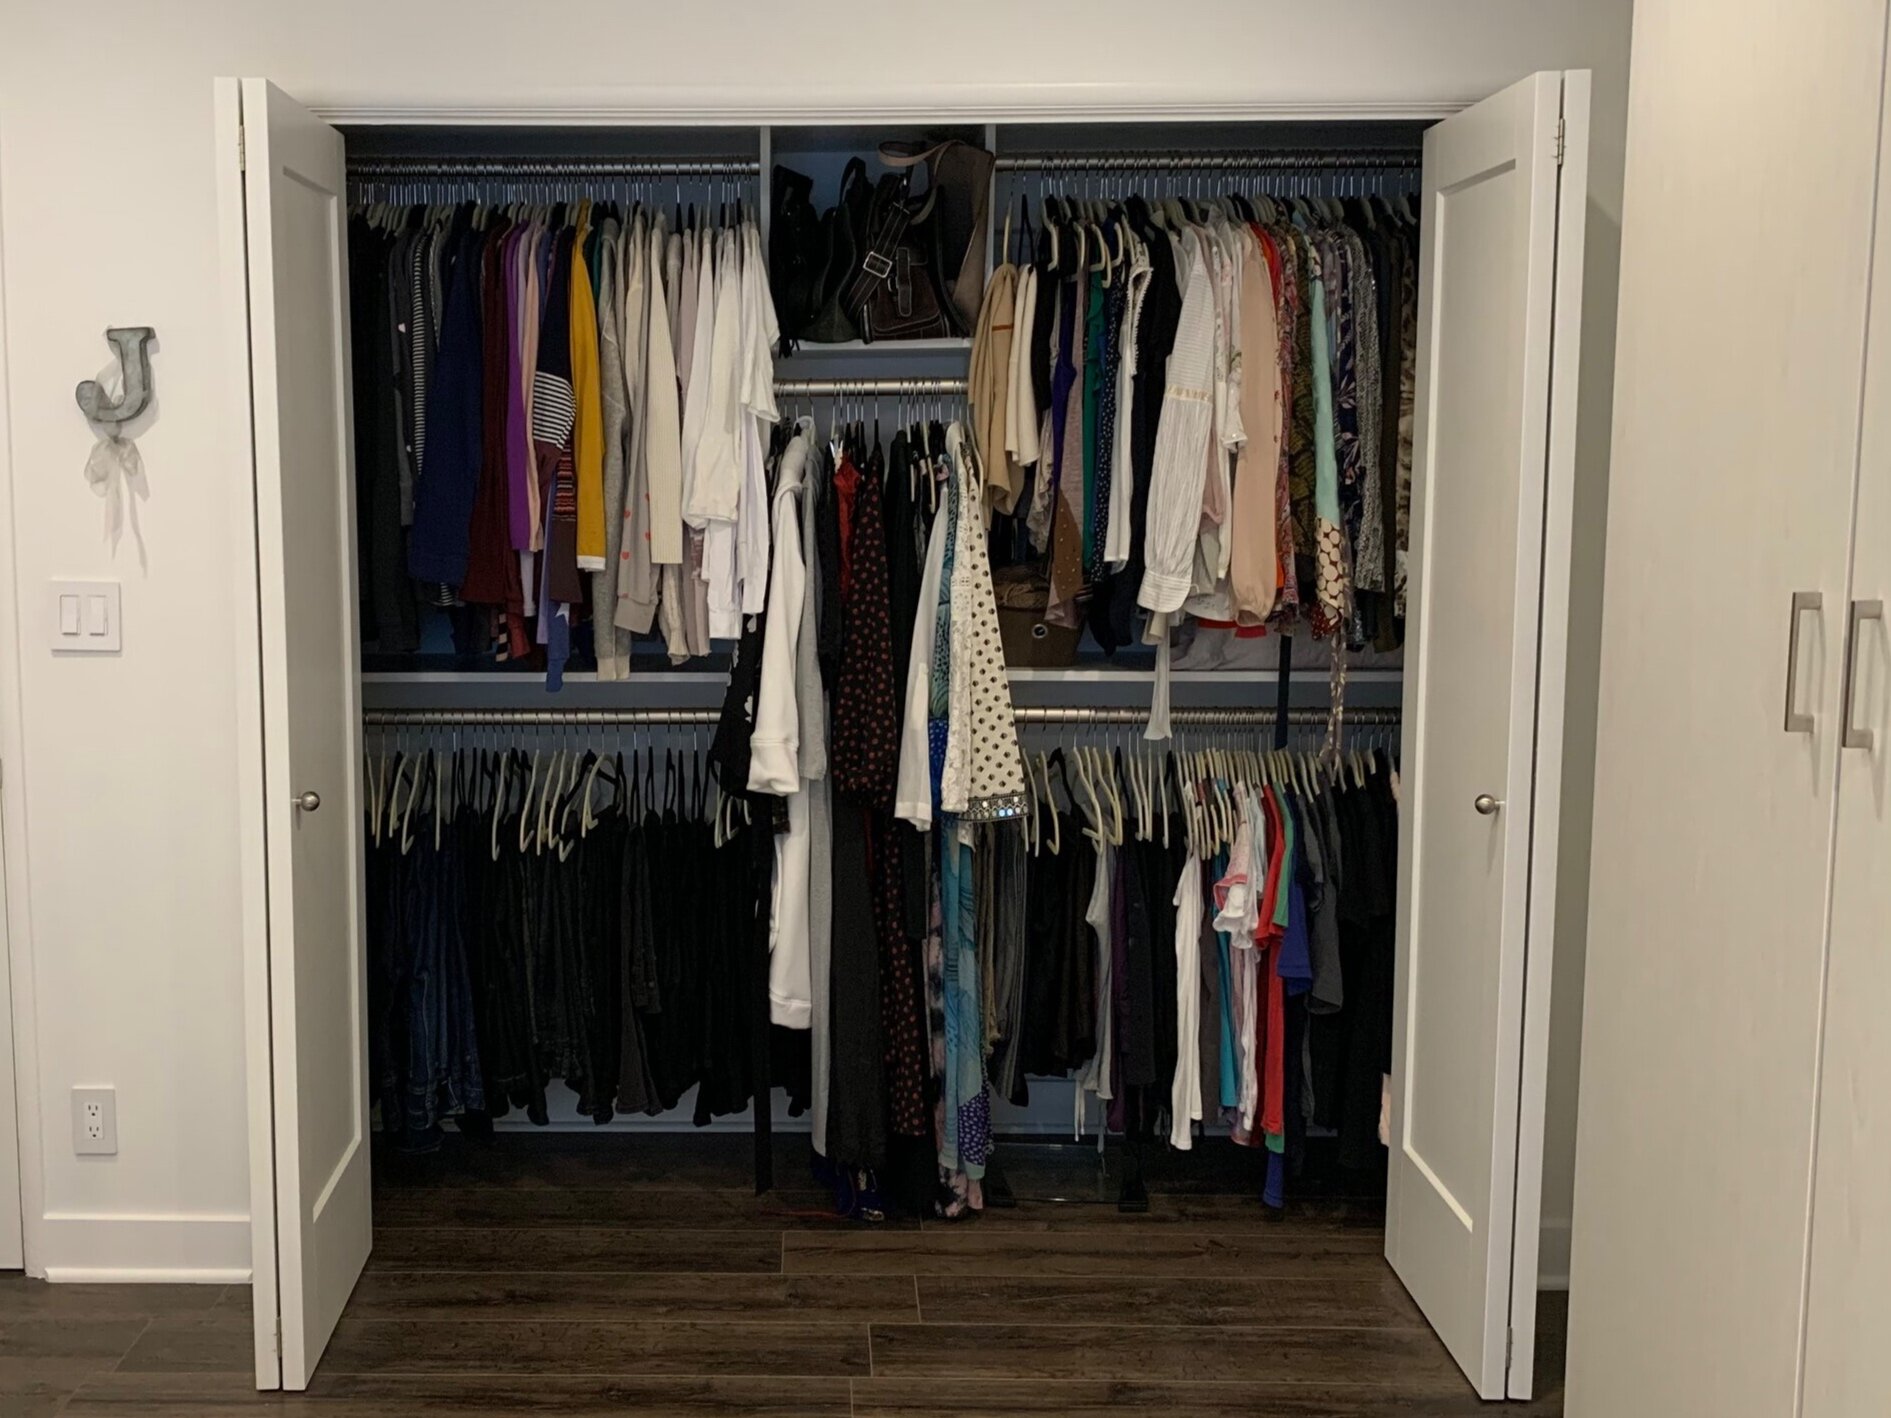
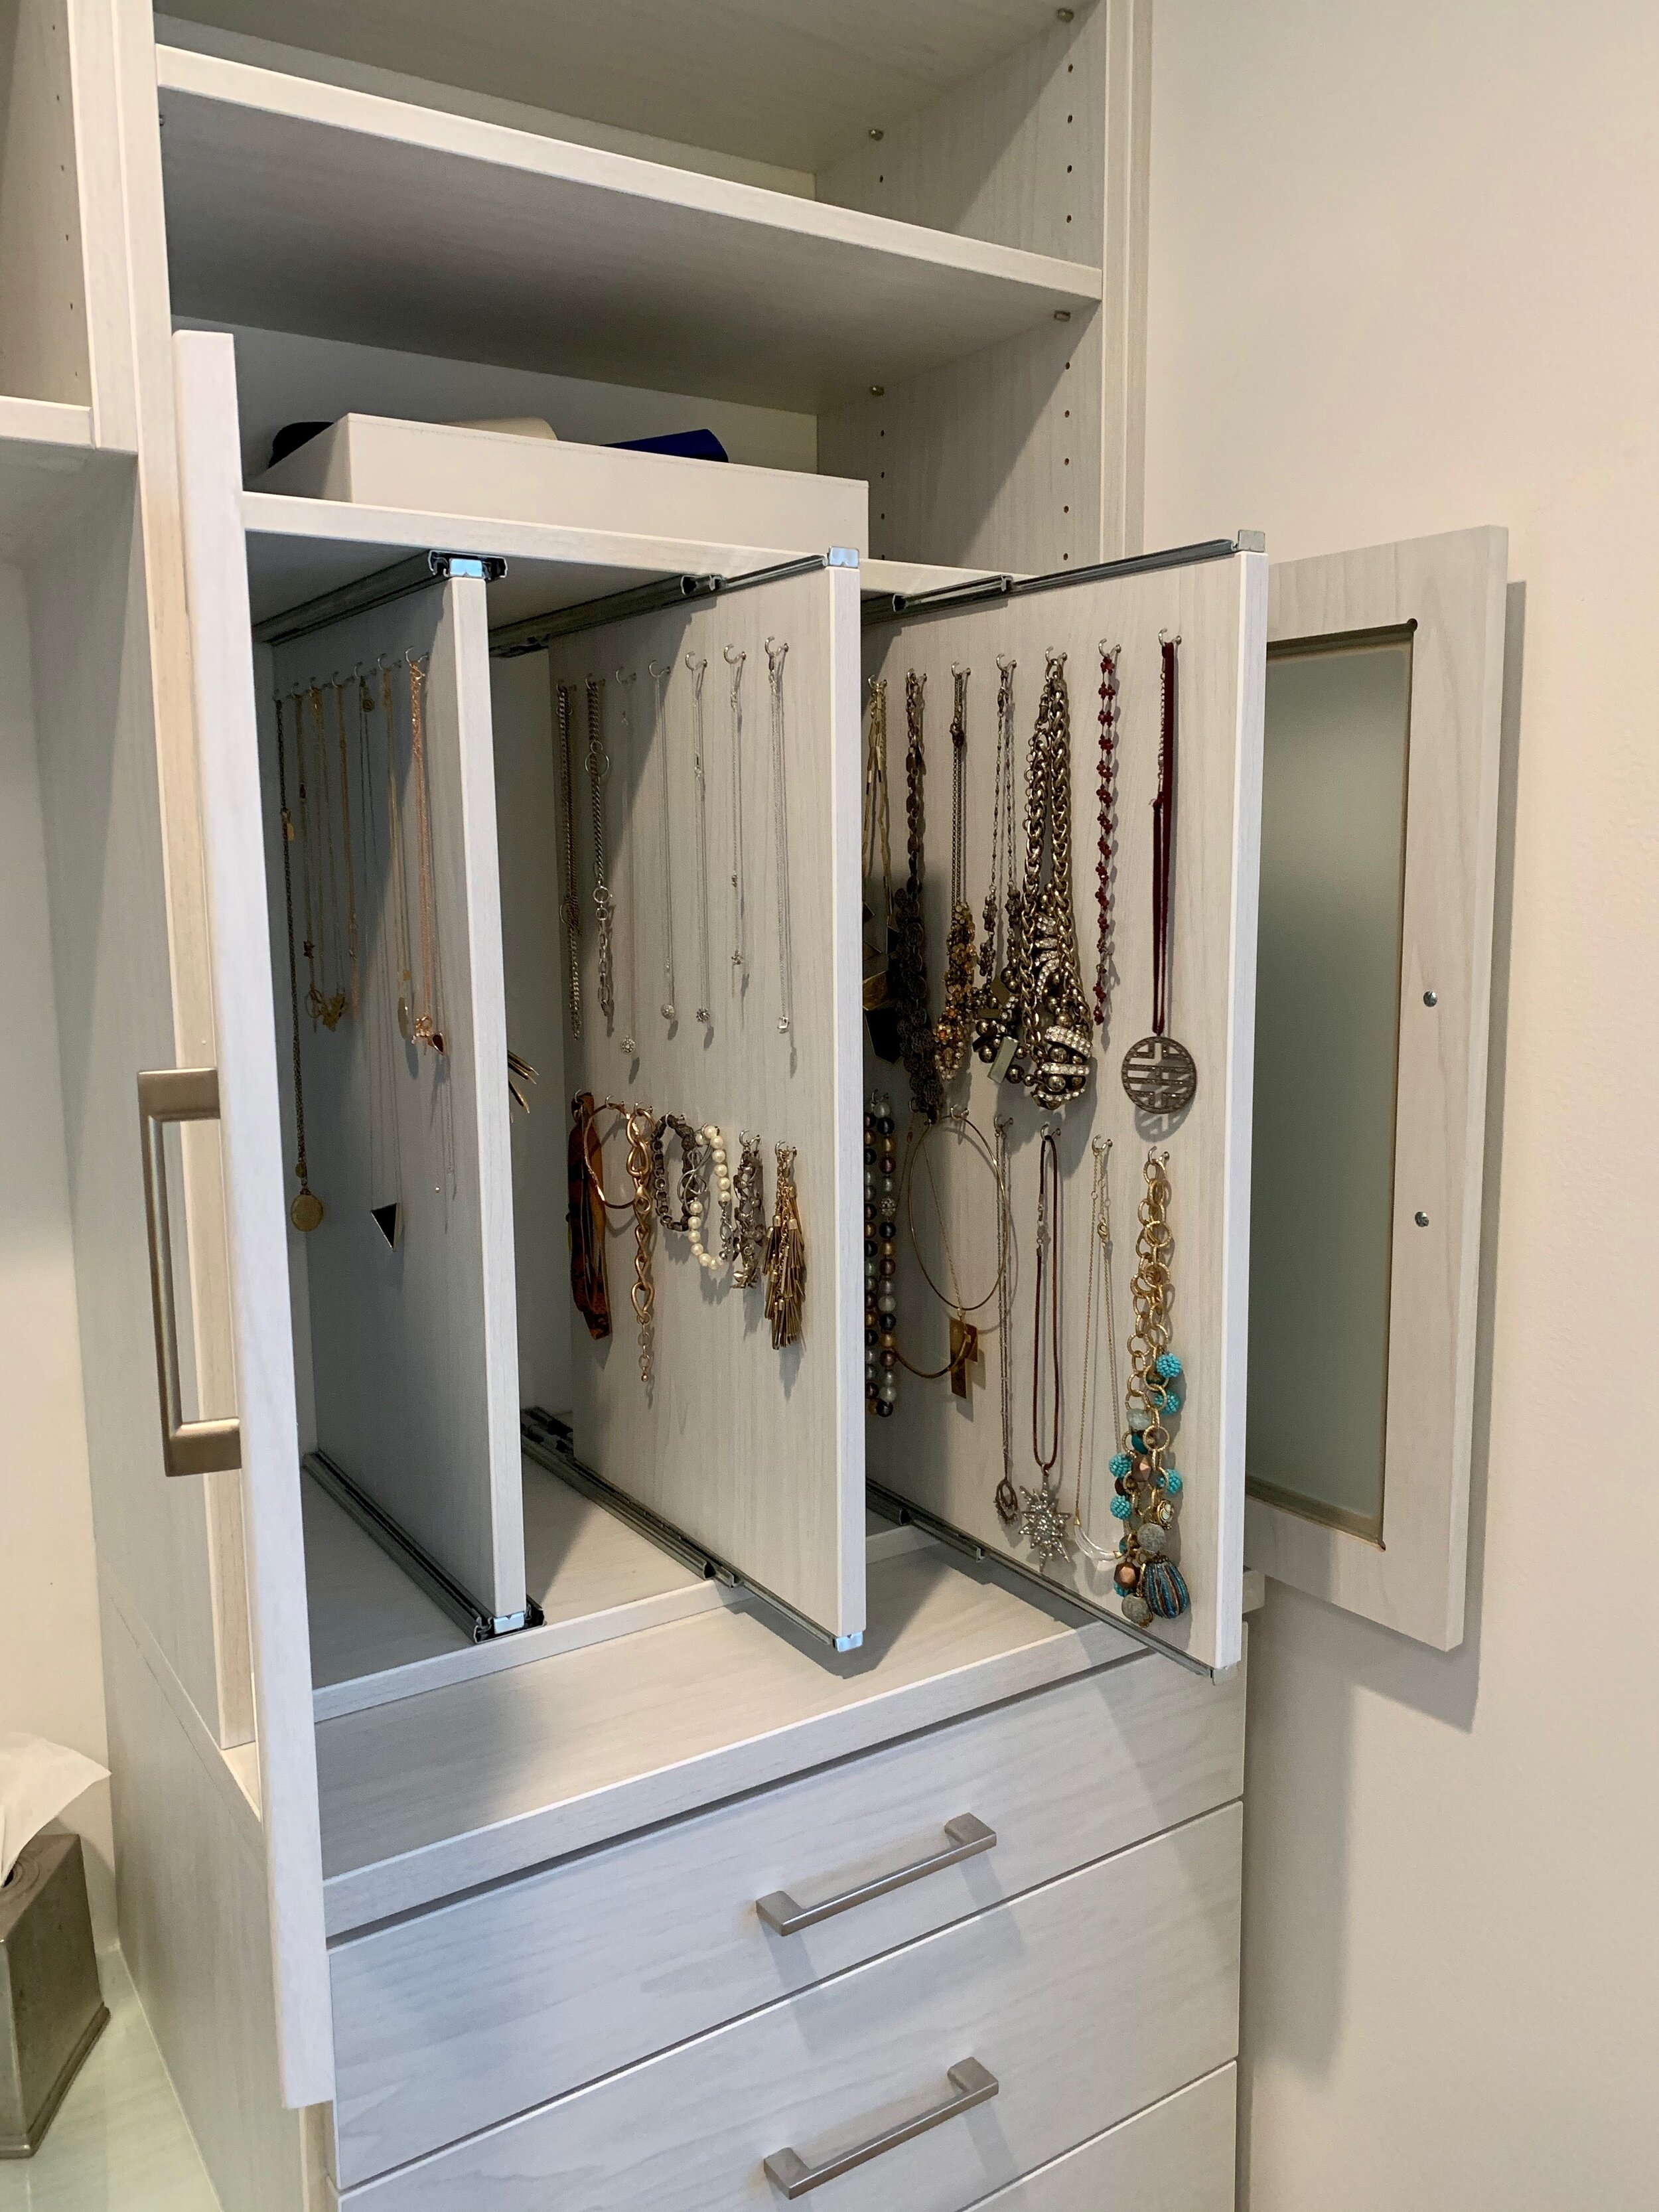
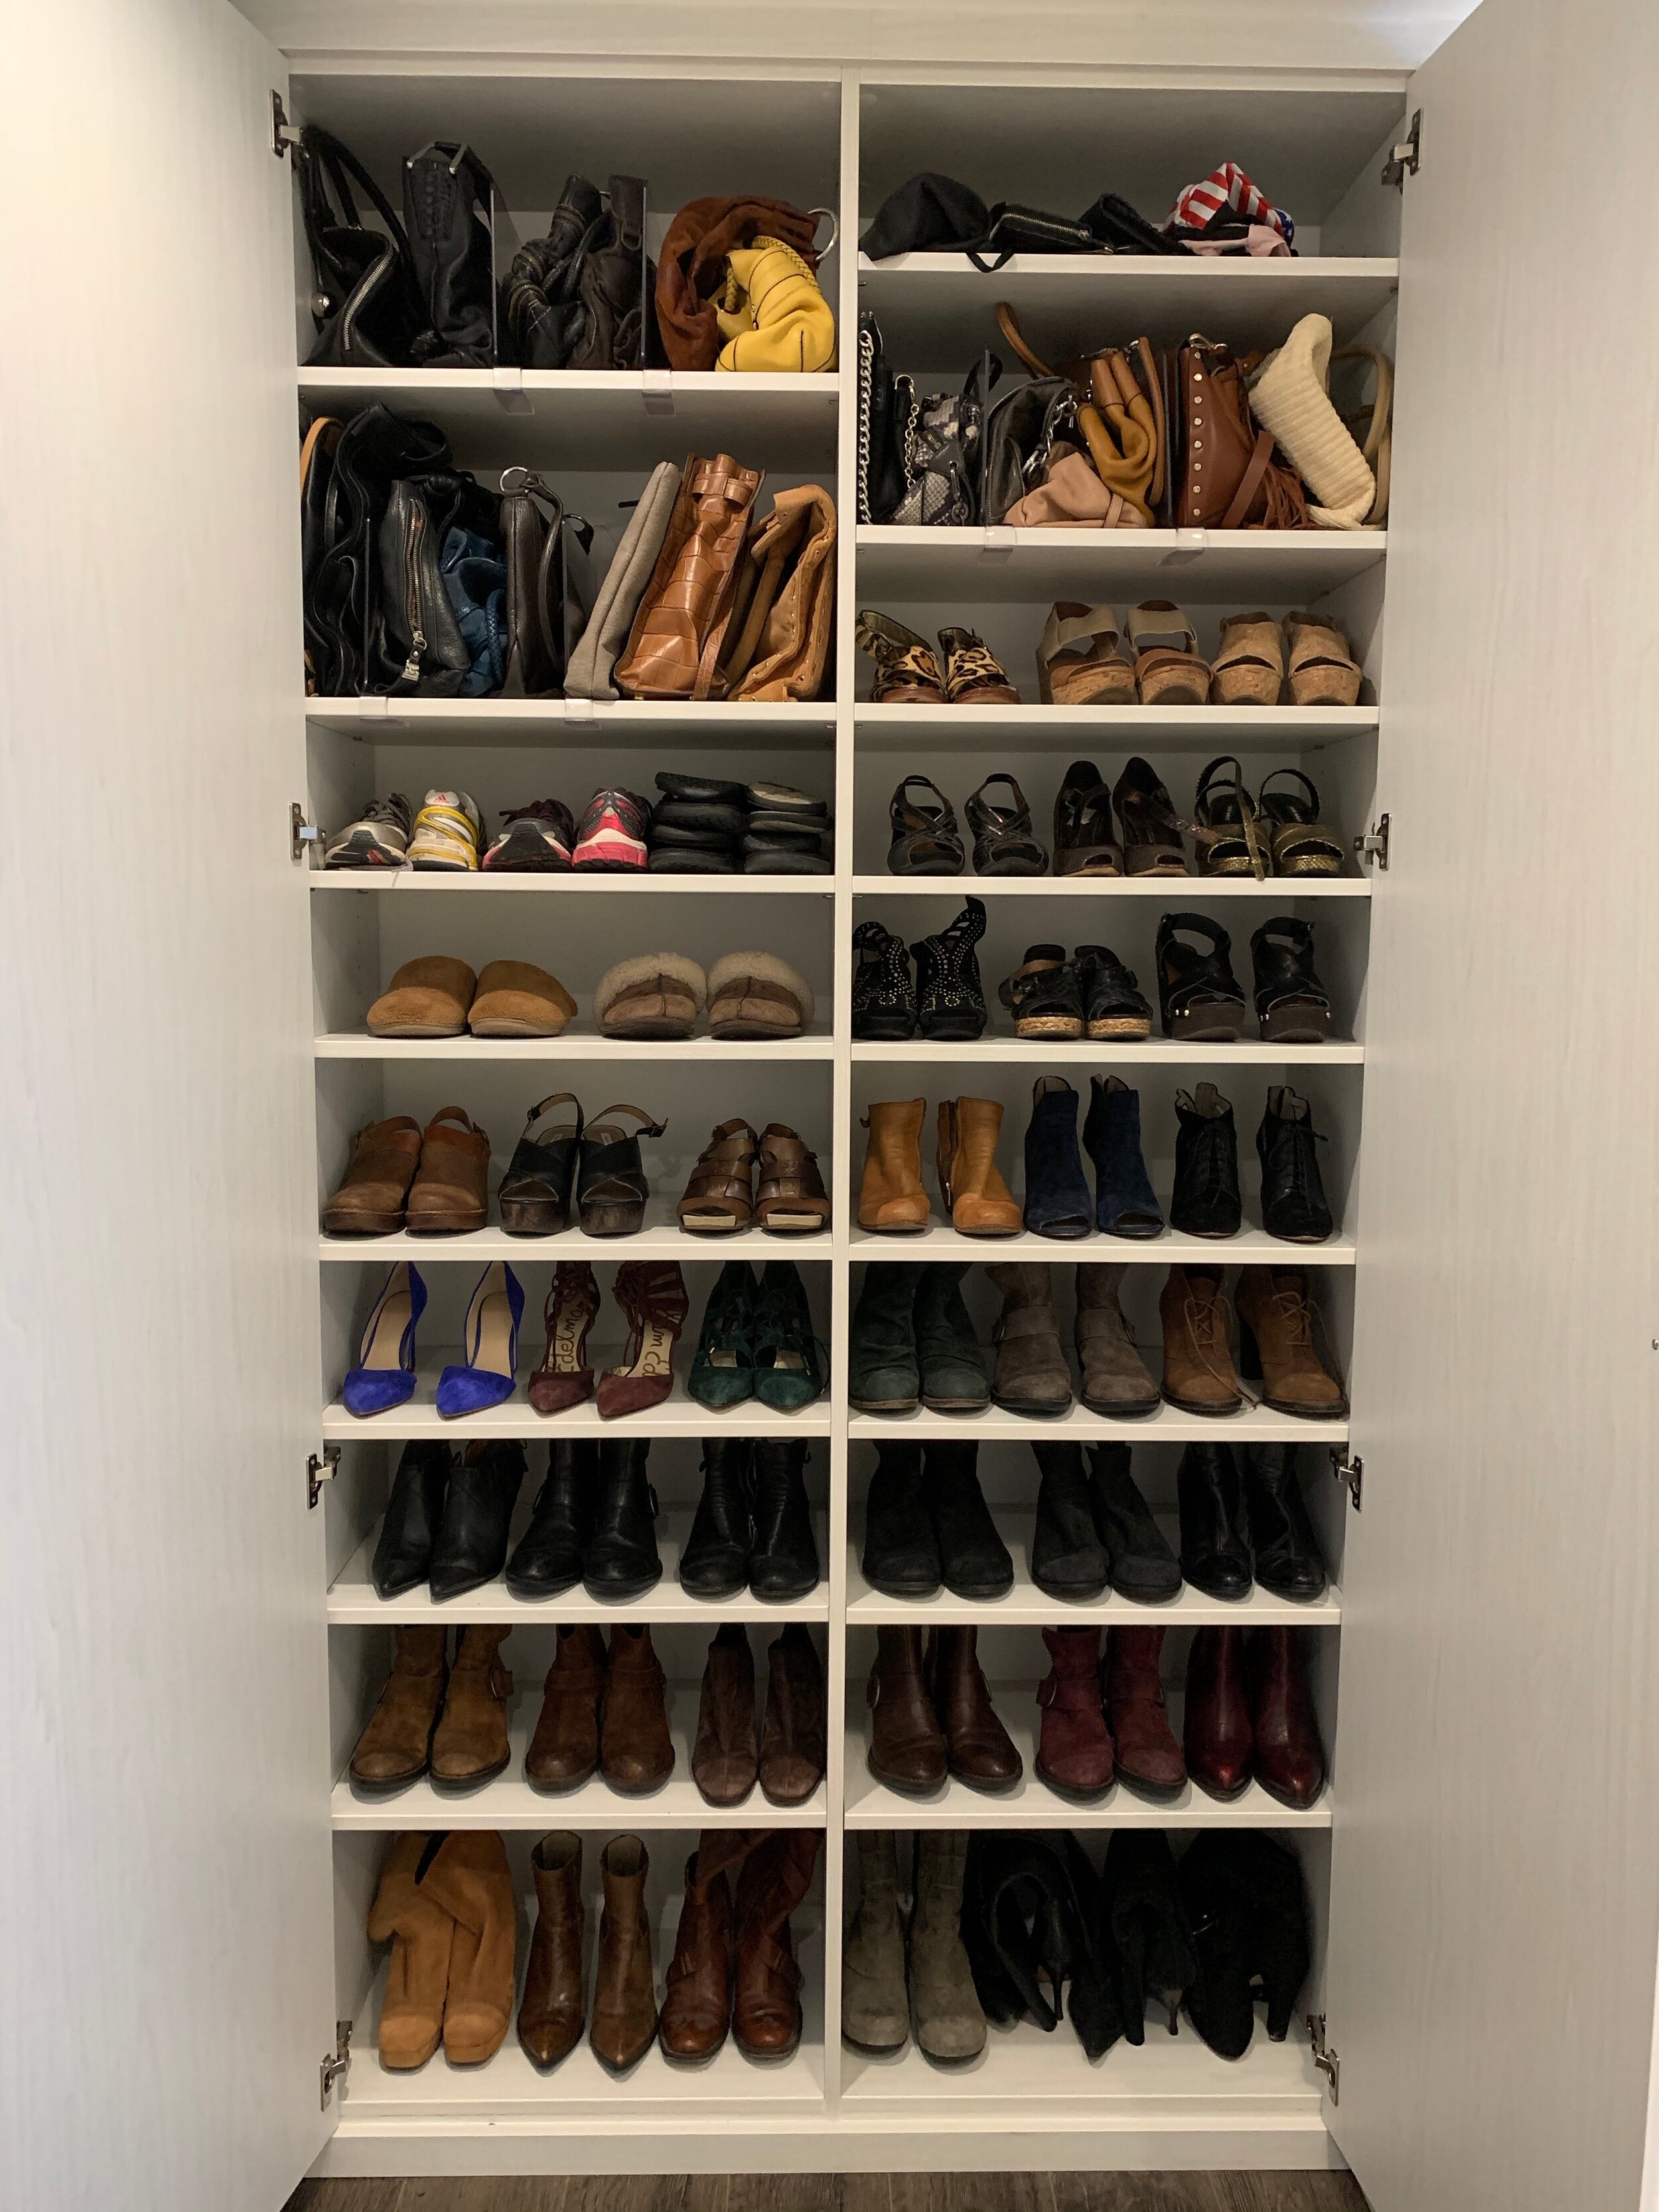
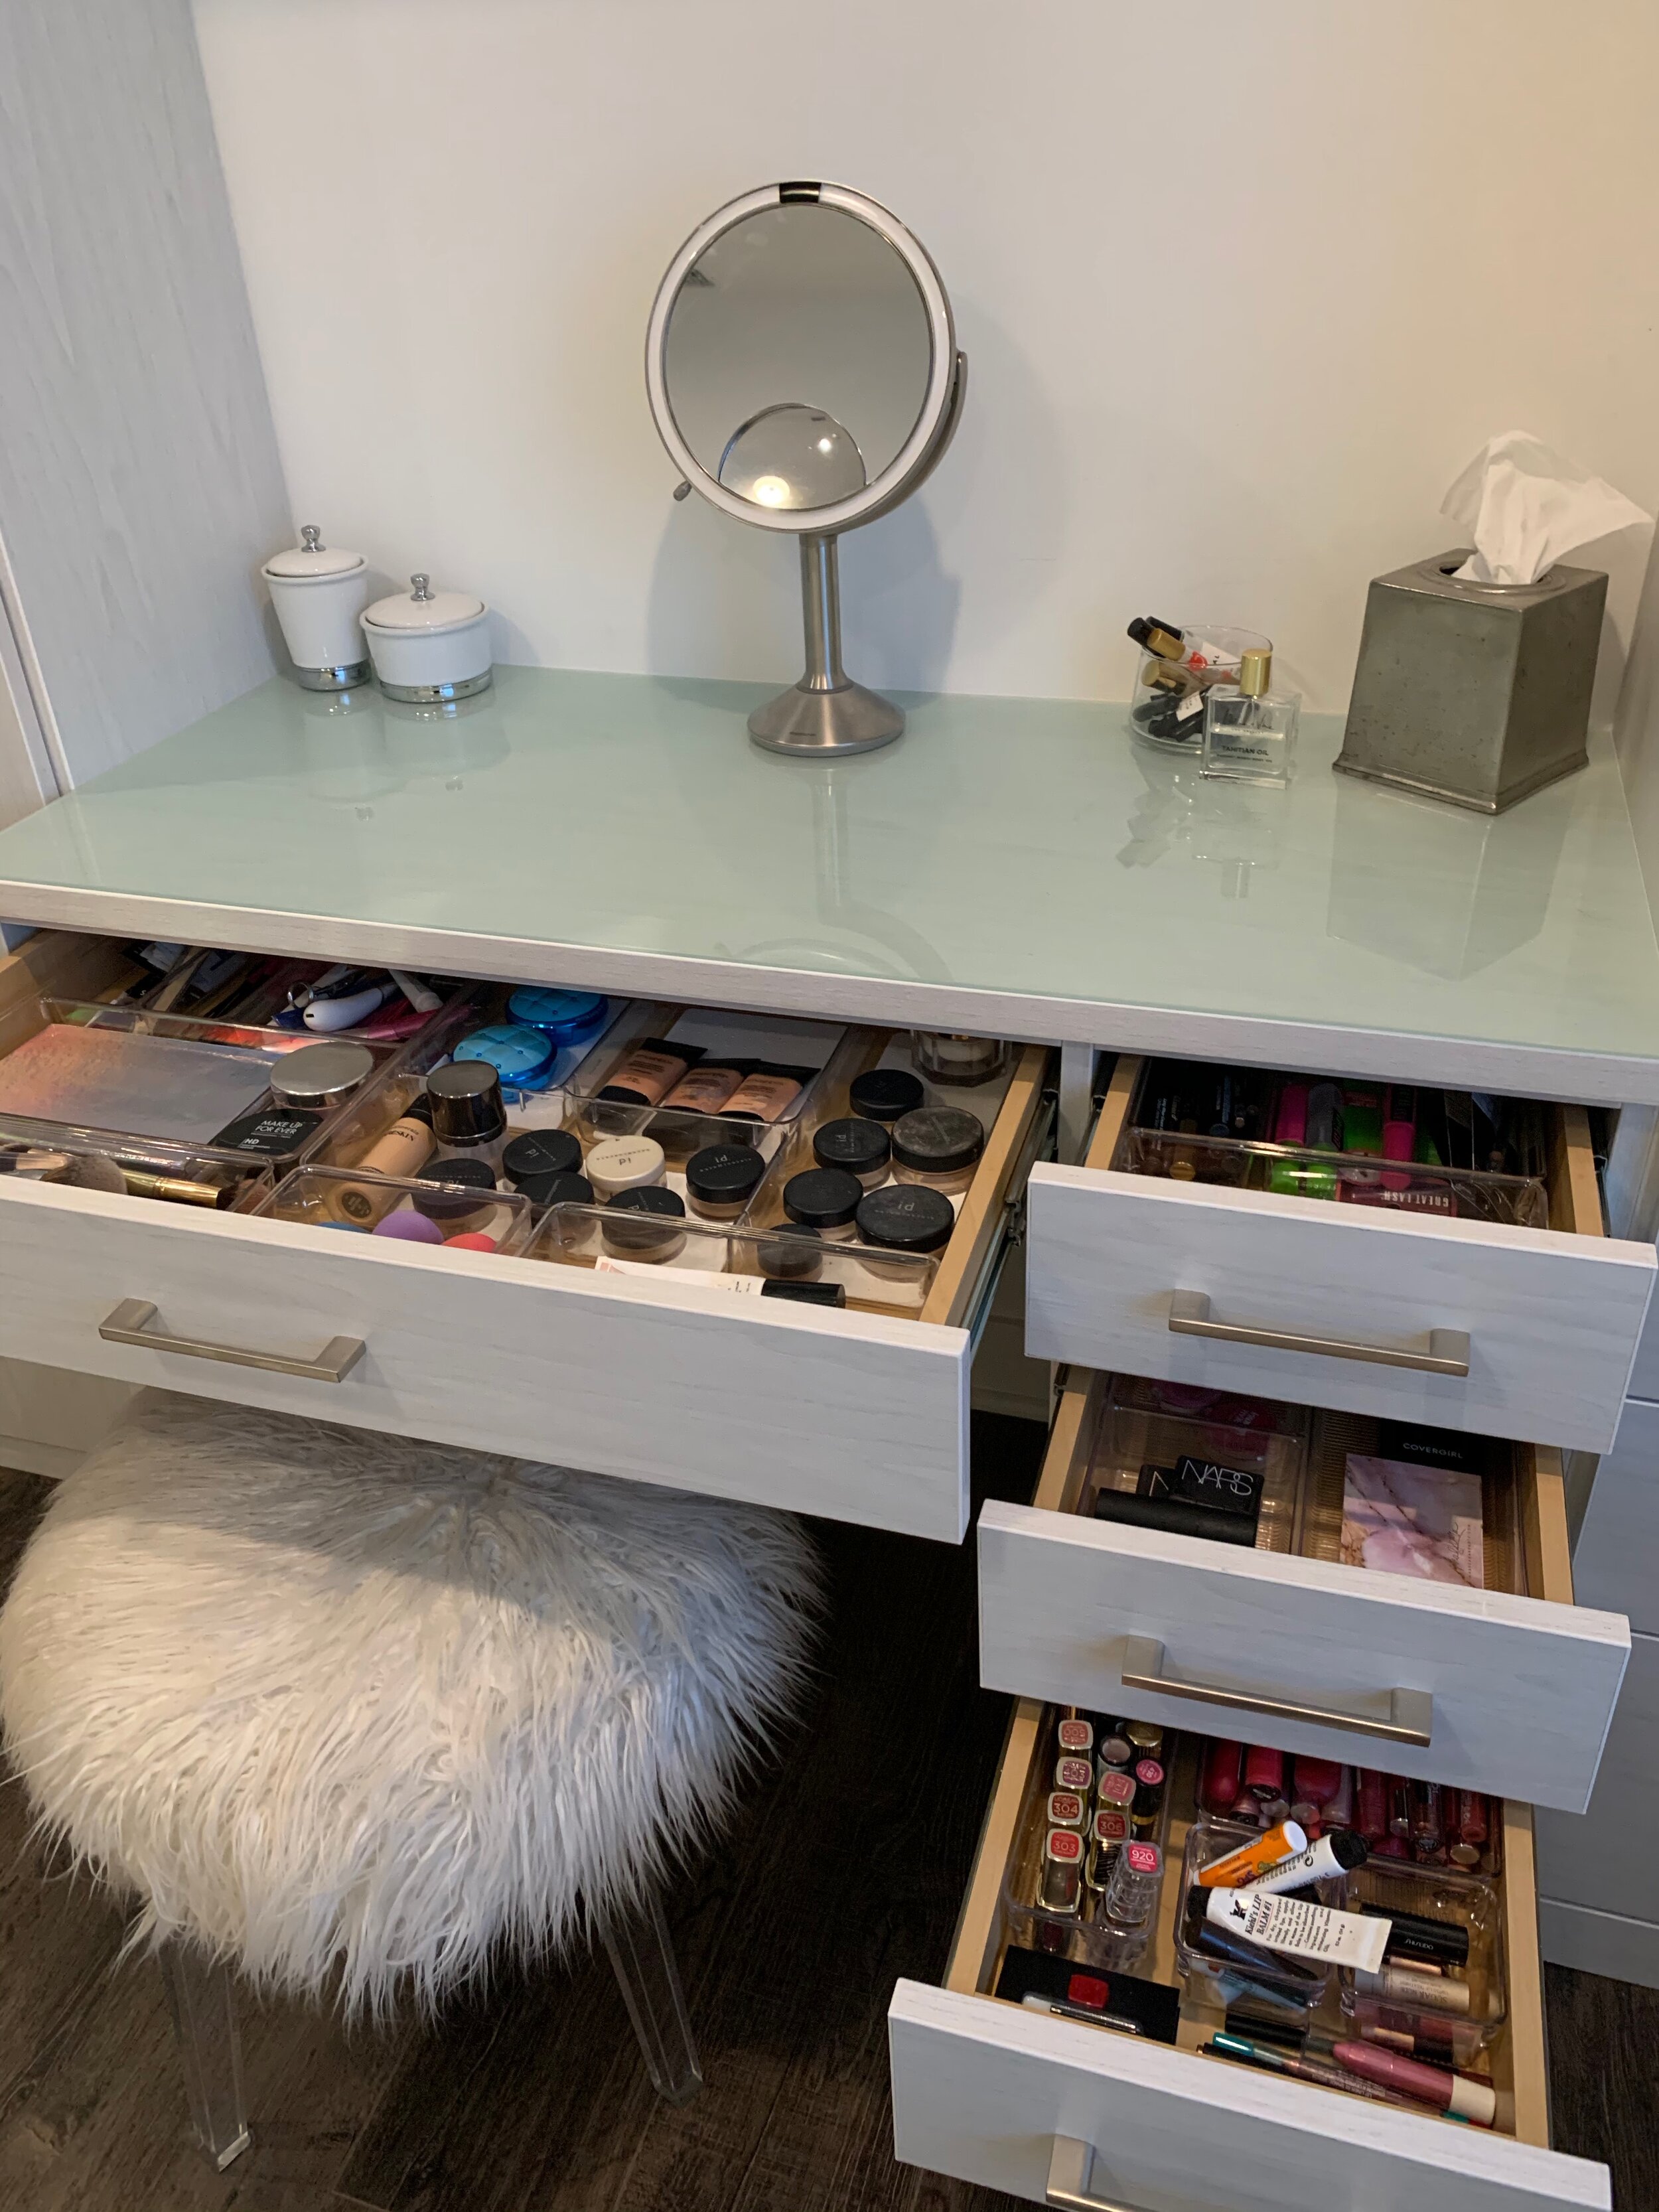
Second, you want to take inventory of your items. It’s important to know what you have so that you can create the space that you need. How many shoes, scarves, purses, belts and hats do you have? Also, ask yourself, do I want to hang my t-shirts and jeans or fold them? And, if I fold them, will they be in a drawer or on shelves? Think about the socks, underwear, intimates and pj’s you have. How many drawers will that take up?  How many feet of hanging space do you need? Double-hanging in the closet is a better use of the vertical space if you don’t have too many long hanging items. I also took into consideration all the jewelry she owned. There were many necklaces that needed a home. She also had an ample supply of makeup and a vanity so plenty of drawer space was imperative. This brings us right into the next step.

Third, you want to design the space now that you know what you need. I designed the space and then we hired Inspired Closets to build it out for us. Of course, if you don’t want to do the design part they will do it for you. It was easier for me because I already knew what my client needed. So we looked at the layout of the room and picked the wall that would best be suited for the unit. I drew a sketch of what the unit would potentially look like. Starting with the vanity in the middle and then adding shelves for the shoes and purses to the left. On the right side, I added the drawers. The top one was for her jewelry and the rest for socks, pj’s, workout, etc. I wanted to include these cool pull-outs for hanging jewelry that Inspired Closets had, I added those above the drawers. I added double hanging bars in the closet for all her blouses and she also wanted to hang her jeans. Then I gave the sketch to Inspired Closets and they came out and took the final measurements. My client went down to the showroom and picked the finishes and hardware that she liked. All we were waiting for was the vanity mirror with lights to come. We ordered that separately. Inspired Closets really are a dream to work with.

If you are looking to create a space that makes you want to get up and get dressed in the morning, use these three steps. No matter what size space you have you can create a dressing room or area of your dreams.