From Chaos to Comfort: A Living Room Transformation

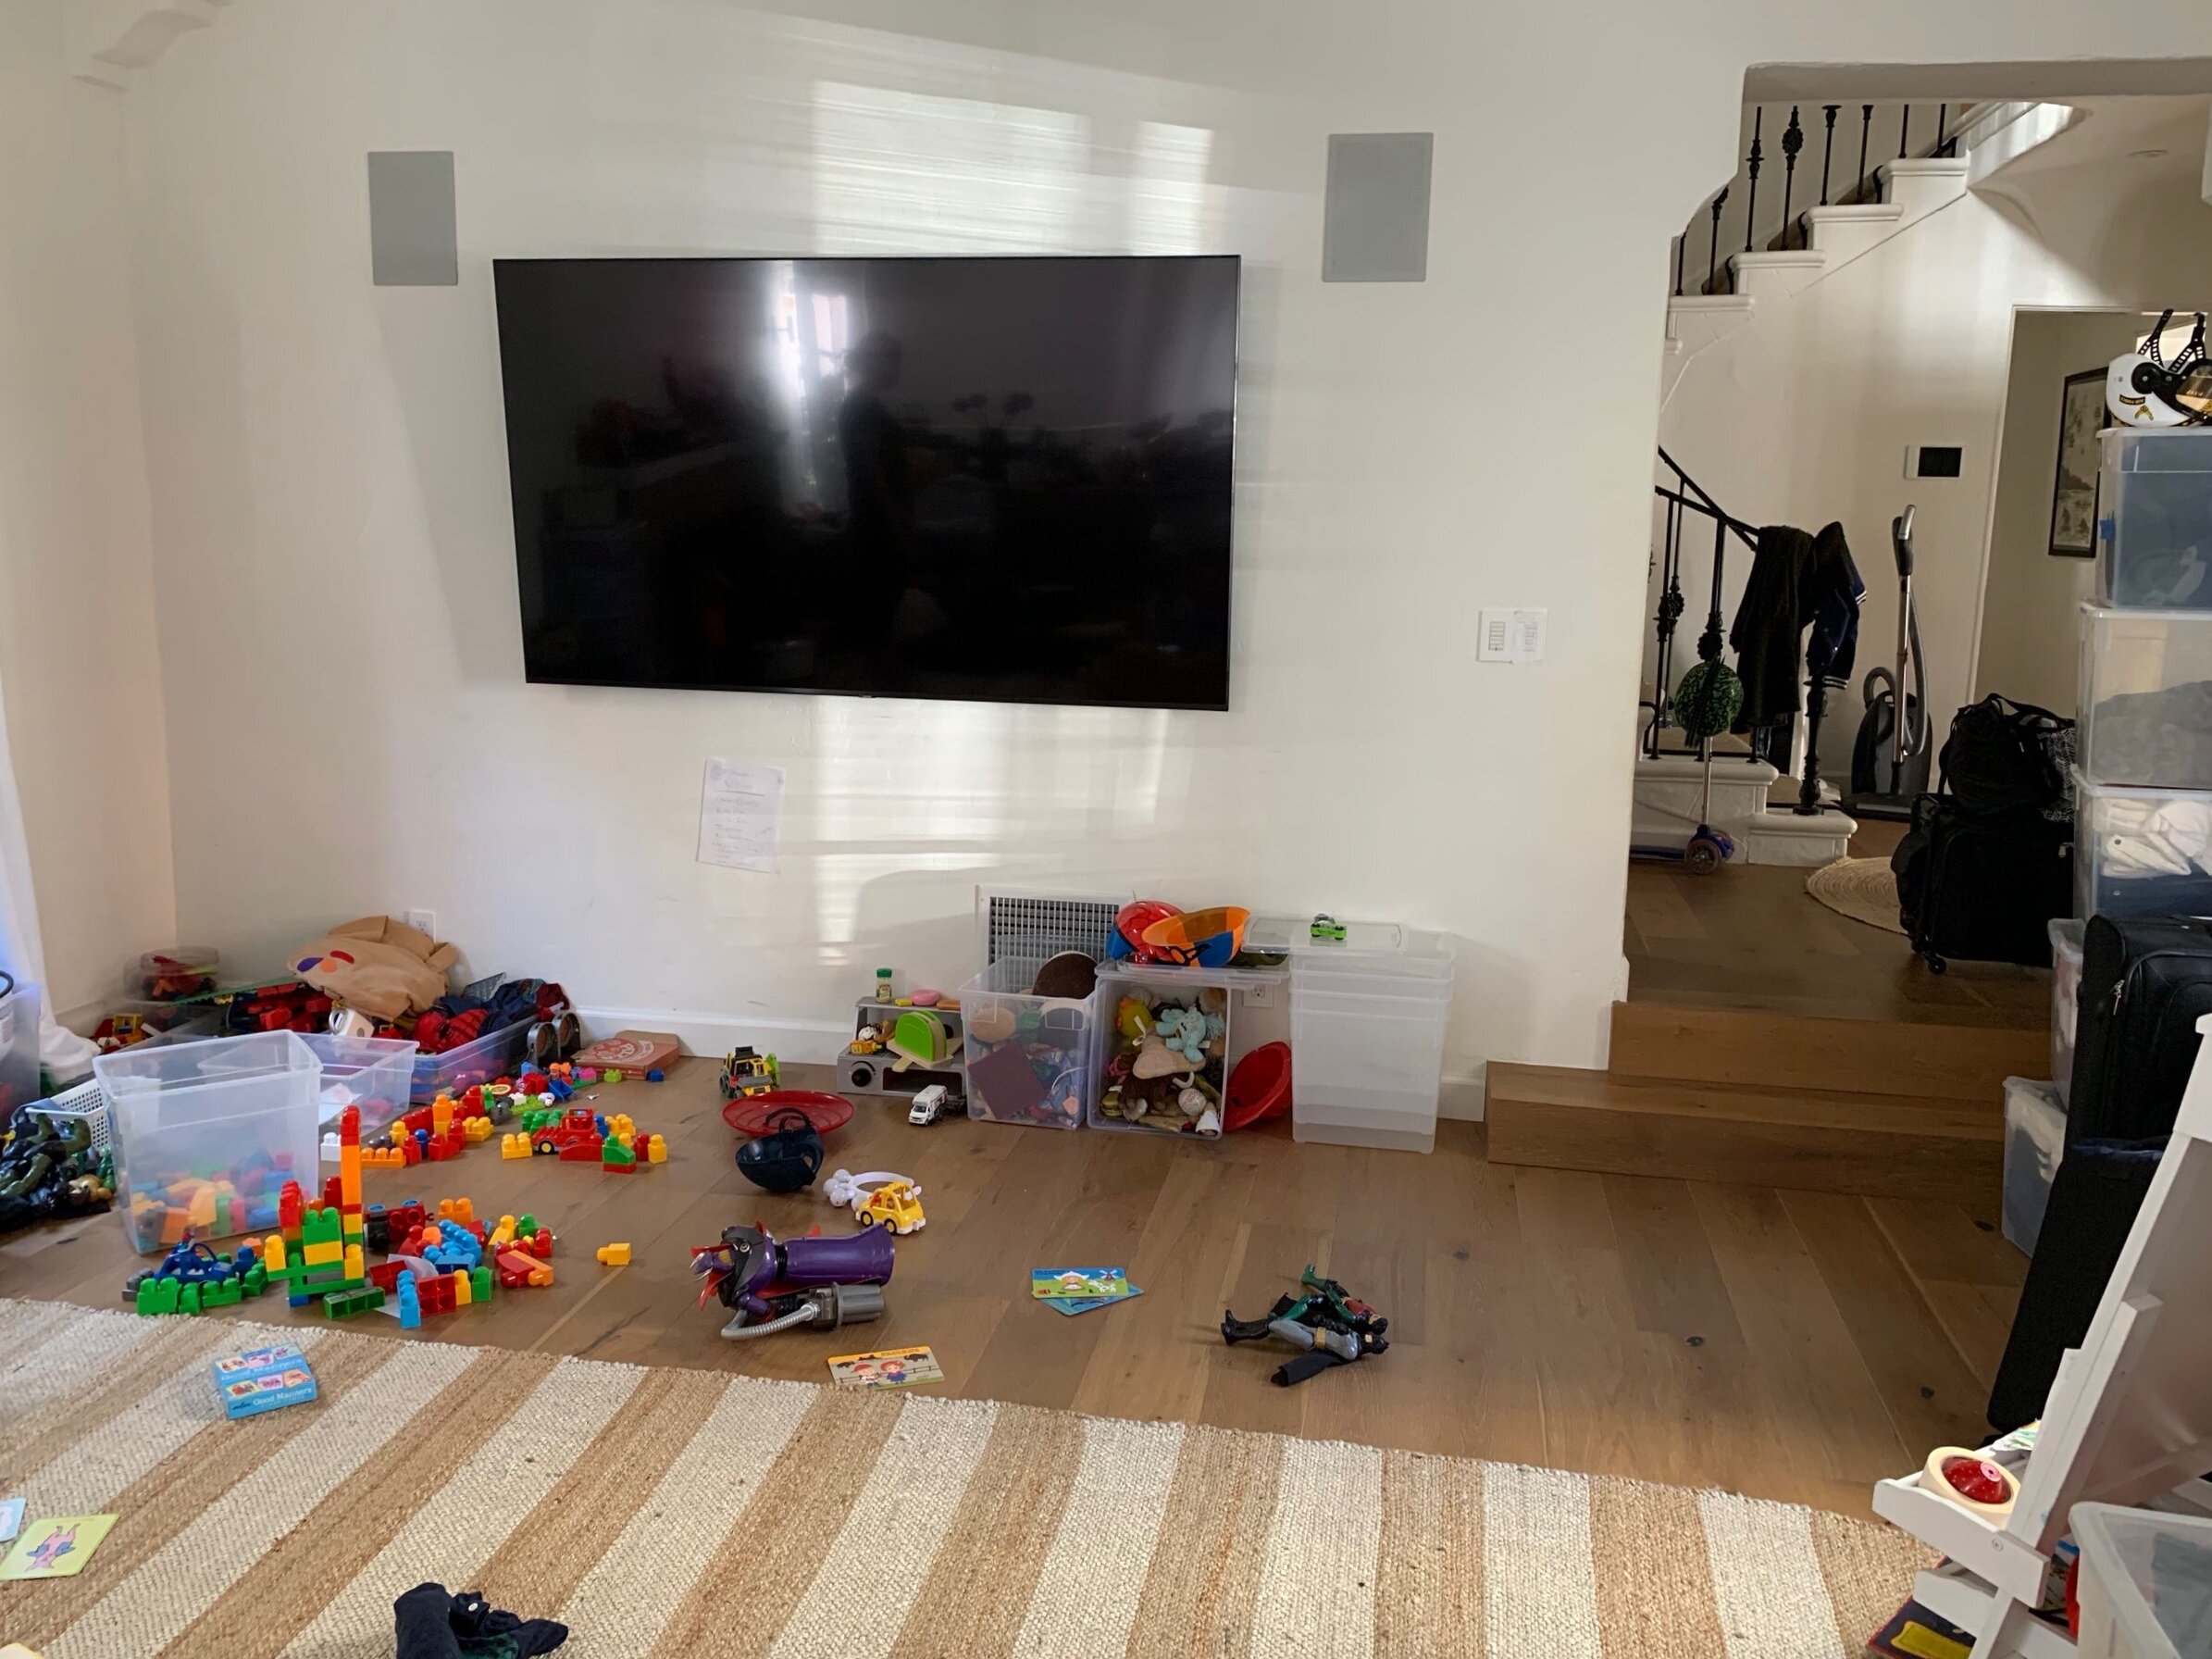
How many of you have a room in your house that is being used as a storage unit? If you could remove the chaos, what would that room be used for? Now more than ever with the ongoing COVID crisis, I can think of many ideas for extra space: mini gym, meditation, homeschooling, zoom meetings, or a functioning living room for future movie nights.

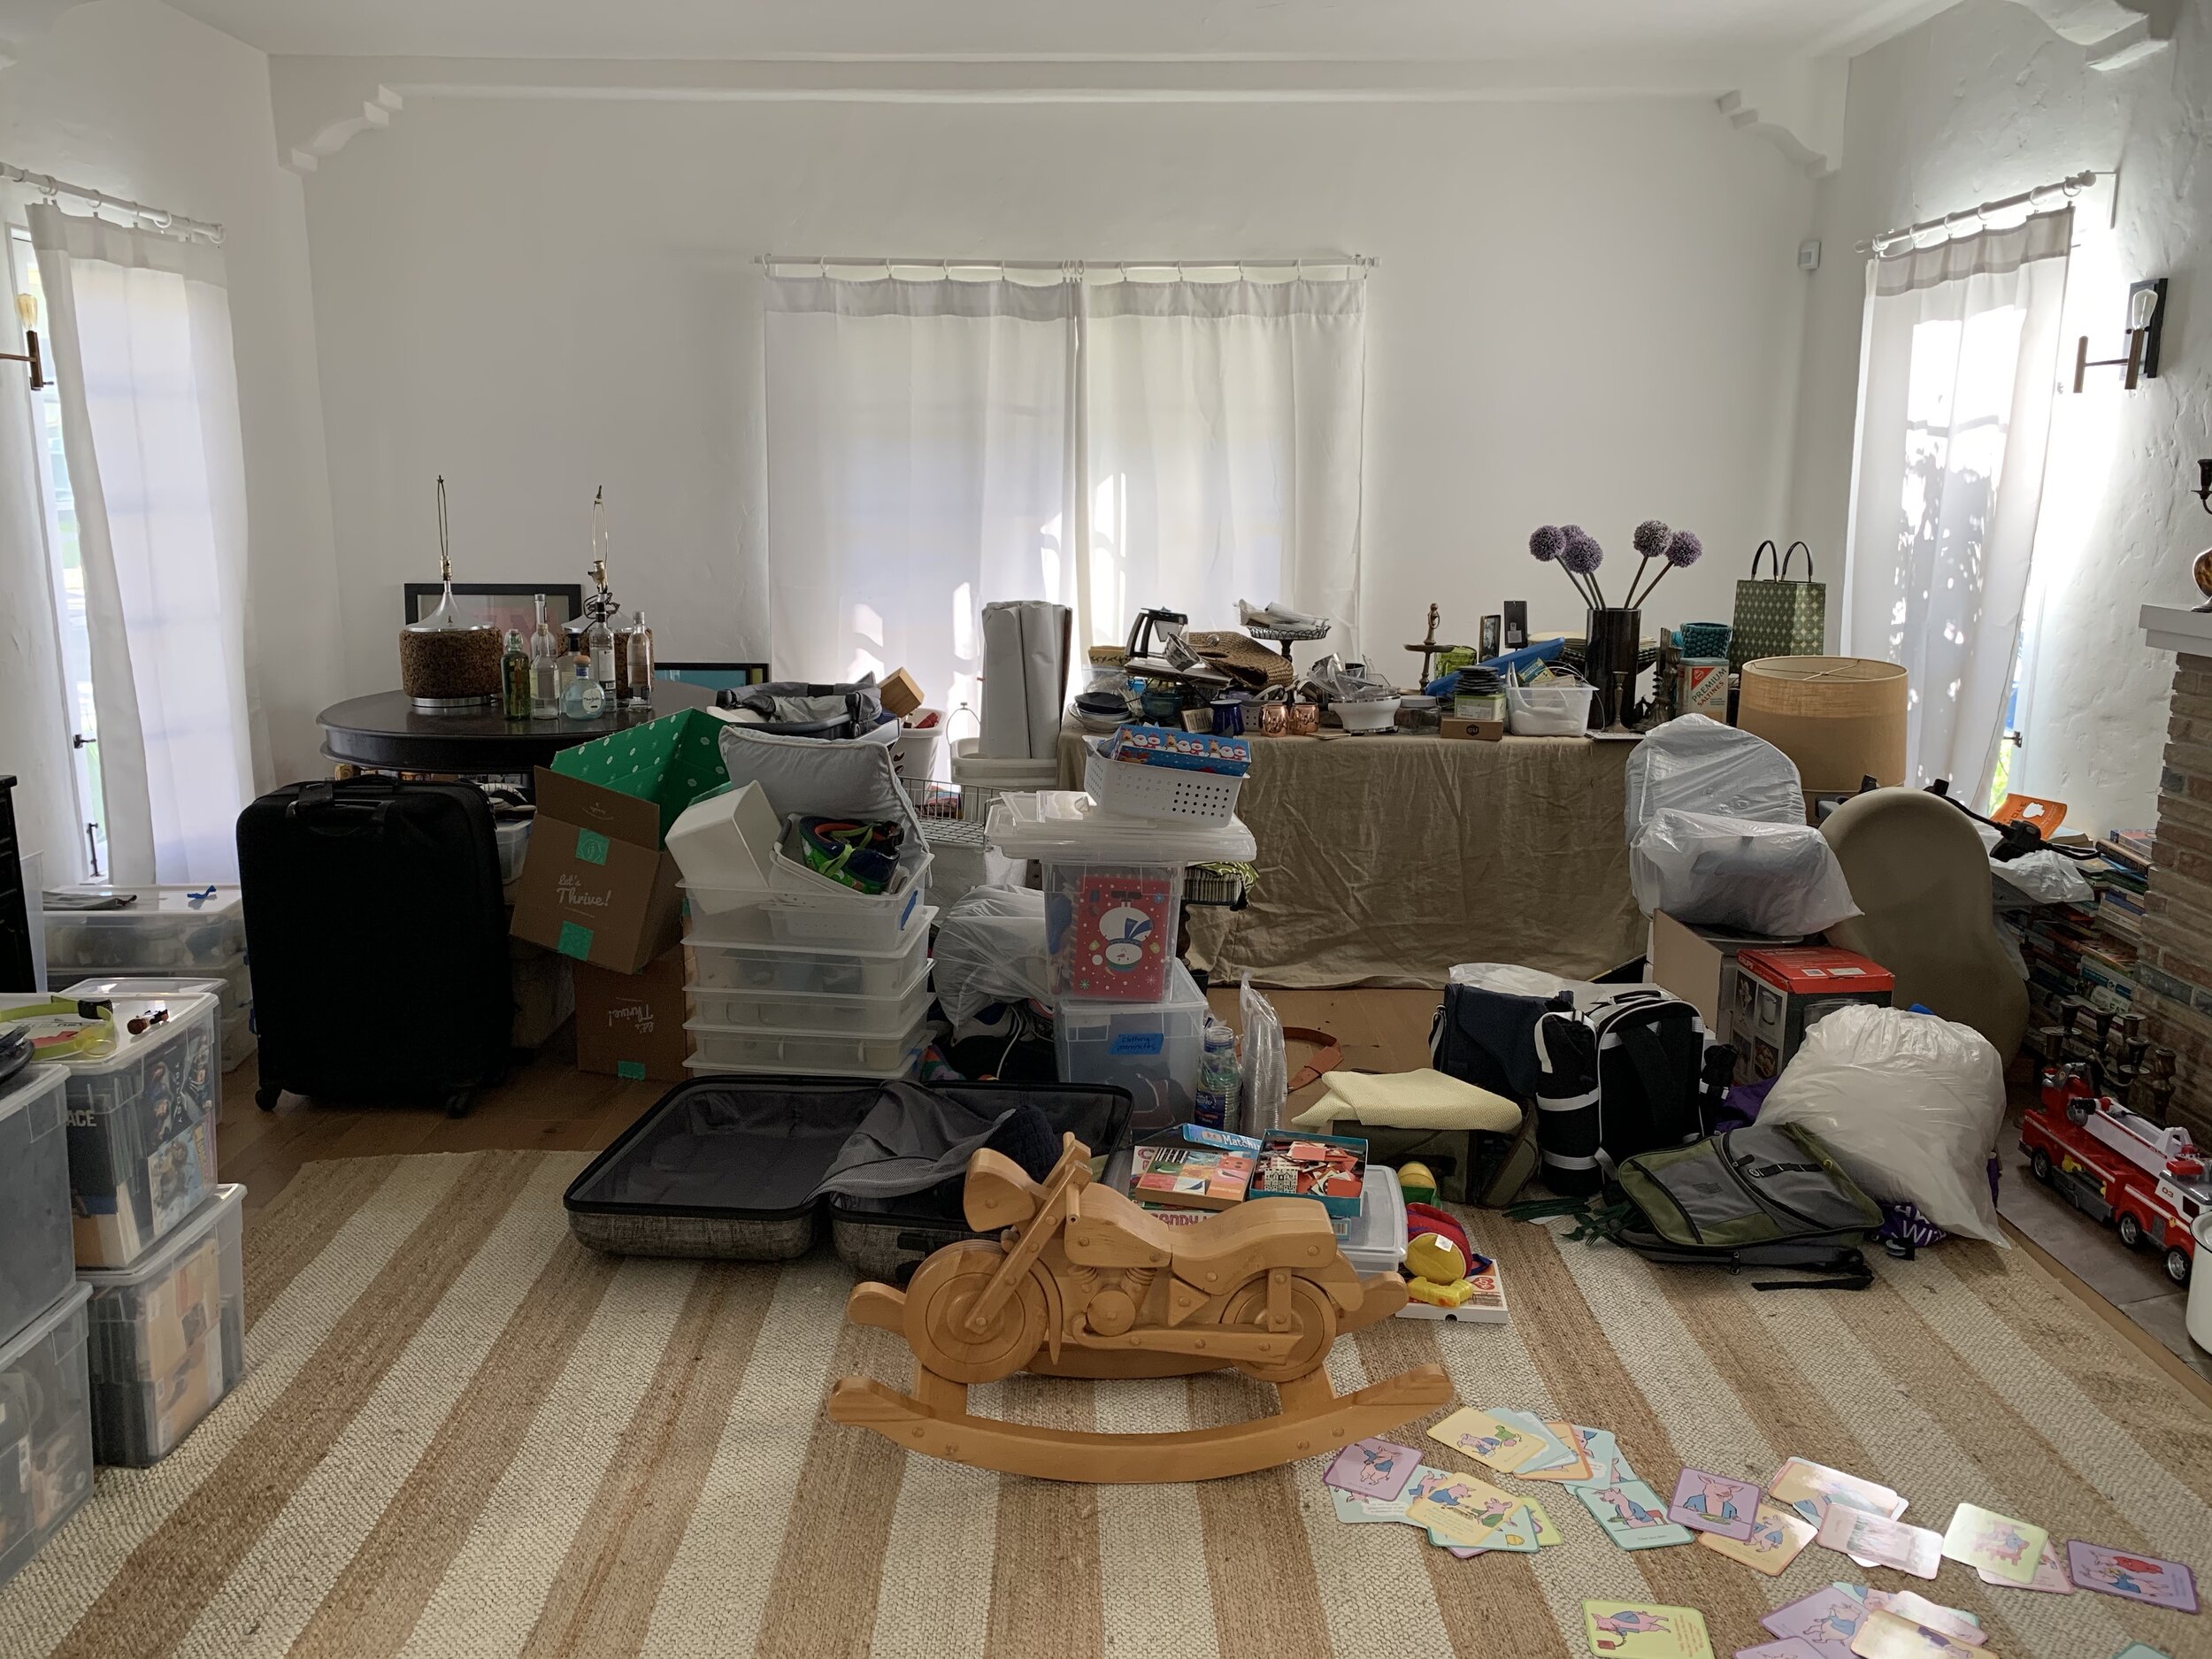
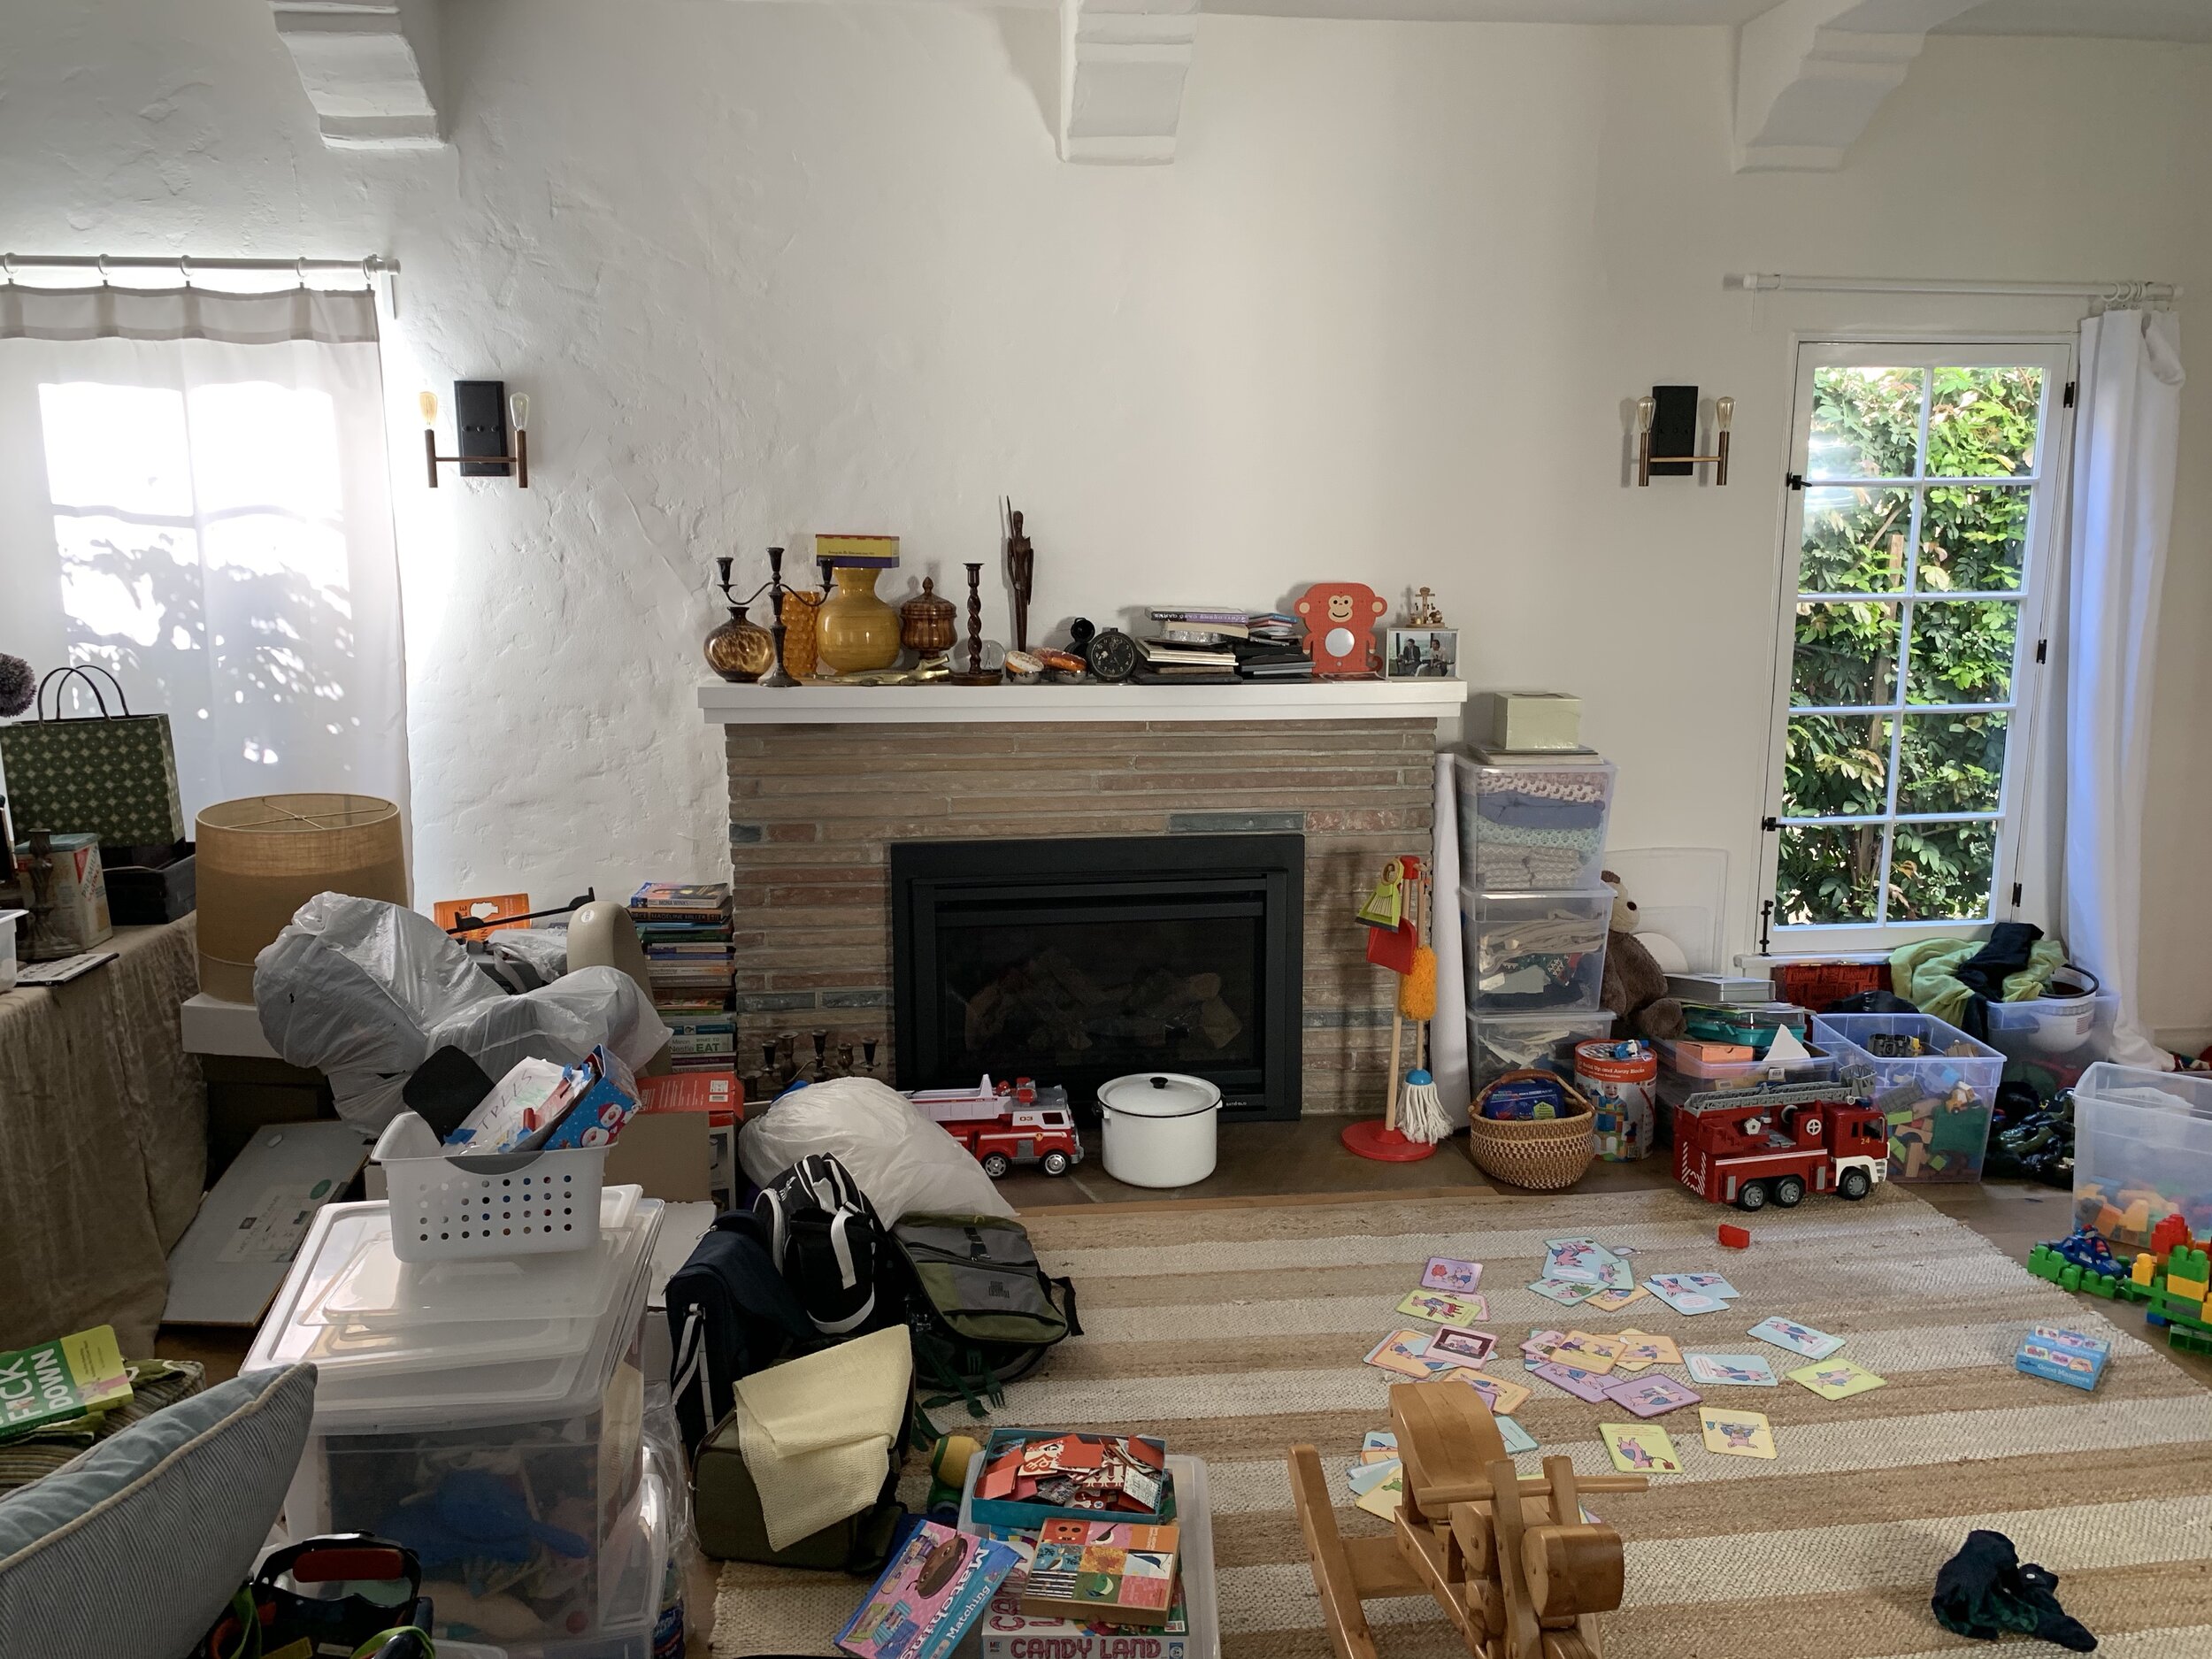
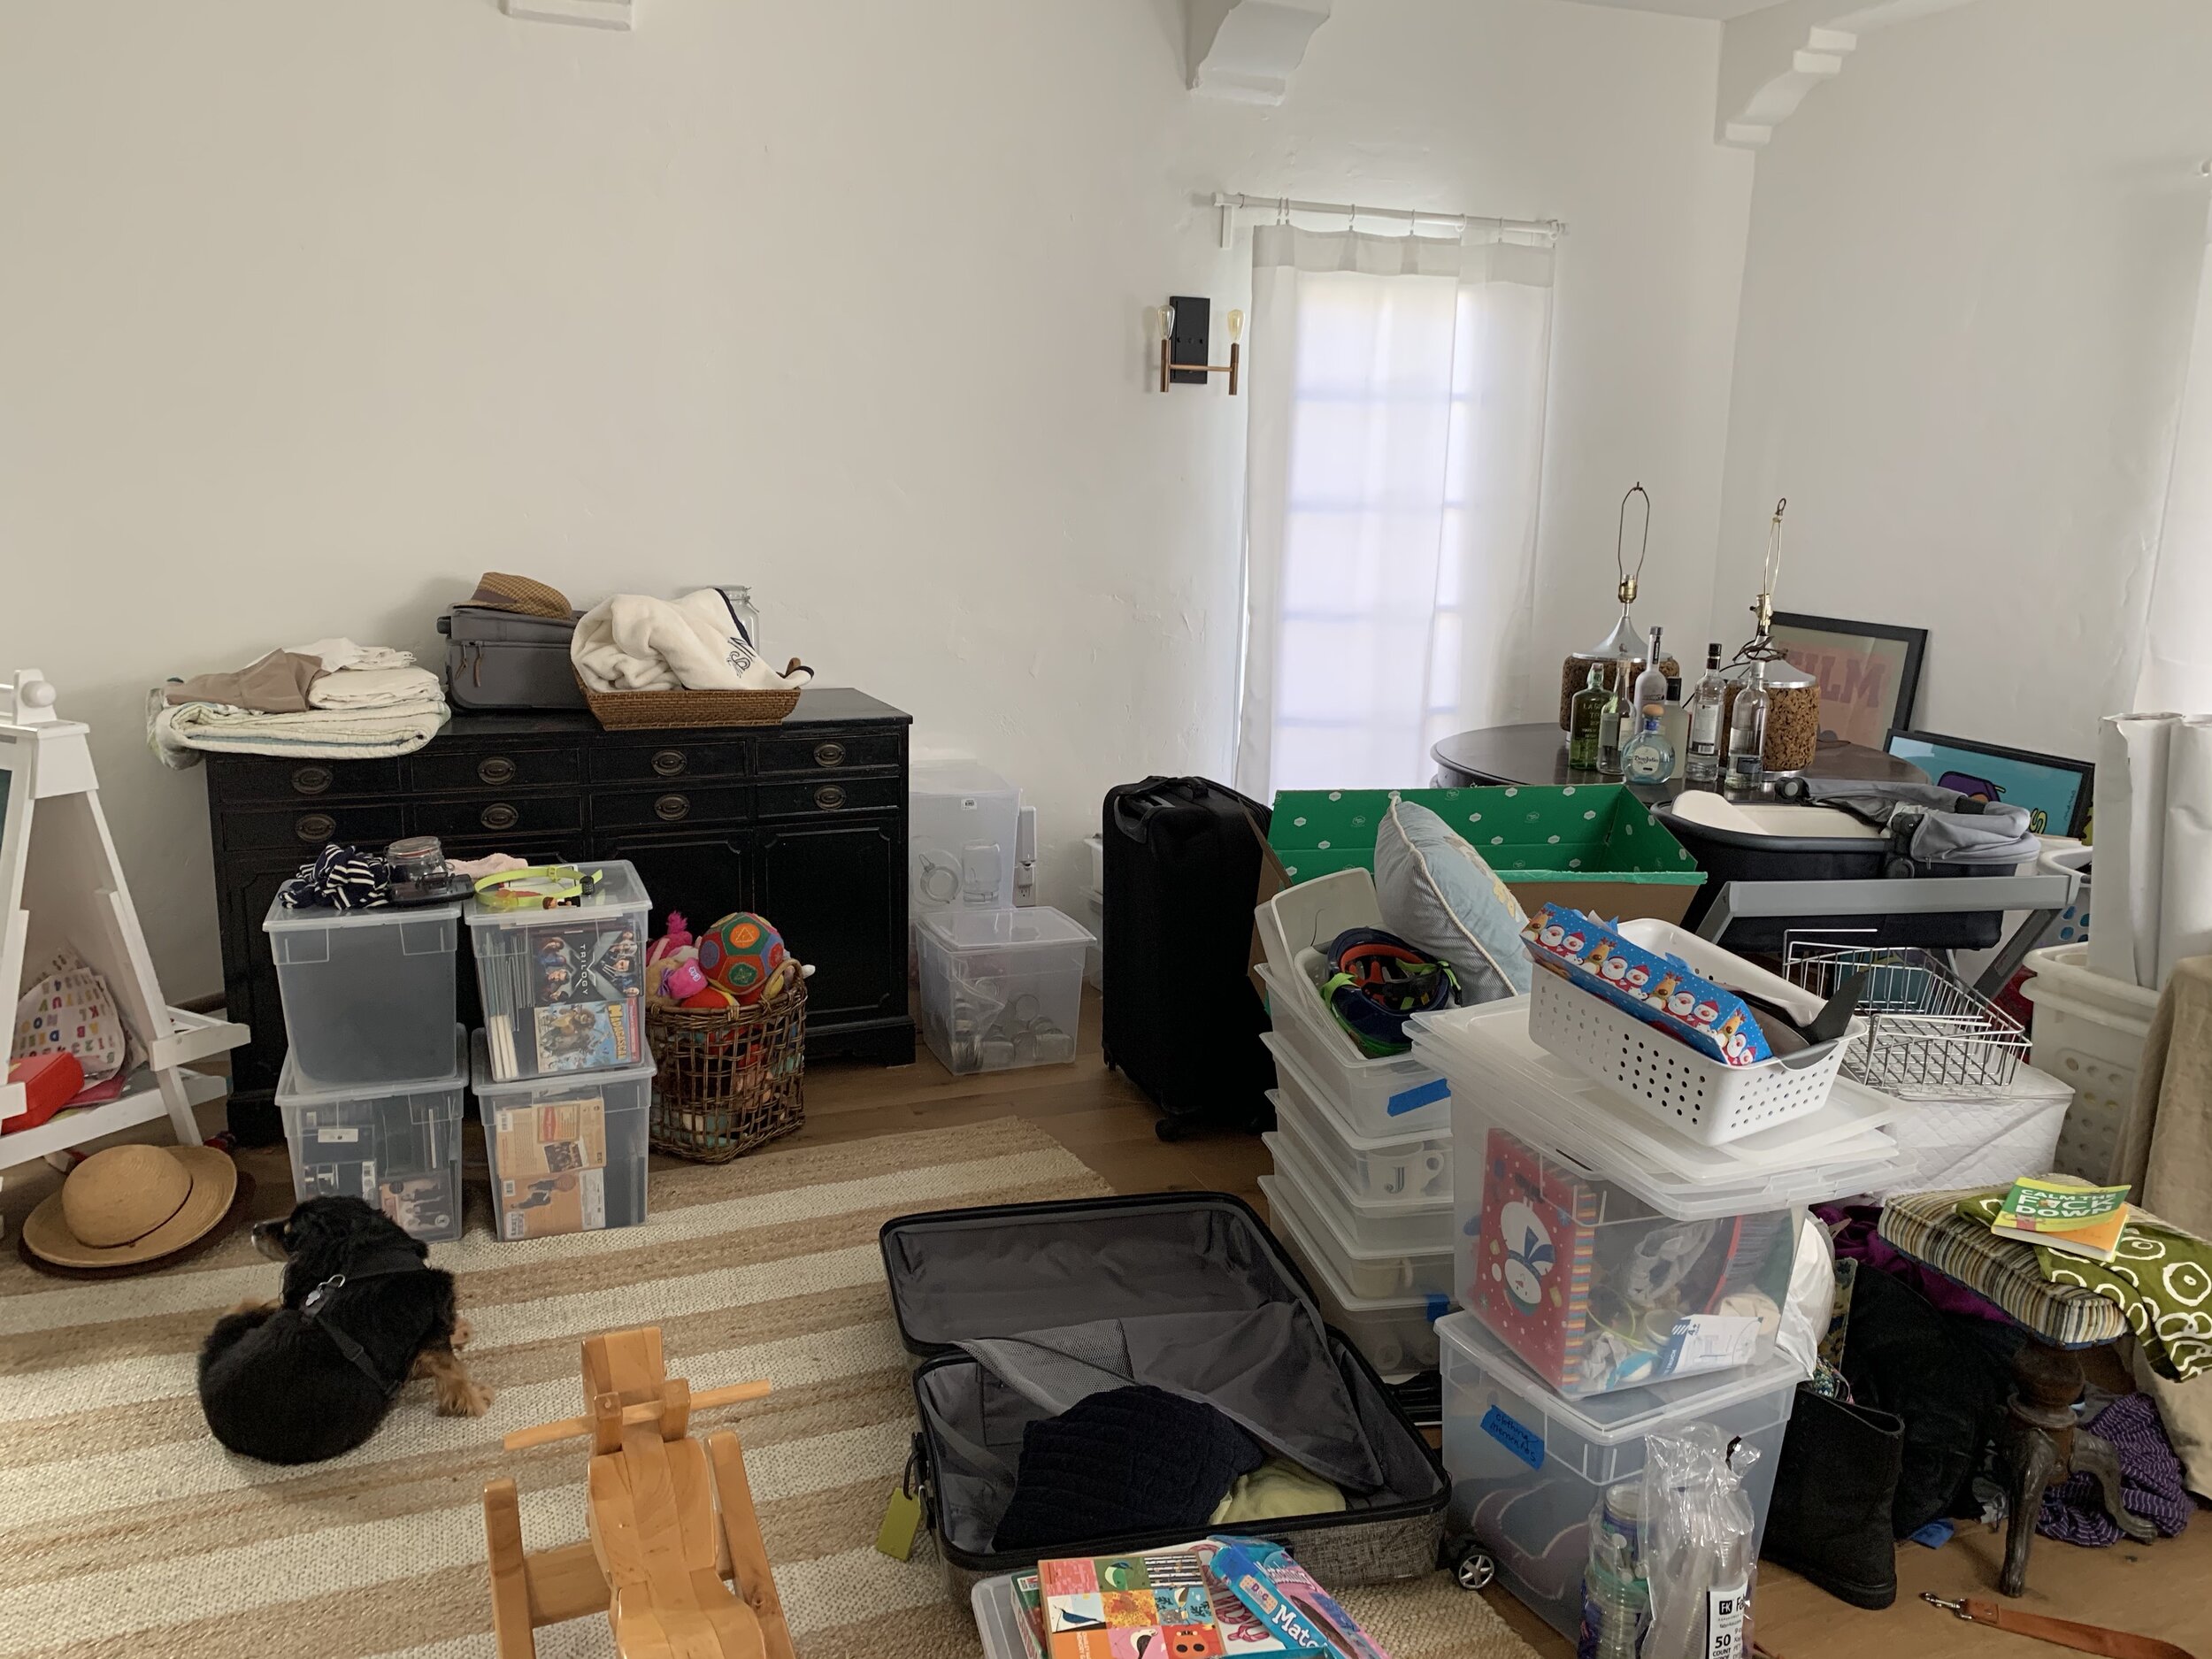
A recent client of mine in Los Angeles had just moved into their dream home but shortly after was stressed out with the lack of storage. The house was a beautiful Spanish revival that had limitations for their belongings and it was imperative to come up with storage solutions that didn’t involve acquiring a storage unit. That is why their clutter ended up in the living room.

As with all projects, big or small, it is important to visualize what you want to use the space for, how you want it to look, and how it makes you feel. Before we jumped into the 5 step Space to Love® method to getting organized I wanted my client to convey to me what their vision was for the cluttered living room. They envisioned kid sleepovers, out of town family members staying for the weekend, having drinks with friends during game night and movie night with the family. This translated into a large and comfy sectional couch that opened up to a bed. The couch would have a dark-colored fabric that would be more forgiving of kids and pets. This layout also needed to include space for a bar and comfortable seating with side tables. This visualization process allows you to know what you need and is always a big motivator to get started on any project.

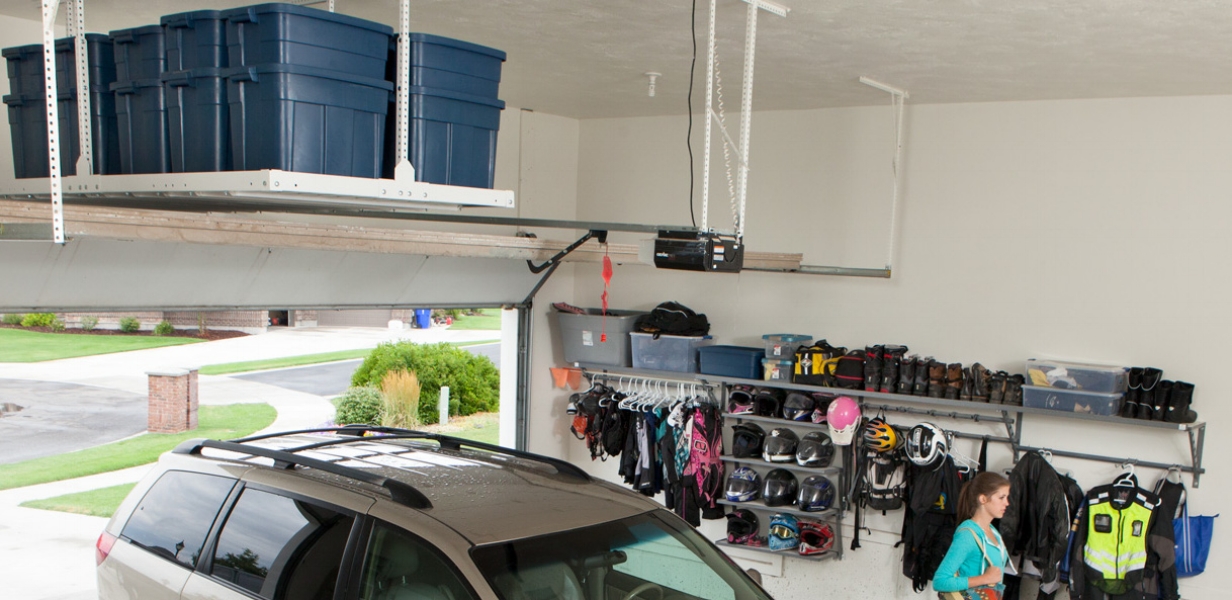
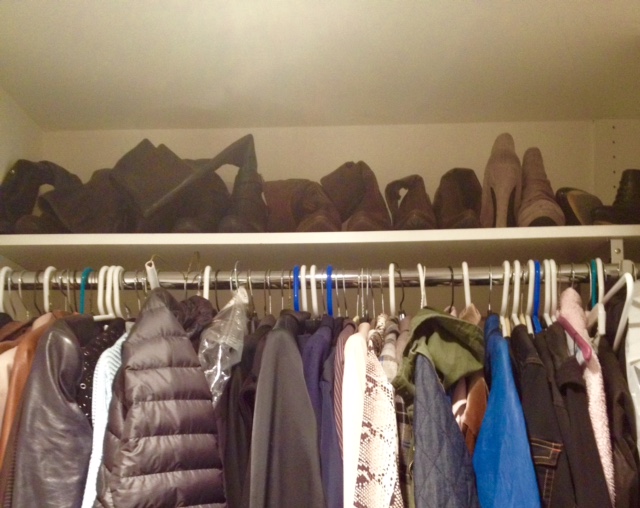
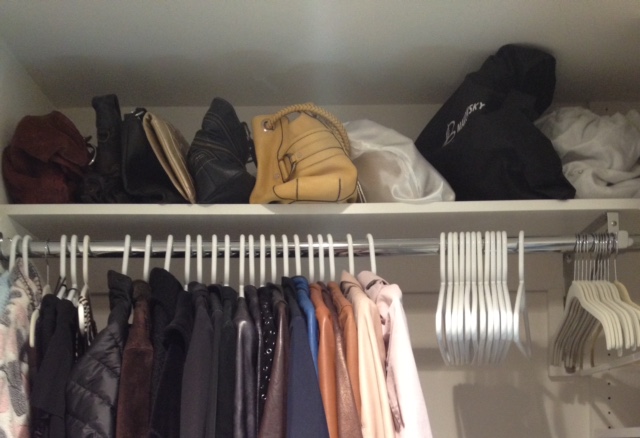
After visualizing we went on to assess and prioritize. We did a walkthrough of the entire house and outdoor space to see where, if any, would be an accessible and functional place for storage. I was pleased to learn that they had an unutilized basement. A basement in LA is a rare thing, and this one had ample space to add additional shelving. They had a garage that was being used as an extension of the outdoor space, not for a car. We decided to use one of the walls to build storage cabinets (that will be for another blog). Now, I was able to see where all the items that they wanted to keep would go.

After that, we were ready for the Space to Love® method. For the first step, Setup, we used foldout tables where we could group the like items together and see everything. We created areas in the room for the common categories, such as donations, trash, and recycle. With our post-its and markers ready we moved on to step two, Sorting.

While working through the sorting process I was able to learn a lot about my client. For instance, I could tell what they did for a living and what their hobbies were. This allowed me to come up with an organizational system that would be tailored to their individual needs.

As we continued sorting, everything made their way into specific categories. This allowed them to see which items they had duplicates of, what they forgot they had, and what they weren’t using. I love watching as my clients go through this process because they start to understand what they need, what they want for the future, and what is holding them back. It becomes clear to them how they have changed over the years and what was once important doesn’t have much hold over them anymore. This leads right into step three, Select.

Now that everything is sorted it makes it easier to “pick the best and get rid of the rest”. Here is where they see what is no longer serving or supporting them. This is also an opportunity for them to realize how they have been spending their money and their time. Sometimes feelings like guilt, shame, and regret may come up and bring the process to a halt. This is where having a professional organizer there with you is so important, we help ease the feelings that arise and get you through it. Real change starts to happen during this time. Many ah-ha moments.

After sorting and selecting, the items they decided to keep could be stored in the basement. Which brings us to step four, Sanitize.

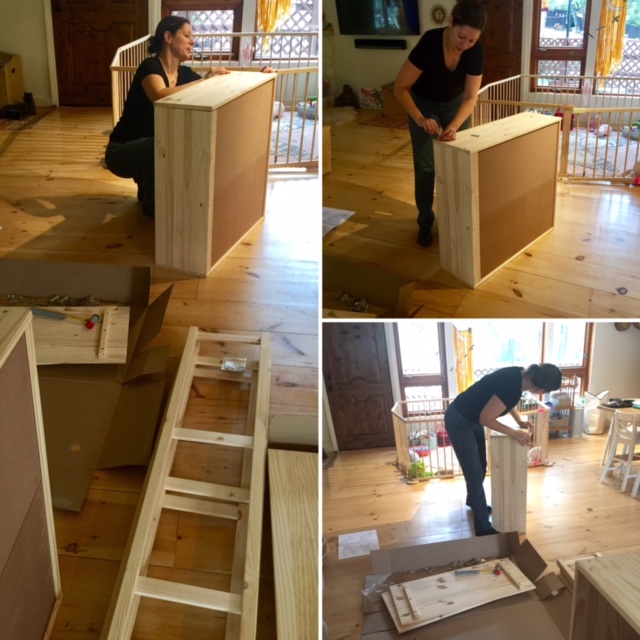
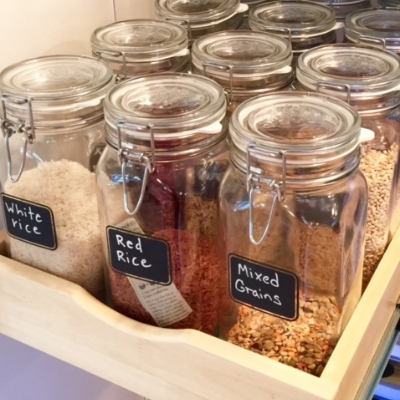
We started with the basement. Before we added shelving from Home Depot we made sure we cleaned the area well. Then we put the shelving in place and organized them with items that were not going to be used on a regular basis. We transported the other items that were needed more often out to the garage on temporary shelving until the storage cabinets were built.

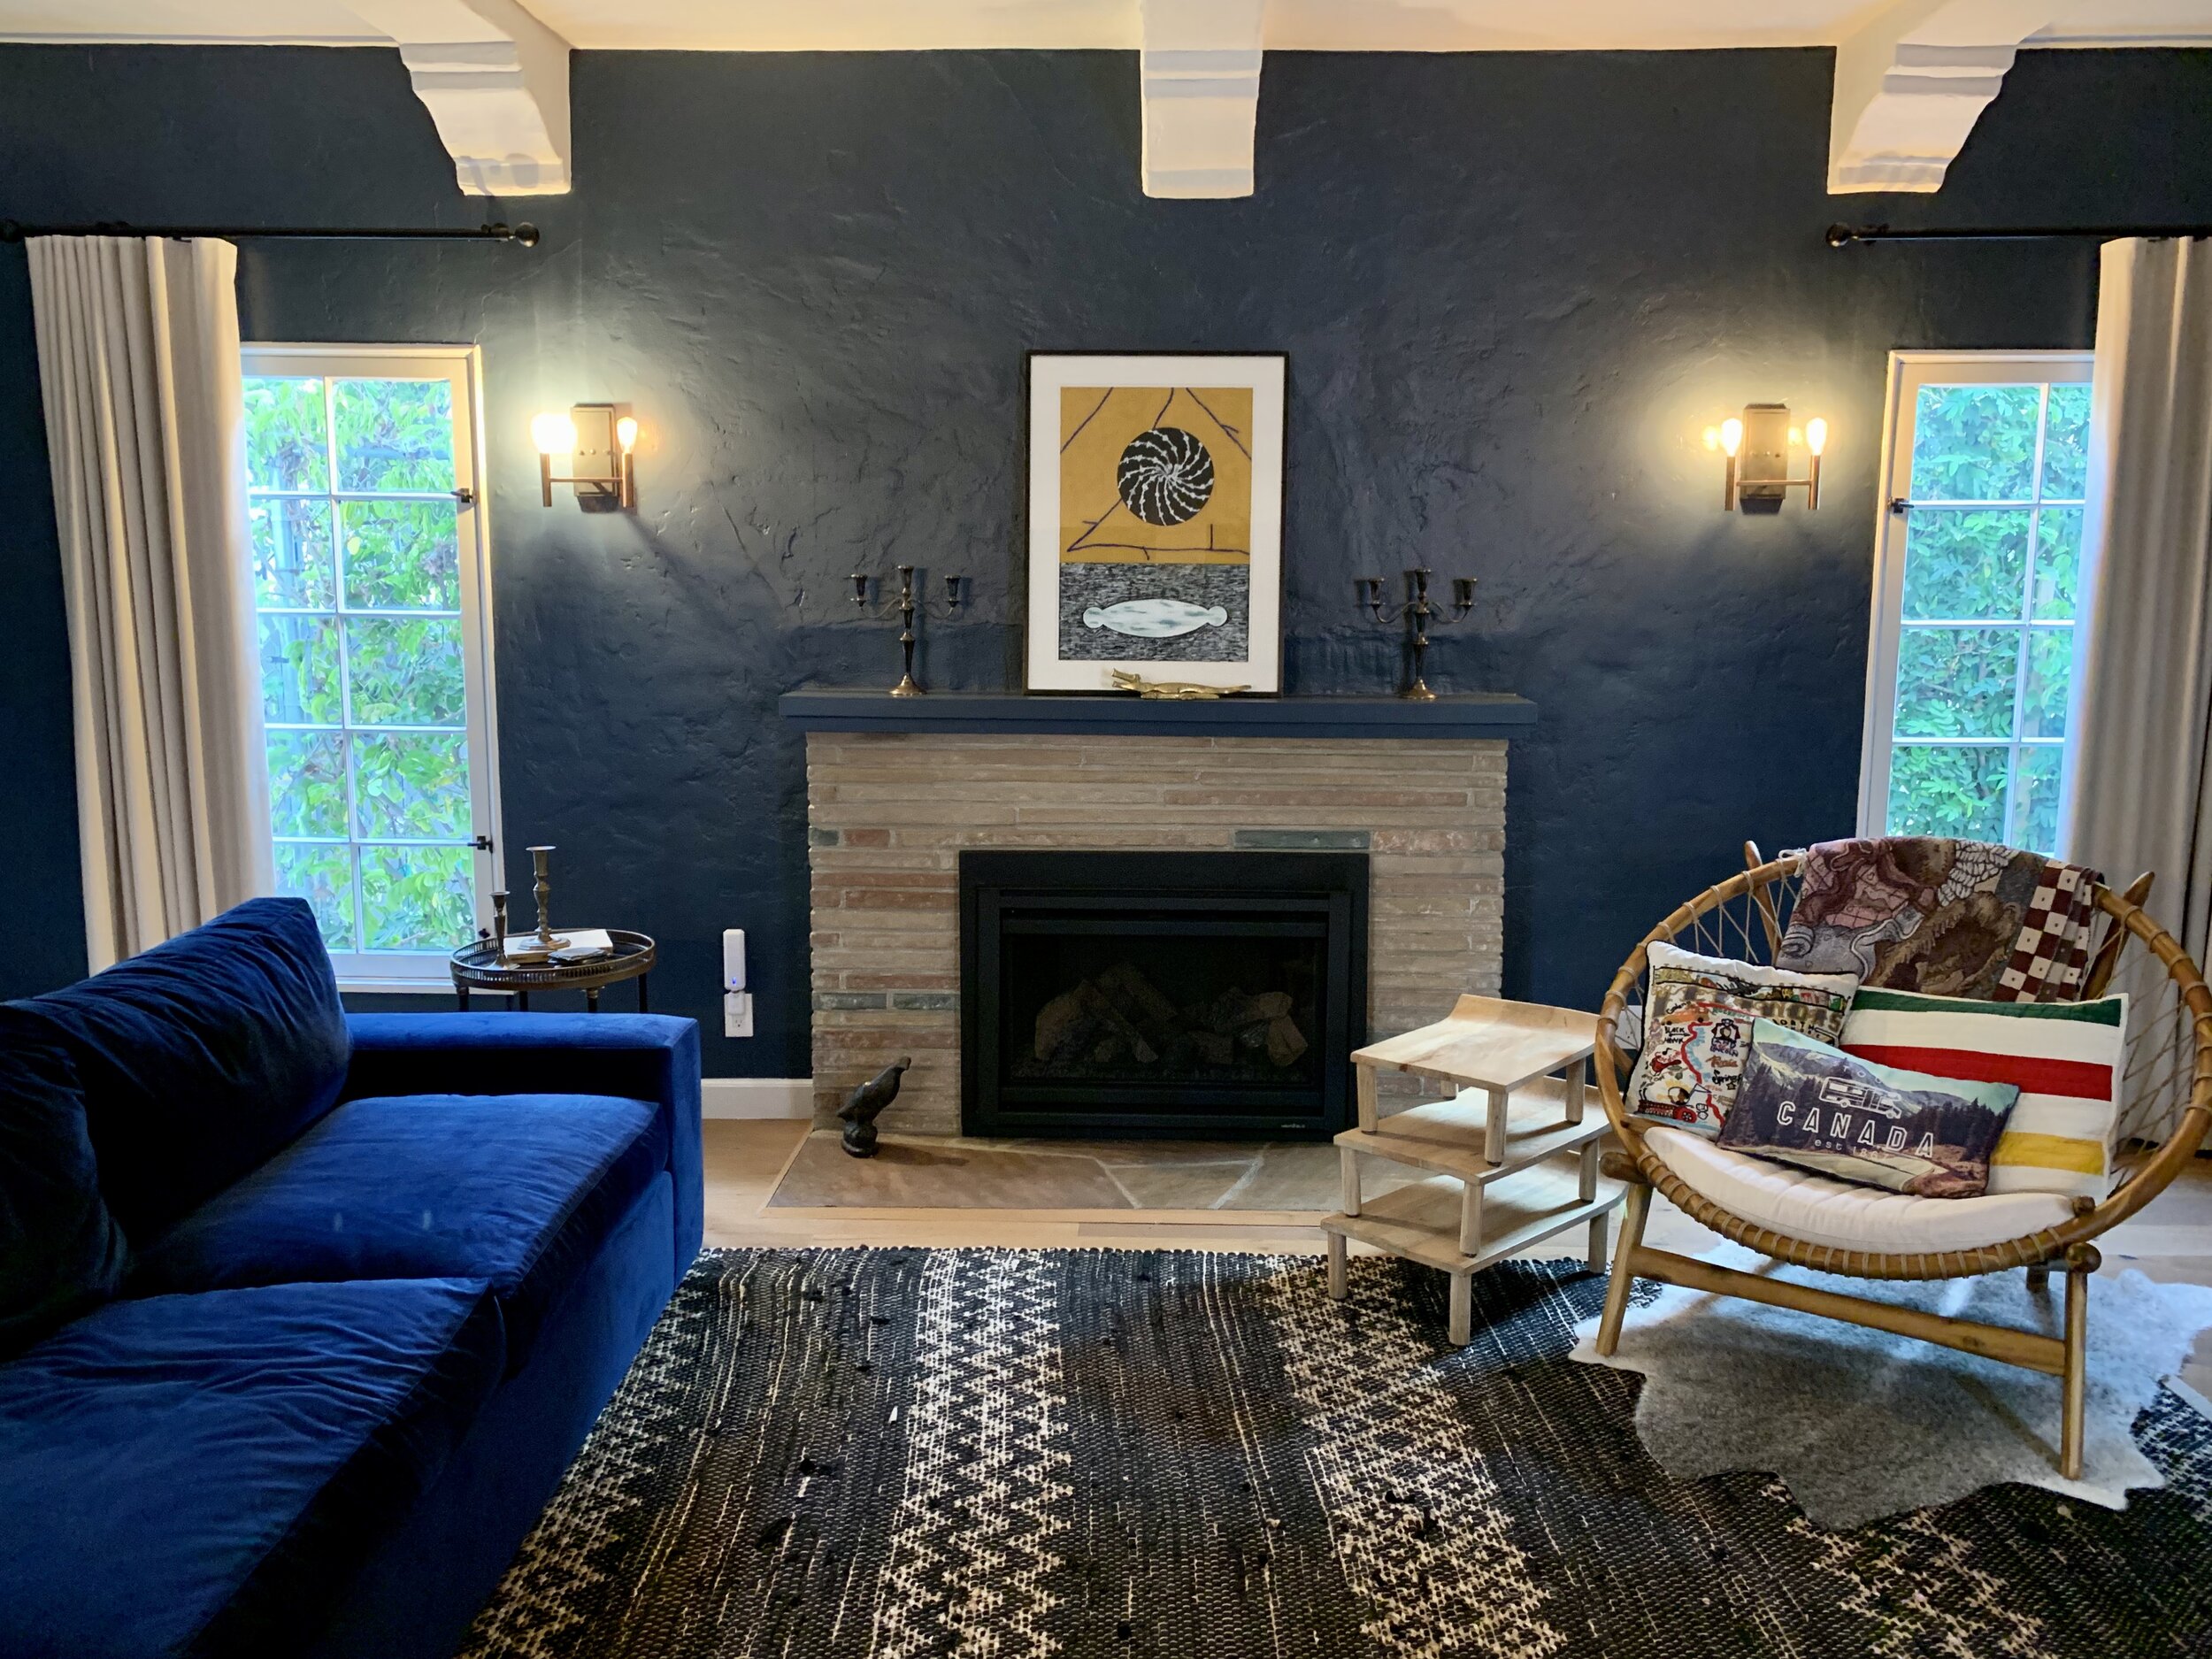
Once everything was moved out of the living room we were able to move onto the fifth step, Style. When it comes to living rooms the best place to start is with the couch. We went to The Joneses LA one of my favorite furniture stores in Los Angeles. We brought the measurements with us and presented them to the salesperson and from there we explored various ideas for the couch. We decided on a left side sectional with a chaise lounge that opened up to a kingsize bed. We were able to go through books of swatches to pick the perfect dark-colored fabric. As we perused the showroom we were able to see the different styles of couches and pick the one they liked the best.

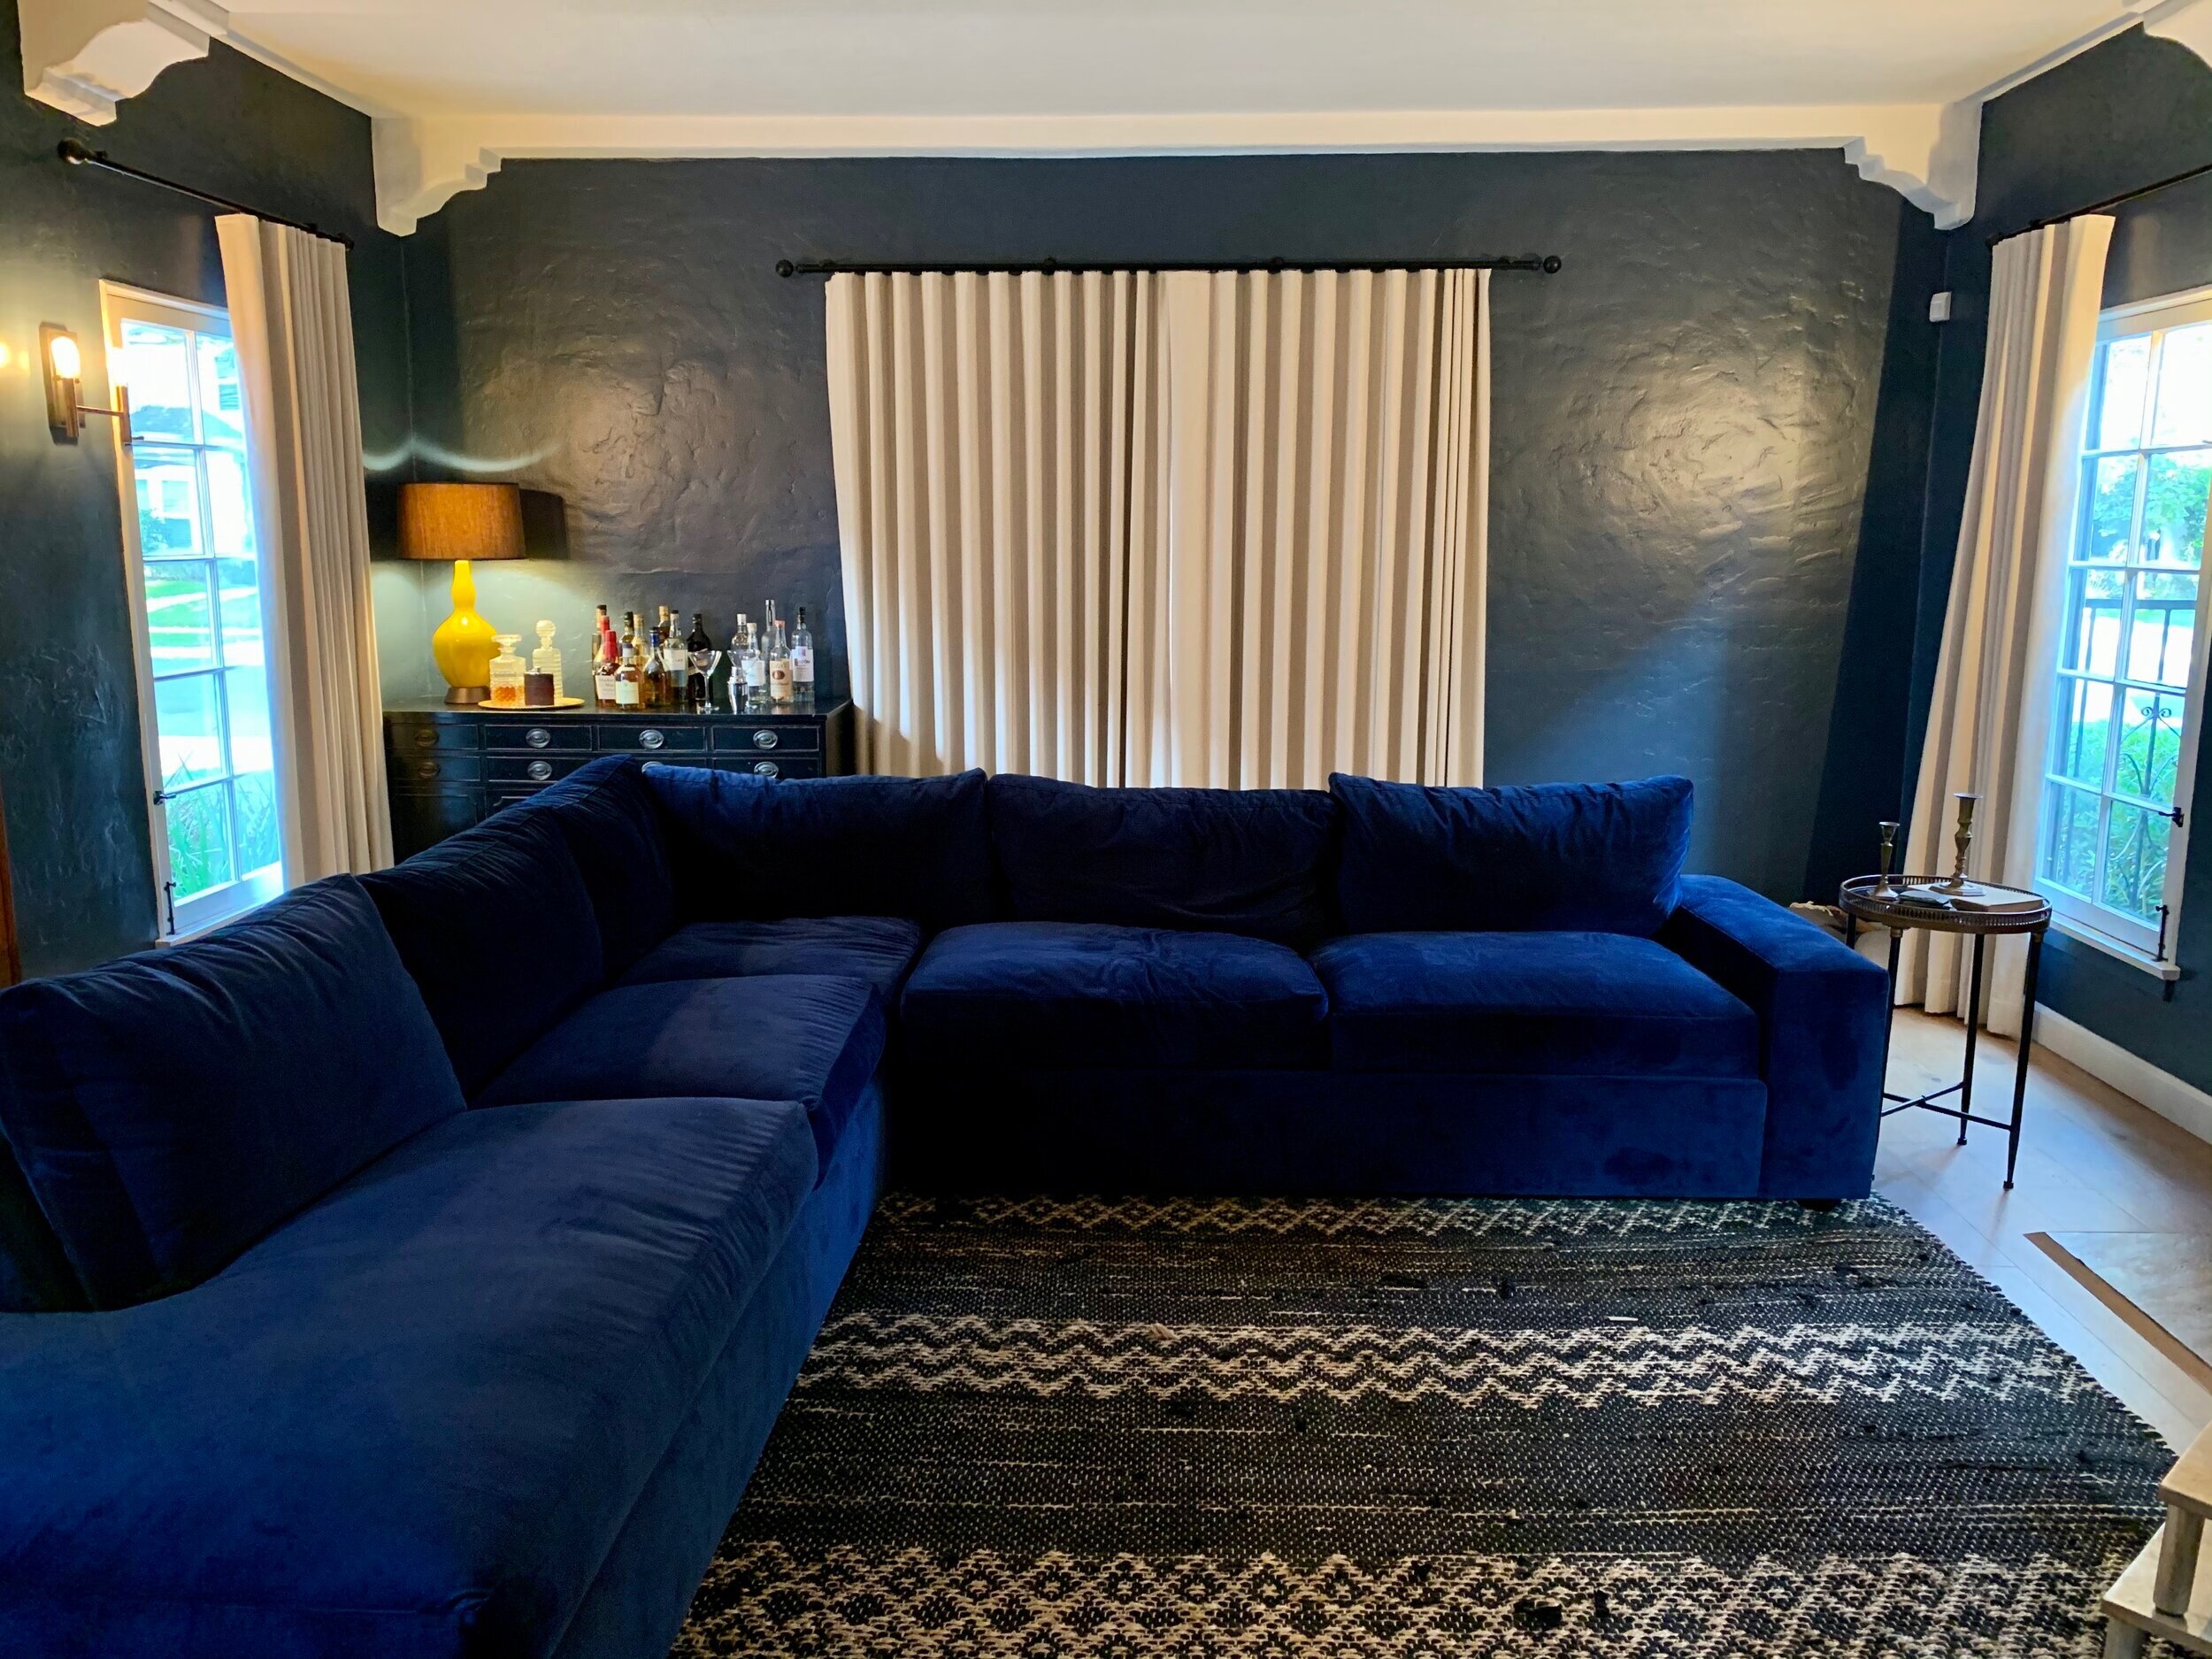
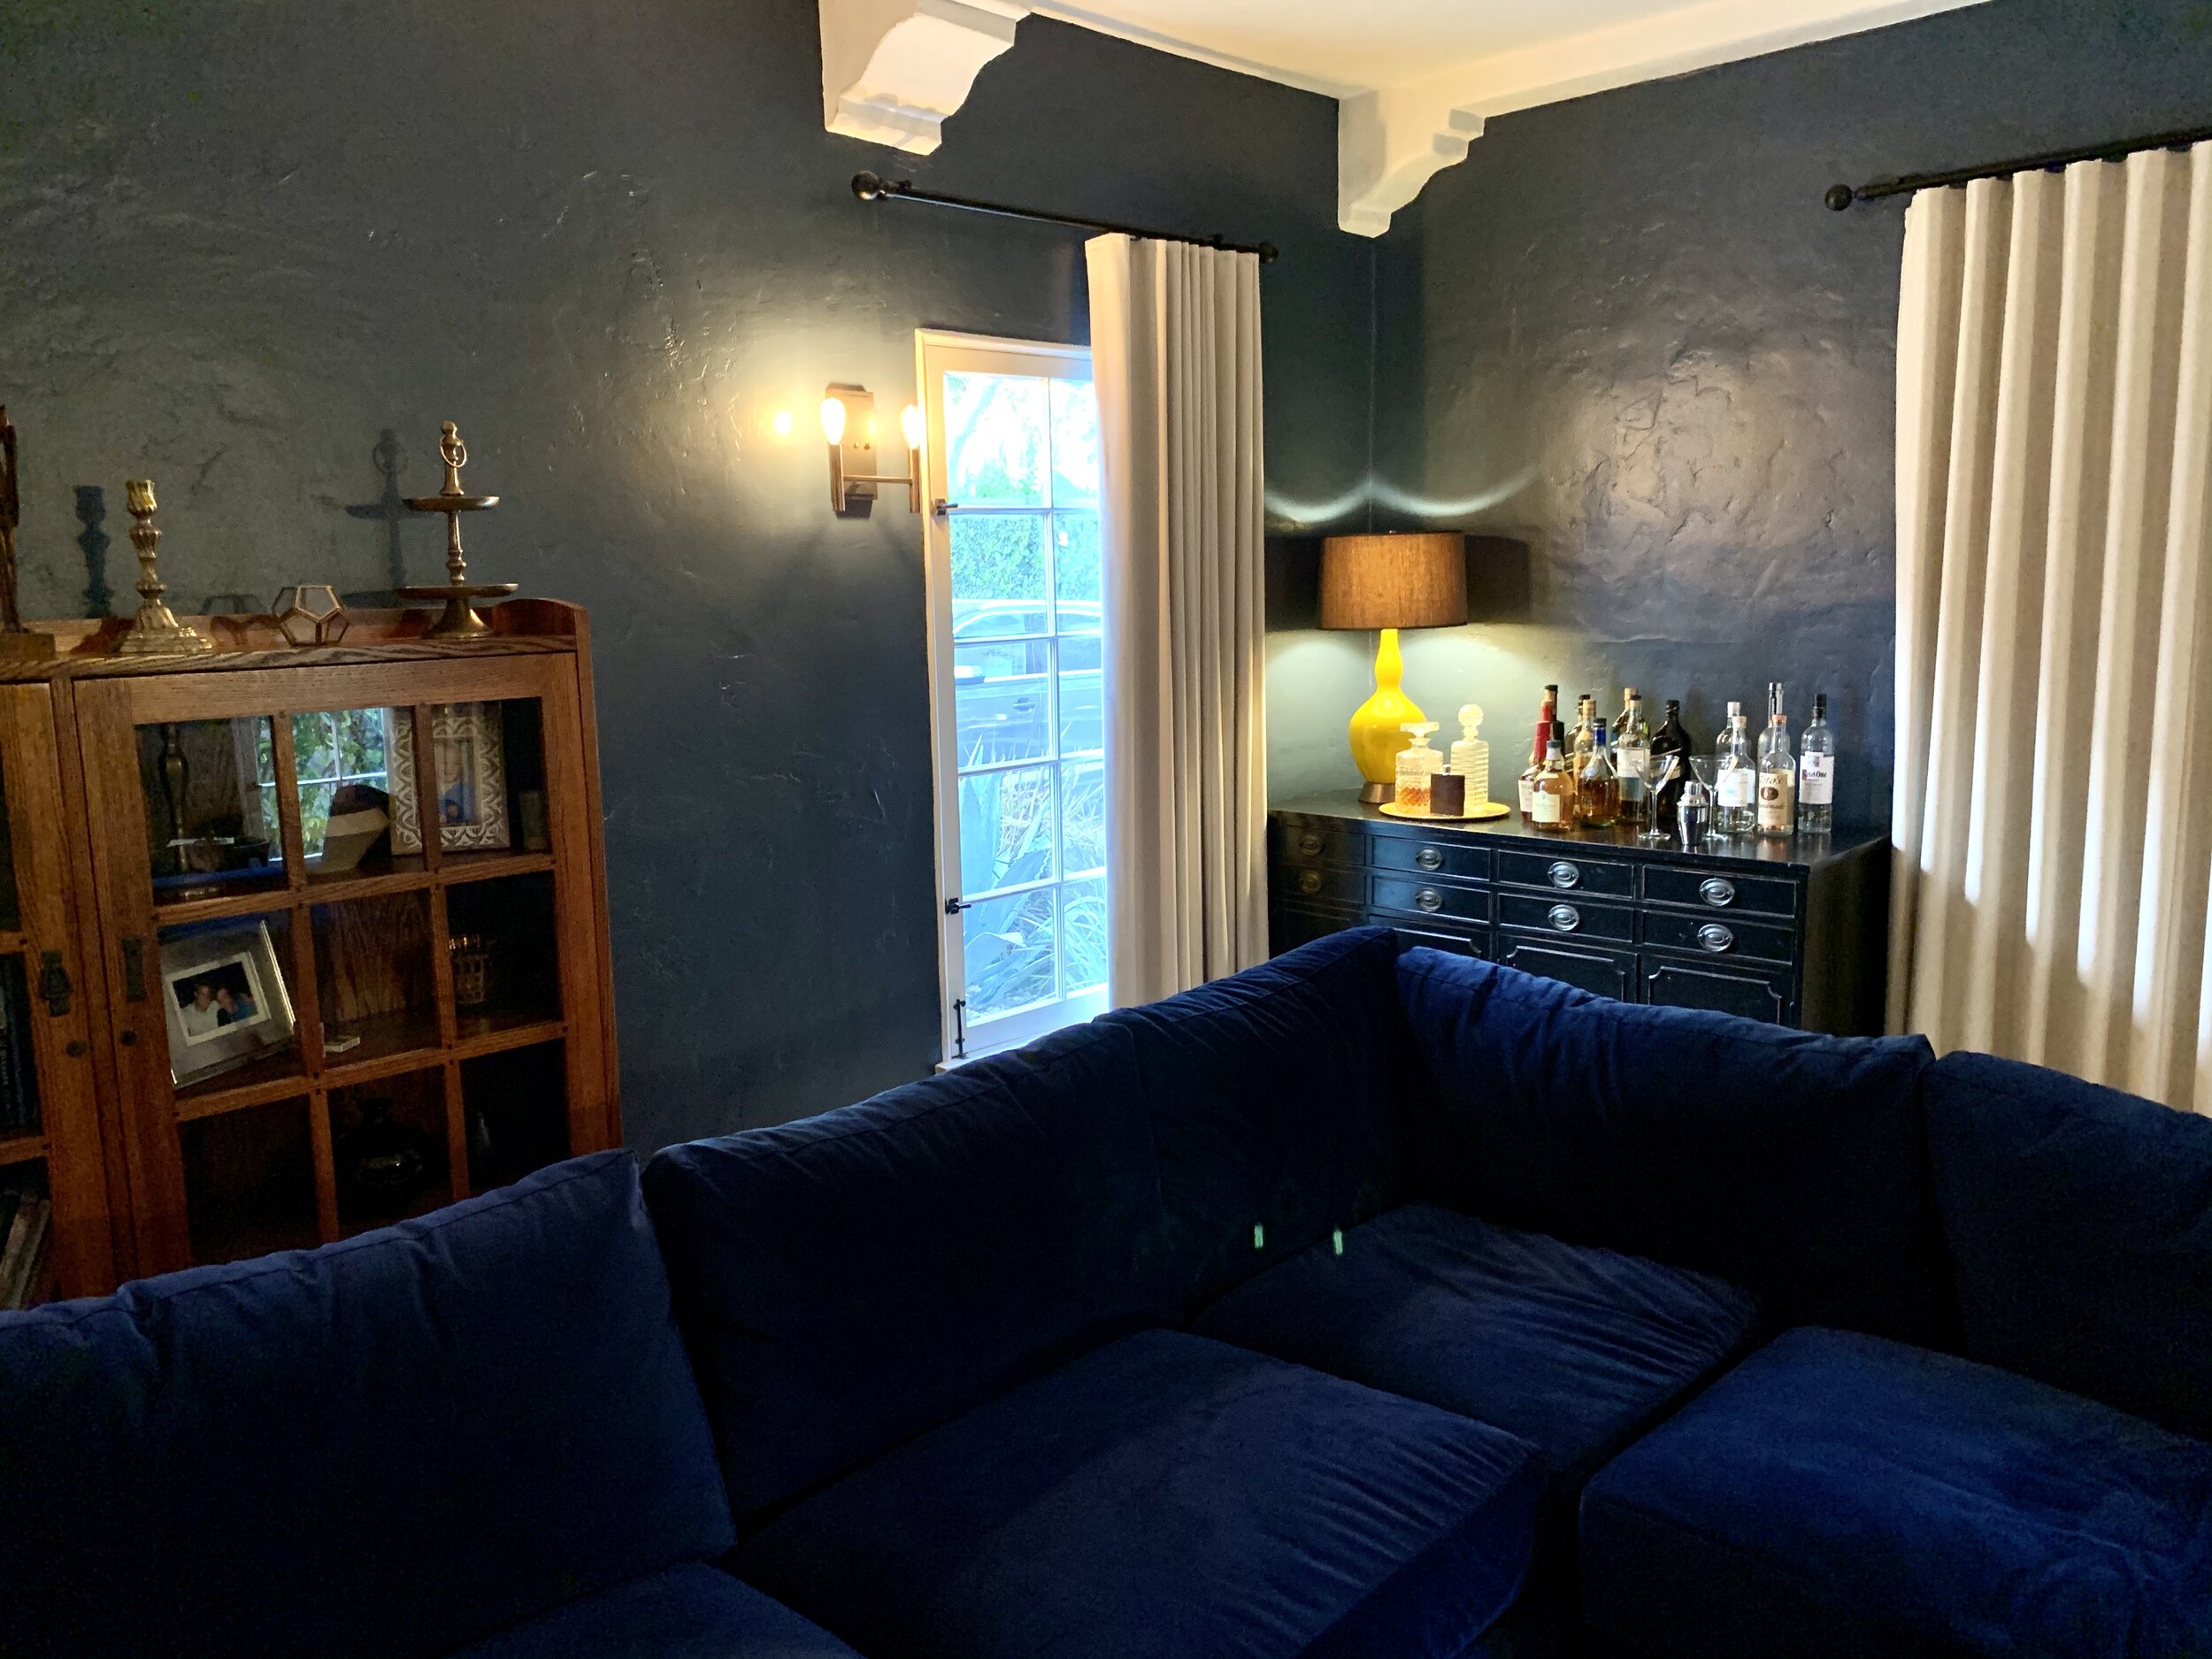
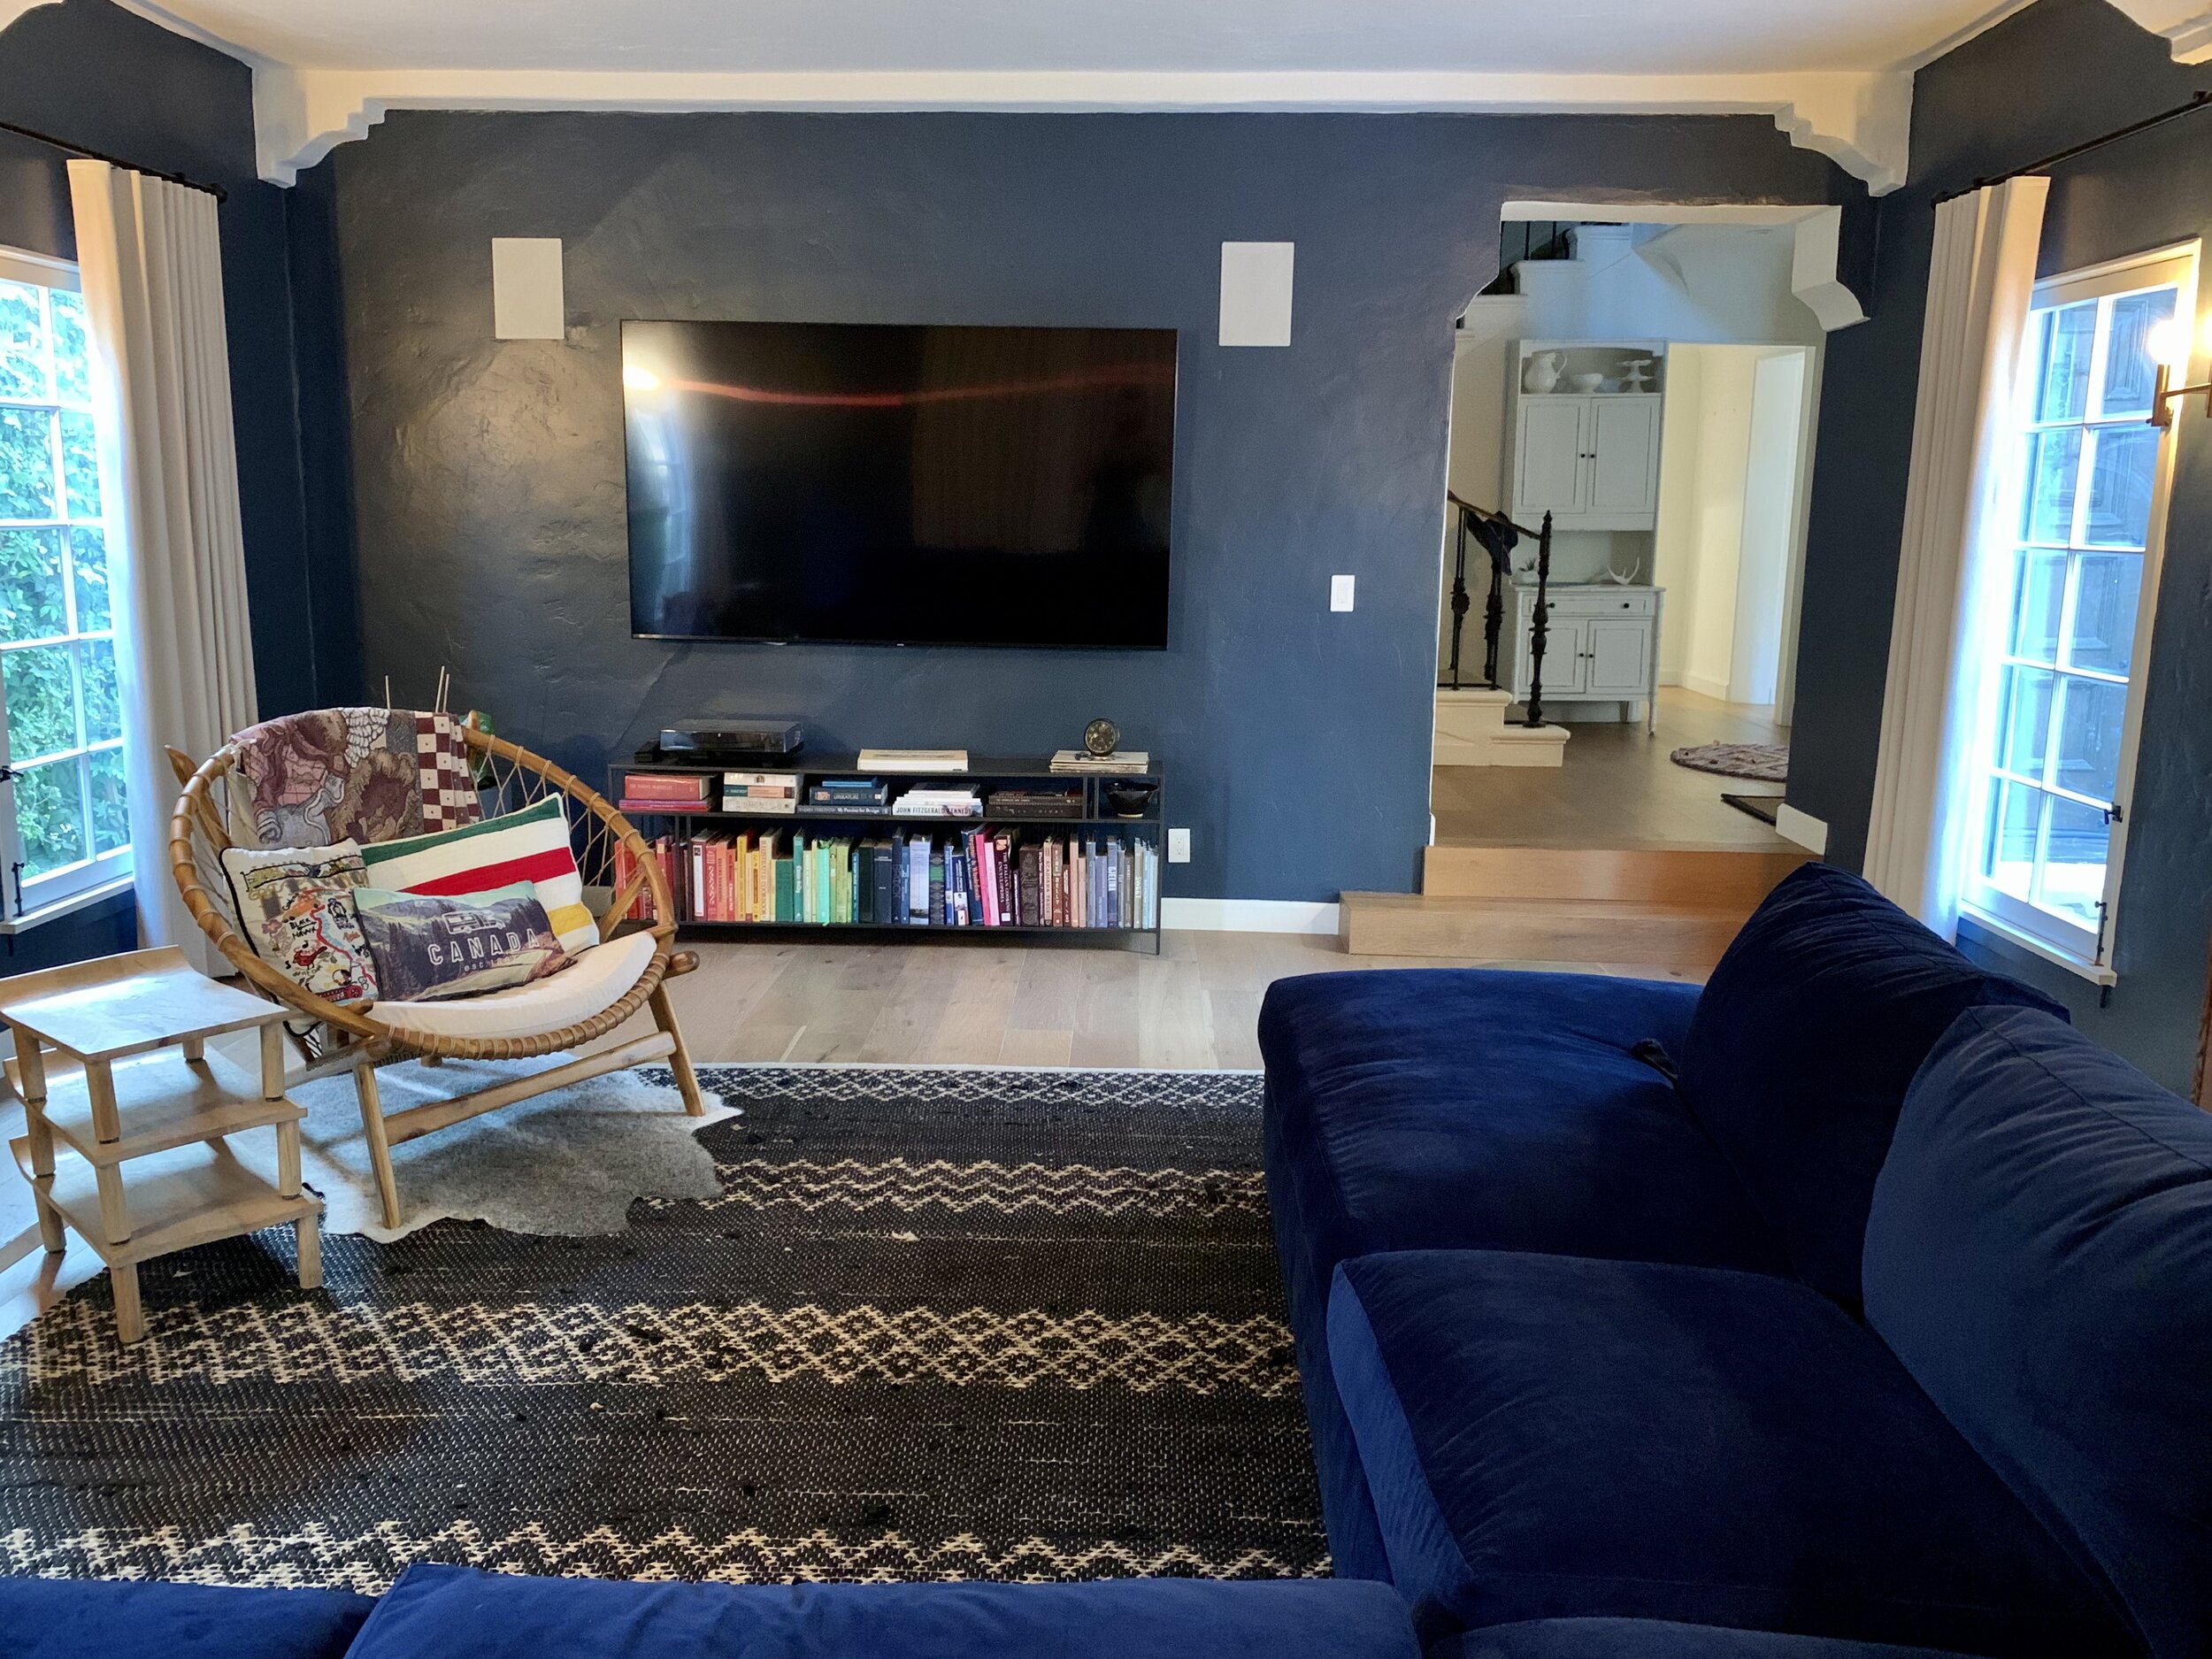
Next, we chose to use a console they already owned that worked perfectly for the bar area. As for the window treatments, we went with The Shade Store on Melrose Ave. It was a treat to be able to view all the fabrics and look at the hardware to see how they worked.

We needed to paint the room and ended up choosing this rich dark blue. This color really made a bold statement in this living room and my client fell in love with it. No more boring here.

I love the transformation of this living room. What do you think? Is there a room you would like to transform?


Time to Digitize

For years I have been helping clients around the Los Angeles area get rid of the clutter and belongings that no longer serve them. But what about personal keepsakes that could still bring joy but are inaccessible and unusable, specifically, the videos and photos rendered obsolete by our fast-moving technology?

Some of you may know that my sister is not well. Her battle with cancer has been devastating, and she will never be the same again. I don’t want to live in the past, but I desperately want to watch the home video of us from when we went to Hawaii. Of course, it is a VHS tape and I don’t own a VCR anymore. I know why I’m keeping it, even though I cannot watch it, and that is the spark for this blog post.

This is where Jeremy Suede from I.O.Solutions comes in. I know Jeremy from NAPO so it was a no-brainer to use his services. Here’s what he did for me:

1 - Converted all VHS tapes into iMovies on my external hard drive.

2 - Transferred all CDs (old photos and headshots) and DVDs (old short films from my acting days) onto my external hard drive.

3 - Transferred all items on my big, old, heavy hard drive to my sleek, new, mega-memory G Drive, then cleared the antiquated device so it could be donated.

I now have all my “stuff” in/on a 4.33” x 3.23” x 0.43” box/hard drive and can access it anytime I want.

Jeremy and I at NAPO-LA’s Monthly Meeting.

Jeremy and I at NAPO-LA’s Monthly Meeting.

How it works…I called Jeremy and he met me at a Starbucks in the Valley, (which was closer to me then his office), where I handed over my precious items. I have to say, when he was walking away with all my memorabilia I had a pit in my stomach thinking, what if he never comes back?!

To put my ‘fear of lack’ to bed, Jeremy did in fact return 2 weeks later with all my “stuff” on my G Drive. I paid him a very reasonable fee through Venmo and we parted ways.

As soon as I got home I plugged my hard drive into my computer and cried like a baby watching the video of my sister and I from over 20 years ago. I couldn’t have been happier.

My sister and I in Hawaii, early 90’s.

My sister and I in Hawaii, early 90’s.

Cautionary tale: Jeremy told me that had I waited any longer, the tapes could have deteriorated and the footage would have been lost forever. I am so grateful I have a physical reminder of a magical memory with my sister.

If you have memories that brings you joy, I urge you to digitize. Whether via hard drive or uploading to your cloud, you can keep more stuff in less space, and have it in a vastly more accessible way. Less clutter, more joy. Win-Win!

I’m thinking this would be a great gift this holiday season: a gift certificate to I.O.Solutions!

Don’t let the past clutter up your present.

I hope you create new wonderful memories this holiday season with your family and friends.

Happy Holidays!

Make Room for Summer Fun

It’s finally summer and feeling like it in Southern California. Not to complain, but it has been cold here in SoCal; Los Angeles is always sunny, but brrr. Anyway, the first hot day arrives and of course, we're clearing out a garage.

Fun Finds in the Garage.

Fun Finds in the Garage.

My clients' miscellaneous items have been nonpaying tenants of the garage since they moved into their home many years ago. I see this cluttered storage issue all the time, so here's a pro hint: when we store stuff in the garage/attic/crawlspace to be sorted later, for that magical "I’ll get to it when I have more time," time, it’s a good sign the items may never see the light of day again. 

We found a great variety of items in boxes and crates, including old clothes, paperwork from a job that they long moved on from, and ancient electronics with outdated technology. We had some fun with the donations on this job...


The organizing part of this garage gig was easy, considering there were really only a few items my fab clients wanted to keep: a few nice pots and pans, family heirloom fancy glasses, some long-lost decor that is finally going to be used, and some items that belong to other family members that need to be returned. From there, we donated what we could, and then called 1-800-GotJunk for the rest. Presto! Space!

Before and After of One Car Garage.

Before and After of One Car Garage.


We made room just in time for some summer fun in this garage... A new Mercedes!

Happy ending for my clients, but what if you actually use those DIY / gardening tools and yard equipment?  If you own a house and have kids it is a whole different ballgame: baby strollers, beach gear, camping supplies anyone? What about winter ski storage and holiday decor? How about bikes, helmets, scooters and surfboards?


Whatever the sport or season I’m here to help sort and purge. Once we figure out what is leaving your space, we take a look at what's left, and in the case of garage storage solutions, we call the experts. This is where the fun begins.

I love partnering with monkeybarstorage.com an amazing garage storage systems company. The local LA location is who I will collaborate with and figure out just how many bins and hooks you will need to fit all your sports equipment and baby gear for your growing family. Presto again!

So whether you're an outdoor junky with an extreme sports habit, an active family on the move, or finally getting that dream car, take a look at your space and then give me a call.  Together let’s create some more space to love this summer!

Creating More Space

We all want more space, well most of us. Ever the minimalist, I'm in the middle of downsizing from a mid-city 2-bedroom unit to a Culver City studio apartment; I'm just one person. Not like my client in Los Angeles with a growing family, totaling 8 people.

I've been working with this client for a while now. We've put systems in place to maximize every cabinet and drawer with organizers.  We've de-cluttered every thing that was not used or will never be used in the near future. Not one extra ladle took up valuable drawer real estate, not one mismatched plate in sight, no extra bottom pieces to Tupperware without a matching lid...you get my point. 

So on our latest work day, when I arrived to find my client attempting to put items away from her latest Costco run, all I could think of was, "No, no; these items are never going to fit!" We had maximized her space, but still couldn't accommodate her necessary bulk buys.

I'm a problem solver by nature, but boy, did I need to solve a bulk-sized issue that day. I looked around thinking that there had to be a way to make this work. Where could we add shelves or more storage?  My eyes settled on an unoccupied wall in the kitchen, and the answer appeared. After taking measurements, we concluded we would need something less then 13" deep. I knew it would be tricky, but not impossible.

Looking online, Ikea is always a go-to for me. That's where we found this shelving unit  and wouldn't you know it, perfect measurements! I was off to Ikea.

Did I mention that I build Ikea furniture:)

Did I mention that I build Ikea furniture:)

I do love building things. It was so rewarding to haul this unit in, build the structure, and fill it with items conducive to my client's needs!

Before and after close-up - The shelves are a perfect fit!

Before and after close-up - The shelves are a perfect fit!

Before and after wide view - They actually make the kitchen feel bigger!

Before and after wide view - They actually make the kitchen feel bigger!

We created so much usable vertical space! Now there's room for the extra protein powders and baby formula. The kids' lunch boxes have there own space instead of on top of the refrigerator, and the cook books are actually accessible. Paper towels - stored! Napkins - tucked away! Extra pancake mix - bring it on! 

After Picture front view

After Picture front view

The fun add-ons for better organization we used included: clip-on baskets for bread and produce, bottle rack for the wine:) and baskets for linen and party goods.

It was a great workday solving problems and creating more space to love!


Stay Organized in Your Bathroom & Take Back Your Morning

What would you do if you had extra time in the morning, without having to change your wake up time? Would you make yourself a cup of coffee with extra care, and actually have the time to enjoy it?  Would you write that friend you don't see often enough?  Would you journal, meditate, yoga, or even catch a few more precious Zzzs? Like in any area of the home, having an organized bathroom will save you time and money.  A well-planned bathroom will also reduce anxiety in your morning routine while saving you time, so you are set up to have a good morning, every morning.

So let's take our mornings back!  And let's start with the first stage of organization bliss: de-cluttering. To get started, and I can't stress enough, you must de-clutter first. Go through every individual item, pull what you use and need, then get rid of everything else. Most people tend to collect and hold on too many products, especially makeup. This is usually done with the best intentions; we don't want to be wasteful and there is a chance we might use the product again. I'm guilty of this...I think I might want to wear that purple eyeshadow for a girls' night out or Halloween. Of course, I bought it about 3 years ago, and I haven't worn it once; so, in the trash it goes. It's also good to keep in mind that makeup has a shelf life of about 3 months to 2 years; check out time frames in this article at popsugar.com; you'll be surprised how soon you should be ditching that liquid eyeliner. 

So you've de-cluttered; now it's time to organize what's left. Since we were on the topic of makeup, these are my favorite acrylic drawer organizers from The Container Store. Measure the drawer in your bathroom to find the best fit and arrangement. I also recommend using grip drawer liners to help the acrylic organizers stay in place.  I love these drawer organizers because they can be used for so many different bathroom items...your toothbrush, toothpaste, dental floss etc., and if something spills or leaks, you only need to take out one caddy for easy cleaning.

Let's take a look at the sink area; bathroom counters are a prime spot for clutter. Cluttered Counter Syndrome usually occurs because we like to keep out what we use everyday to get ready in the morning. On the whole, CCS makes sense, but I like to give my clients a basket or bin, and the morning routine goes inside, so things like body lotion, deodorant, hair gel etc., are not lingering on the counter tops. I recommend storing the basket/bin under the bathroom sink, so you can grab the b/b in one motion after your shower, get ready, and then tuck the b/b back under the sink when finished, and, voila! No CCS. 

Now, the under-the-sink area can get a bit cramped, so I've become obsessed with these Like-It modular drawers, because they take full advantage of usable vertical space.  With these modular drawers you can store items with double or even triple the space, and with the variety of sizes, you can find one or two that fit even in the smallest of under-the-sink spaces, and still have room for your morning routine b/b.

So take some time to invest in taking back your morning, and save yourself future aggravation. 

Happy organizing:)


5 Ways to Label Your Stuff

Labeling is the last step in the organizing process. It happens after you've set aside time for dedicated de-cluttering, after going through all your things and getting rid of the stuff you don't want or use, after you're left only with the things you need, use and love. The label goes on after your trip to The Container Store for a stylish upgraded storage solution, and after every item in the process has been nestled in a location that is intuitive to your lifestyle. Now. Now is the time. All you have to do is label.

As a professional organizer in LA, I know that if you label your stuff, it will save you time and aggravation. Here are some ways to get you started with the final step in organizing, labeling: 

Easily the least-tedious and hand-touched way to label is to utilize containers with blank labels already on them. I love using these Jars (above) in the pantry; they have a clean look and they're air-tight to keep your food fresh. Tip - Cut out the directions from your favorite pantry items and place it in the jar with the expiration date on it.

Sticker labels are another way to go. I like using the chalkboard type for easy re-purposing, and I use them just about everywhere: kitchen, bedroom closets, hallway closets, etc.

Hanging labels are great when you can't use labels with adhesives. I often use the chalkboard gift tags but there are tons of different types. I primarily use hanging labels for baskets, but they also come in handy at parties to label beverage servers, favors, etc.

Of course, I cannot get through this blog without talking about my organizing companion, the P-Touch. I got my first label maker over 10 years and I still use it. It's great for canisters in the pantry, folders for the filing cabinet, for craft bins and drawers. The P-Touch-80 is easy to use and it's light weight. And 10 years. That's longer than most of my relationships.

About a year ago I upgraded to Brother P-Touch D400AD - don't worry, P-Touch-80 is thankful for the shared workload. The P-Touch D400AD offers more personality then the P-Touch-80, boasting nifty boarders, basic clip-art-like pictures, and a variety of fonts. If my clients are game, I ask them to choose the pictures and boarders to personalize their space. 

Of course, if you don't want to get too fancy, you can just print on address labels and call it a day. I employ this method for larger jobs for efficiency and to avoid hand cramps, and to corporate clients for a more professional, less personal touch.

In the end it doesn't matter what method you choose, but take my word as a professional organizer; labeling your items will make your day-to-day life easier: imaging finding exactly what you are looking for in the first place you look for it, every time.

Find this helpful? 

I'm always looking for knew ways to label things. 

Have a great method? I'd love to hear it! Thoughts on labeling? Leave them below! 

Thanks for reading, and happy organizing!


3 Ways to Organize Baby Clothes

For new and expecting moms, it can be overwhelming with all the baby items that come into the home. Many of the items are baby clothes. You see cute outfits at the store, or there was a great sale and maybe they're four sizes too big, but you get them anyway because they'll eventually fit, right?! And it's not just you, friends and family give baby clothes as gifts or bags of hand-me-downs that can range from all different ages. But what do you do with the clothes in the meanwhile? For this blog we are going to concentrate on clothing storage solutions for newborn to two year olds. 

I've found the best way to get started is to make piles of clothes by size. We know the first two years are broken down into newborn and/or 0-3 months, 3-6 months, 6-12 months, 12-18 months and then 18-24 months. First we separate, then we decide what we want to keep. Even if that skull-and-crossbones onesie was a gift for your darling Penelope, or the threadbare hand-me-down was given by a cousin you don't see enough, it doesn't mean you have to keep it. Focus on what serves you, and what will be right for your child.

Now that we have our "keep" piles, separated by size, we can decide how we want to organize the clothes. You can use one or a combination of these ideas, but I like incorporating all three.

  • Baskets with chalkboard labels.

  • Dividers for hanging clothes.

  • Clear airtight plastic storage bins with labels.

The baskets with chalkboard label method is great if you have a lot of shelf space; I encourage storing the baskets on the shelves in a closet or bookshelf. Pro Tip: Don't forget to measure your shelves before buying any baskets to make sure they will fit properly. Adhere chalkboard labels on them if they don't already come with them.

This method is great because as your child grows, you can easily swap the sizes. The baskets in the picture below did not come with labels, so I purchased chalkboard gift tags from The Container Store, trimmed them to the shape I wanted, and used this double sided tape to attach them. Personalize it: there are oodles of baskets and labels to choose from, so you can add your own style to your organization endeavors.

The hanging clothes with dividers method is terrific if you have lots of hanging space. You can use clothes dividers, pre-labeled by month/size, or use plain ones. With the latter of the two, using a label maker or chalkboard labels for each divider, allowing an easy change of the sizes as your child gets older.

The third method works for the months to come. The labeled, airtight storage allows for long term keeping, and knowing your baby's clothes are staying clean, and bug and dust free, is especially great if you are storing in an attic, basement or shed. This is also wonderful if you plan on having more children. When you are done with one size, replace it with the next size up, and the first size goes into storage.


The picture of the shed is from a client that has four boys. We wanted to keep all the hand-me-downs organized, so when she is ready for the next size up, she knows exactly where everything is. We also did bins for shoes for the kids by size. 

Did you find this helpful? Comment below with your thoughts, and I would love to hear how you organized your children's clothes! For more useful tips check out Momlovesbest


A Few Ways to Store Your Purses

Living in Los Angeles, I get to work with a lot of opened minded clients, that let me try different organizing ideas to discover what works best for them. After I finished organizing this client's closet, the last thing to consider was her many purses and bags. 

It would have been fine to keep the bags neatly on the top shelf of her closet, but I was concerned about the dust and not being able to see the purses that were in the duster bags.  For me, out of site, out of mind; I forget I have, and I feel this is the same with my clients. 

So, off to The Container Store I went, in search of a solution to the problem of dust, seeing all the bags, and time ... I don't want to spend the time looking through duster bags to find a purse for the evening.

I don't know why I find such joy out of using an organizing tool for something that was actually designed for something else ... anyway, I found sweater storage bags, small PEVA Chest Clear 12" x 9" x 6", just big enough for one or two purses, and the storage bags can be stacked; I love it when you can use more vertical space. 

Ok, that works, right? Well ... now you can see the bags but all the black and brown ones look the same. So, I went back to the old picture trick. It works great for shoes, and now I will be using this for purses as well. I don't have a polaroid camera anymore, but I did have 8168 shipping labels. I took pictures of all the purses on a white background, printed them out on the labels and cut them with a paper cutter for a straight edge. They stick on really well, so no peeling corners over time.

What I also like about the pictures, is if you want to store the purse in the duster bag that it came with, you can and still know what is what in your closet. 

Of course, there's not only one way to organized purses. Here are some other tools to use. I like these Cubbies that are made for shoes and purses, as well as Hanging Canvas Shelves; these are great for clutches.

Like these tips or have a great one to share? Let us know in a comment below. 

If you have a storage dilemma, I can help! Email me at info@spacetolove.com.