Feng Shui in the Bedroom & Unfinished Projects

Moving in together is an exciting milestone, but it also comes with its challenges—especially when it comes to merging two sets of belongings into one shared space. Too often, we focus on making room for things rather than making space for the people we love. That’s where decluttering, organizing, and Feng Shui come in to create a balanced, harmonious home.

And speaking of making space… I finally made space on my desktop by editing this video—ten years later.

Yes, you read that right. I filmed this video ten years ago. And then? I let it sit. For a decade. I told myself I’d edit it when I had time. And let’s be honest—we’ve all said that before.

Somehow, even during Covid, when I had all the time in the world, I still didn’t touch it. It was like that one drawer in your house that you swear you’ll organize one day—except my drawer was digital, and it had a ten-year-old video collecting dust.

But here I am, finally finishing it. And honestly? It feels amazing. Not just because the video is done, but because unfinished projects take up mental space, just like physical clutter. The longer we let things linger, the more they weigh on us.

So, I’ve come up with a new motto: Finish it or forget it.

If there’s something sitting on your to-do list, ask yourself:

  • Do I still care about this?

  • Is it worth finishing?

  • If not, can I let it go?

If it matters, finish it. If it doesn’t, free yourself from it. Either way, you win.

Which brings me back to decluttering—because honestly, finishing this video felt a lot like helping my clients clear out an entire closet.

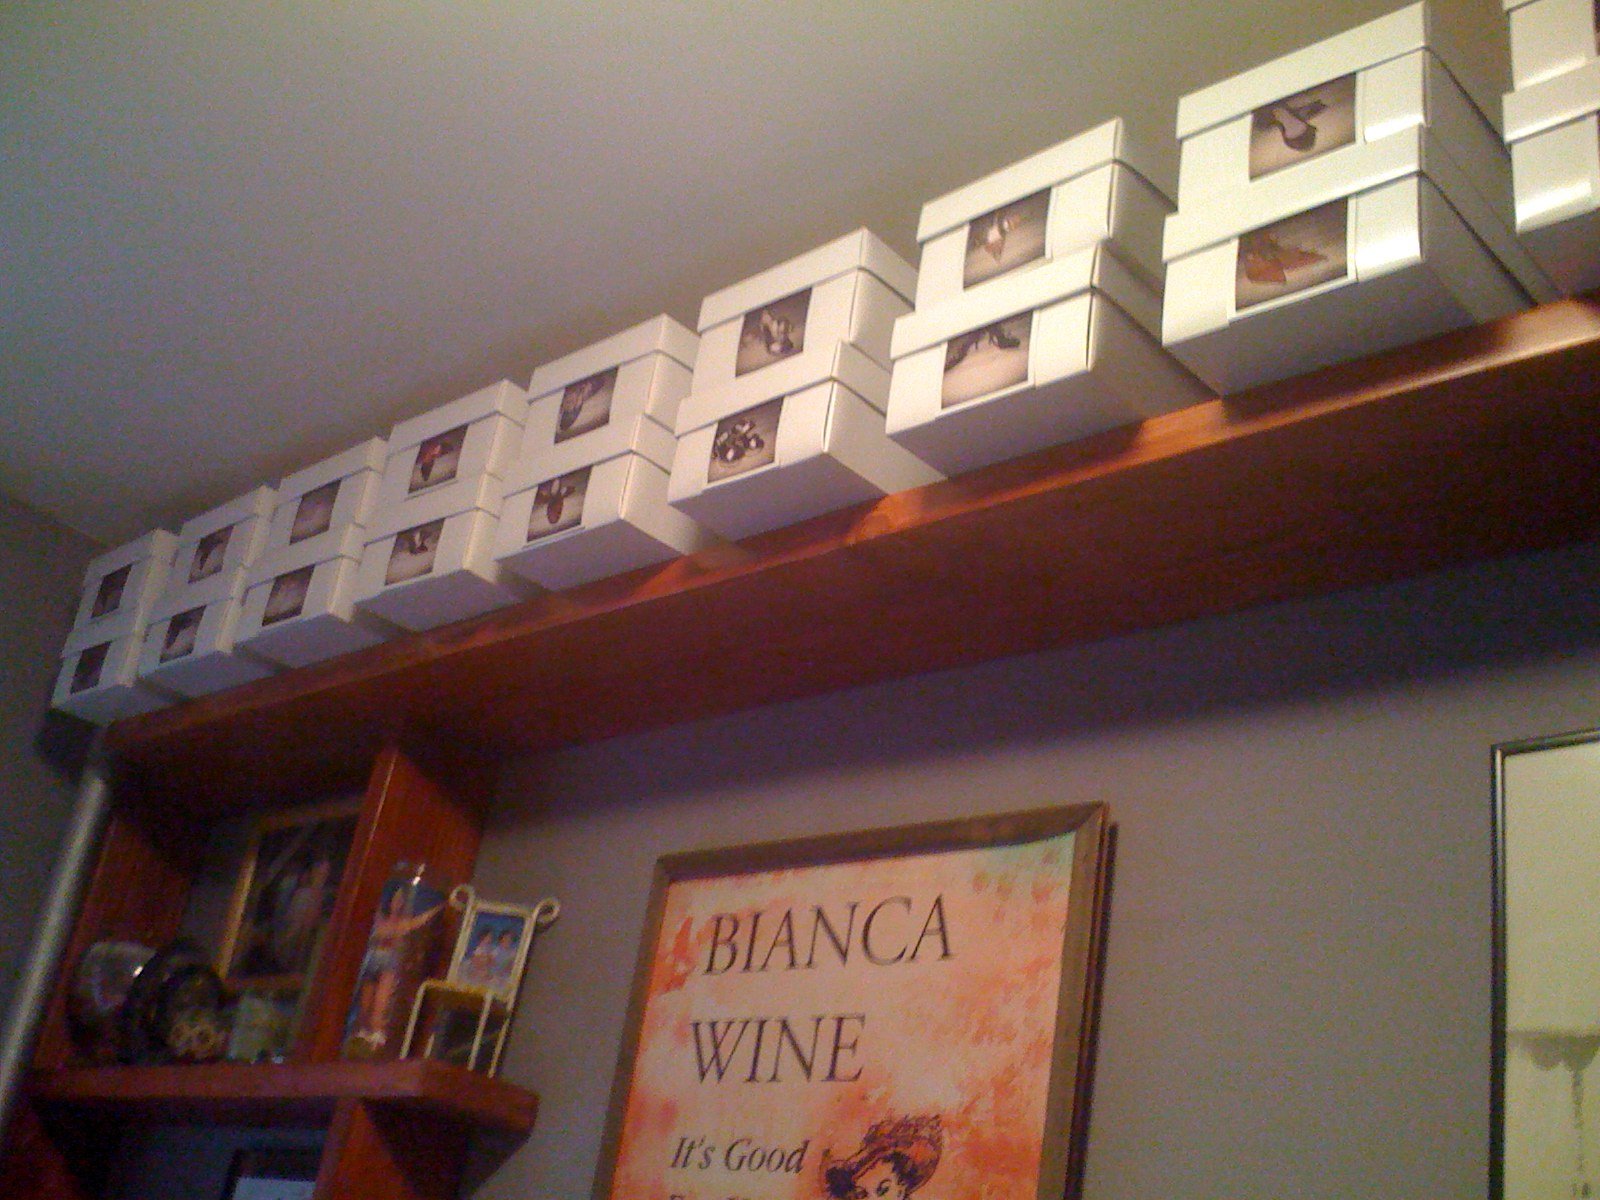
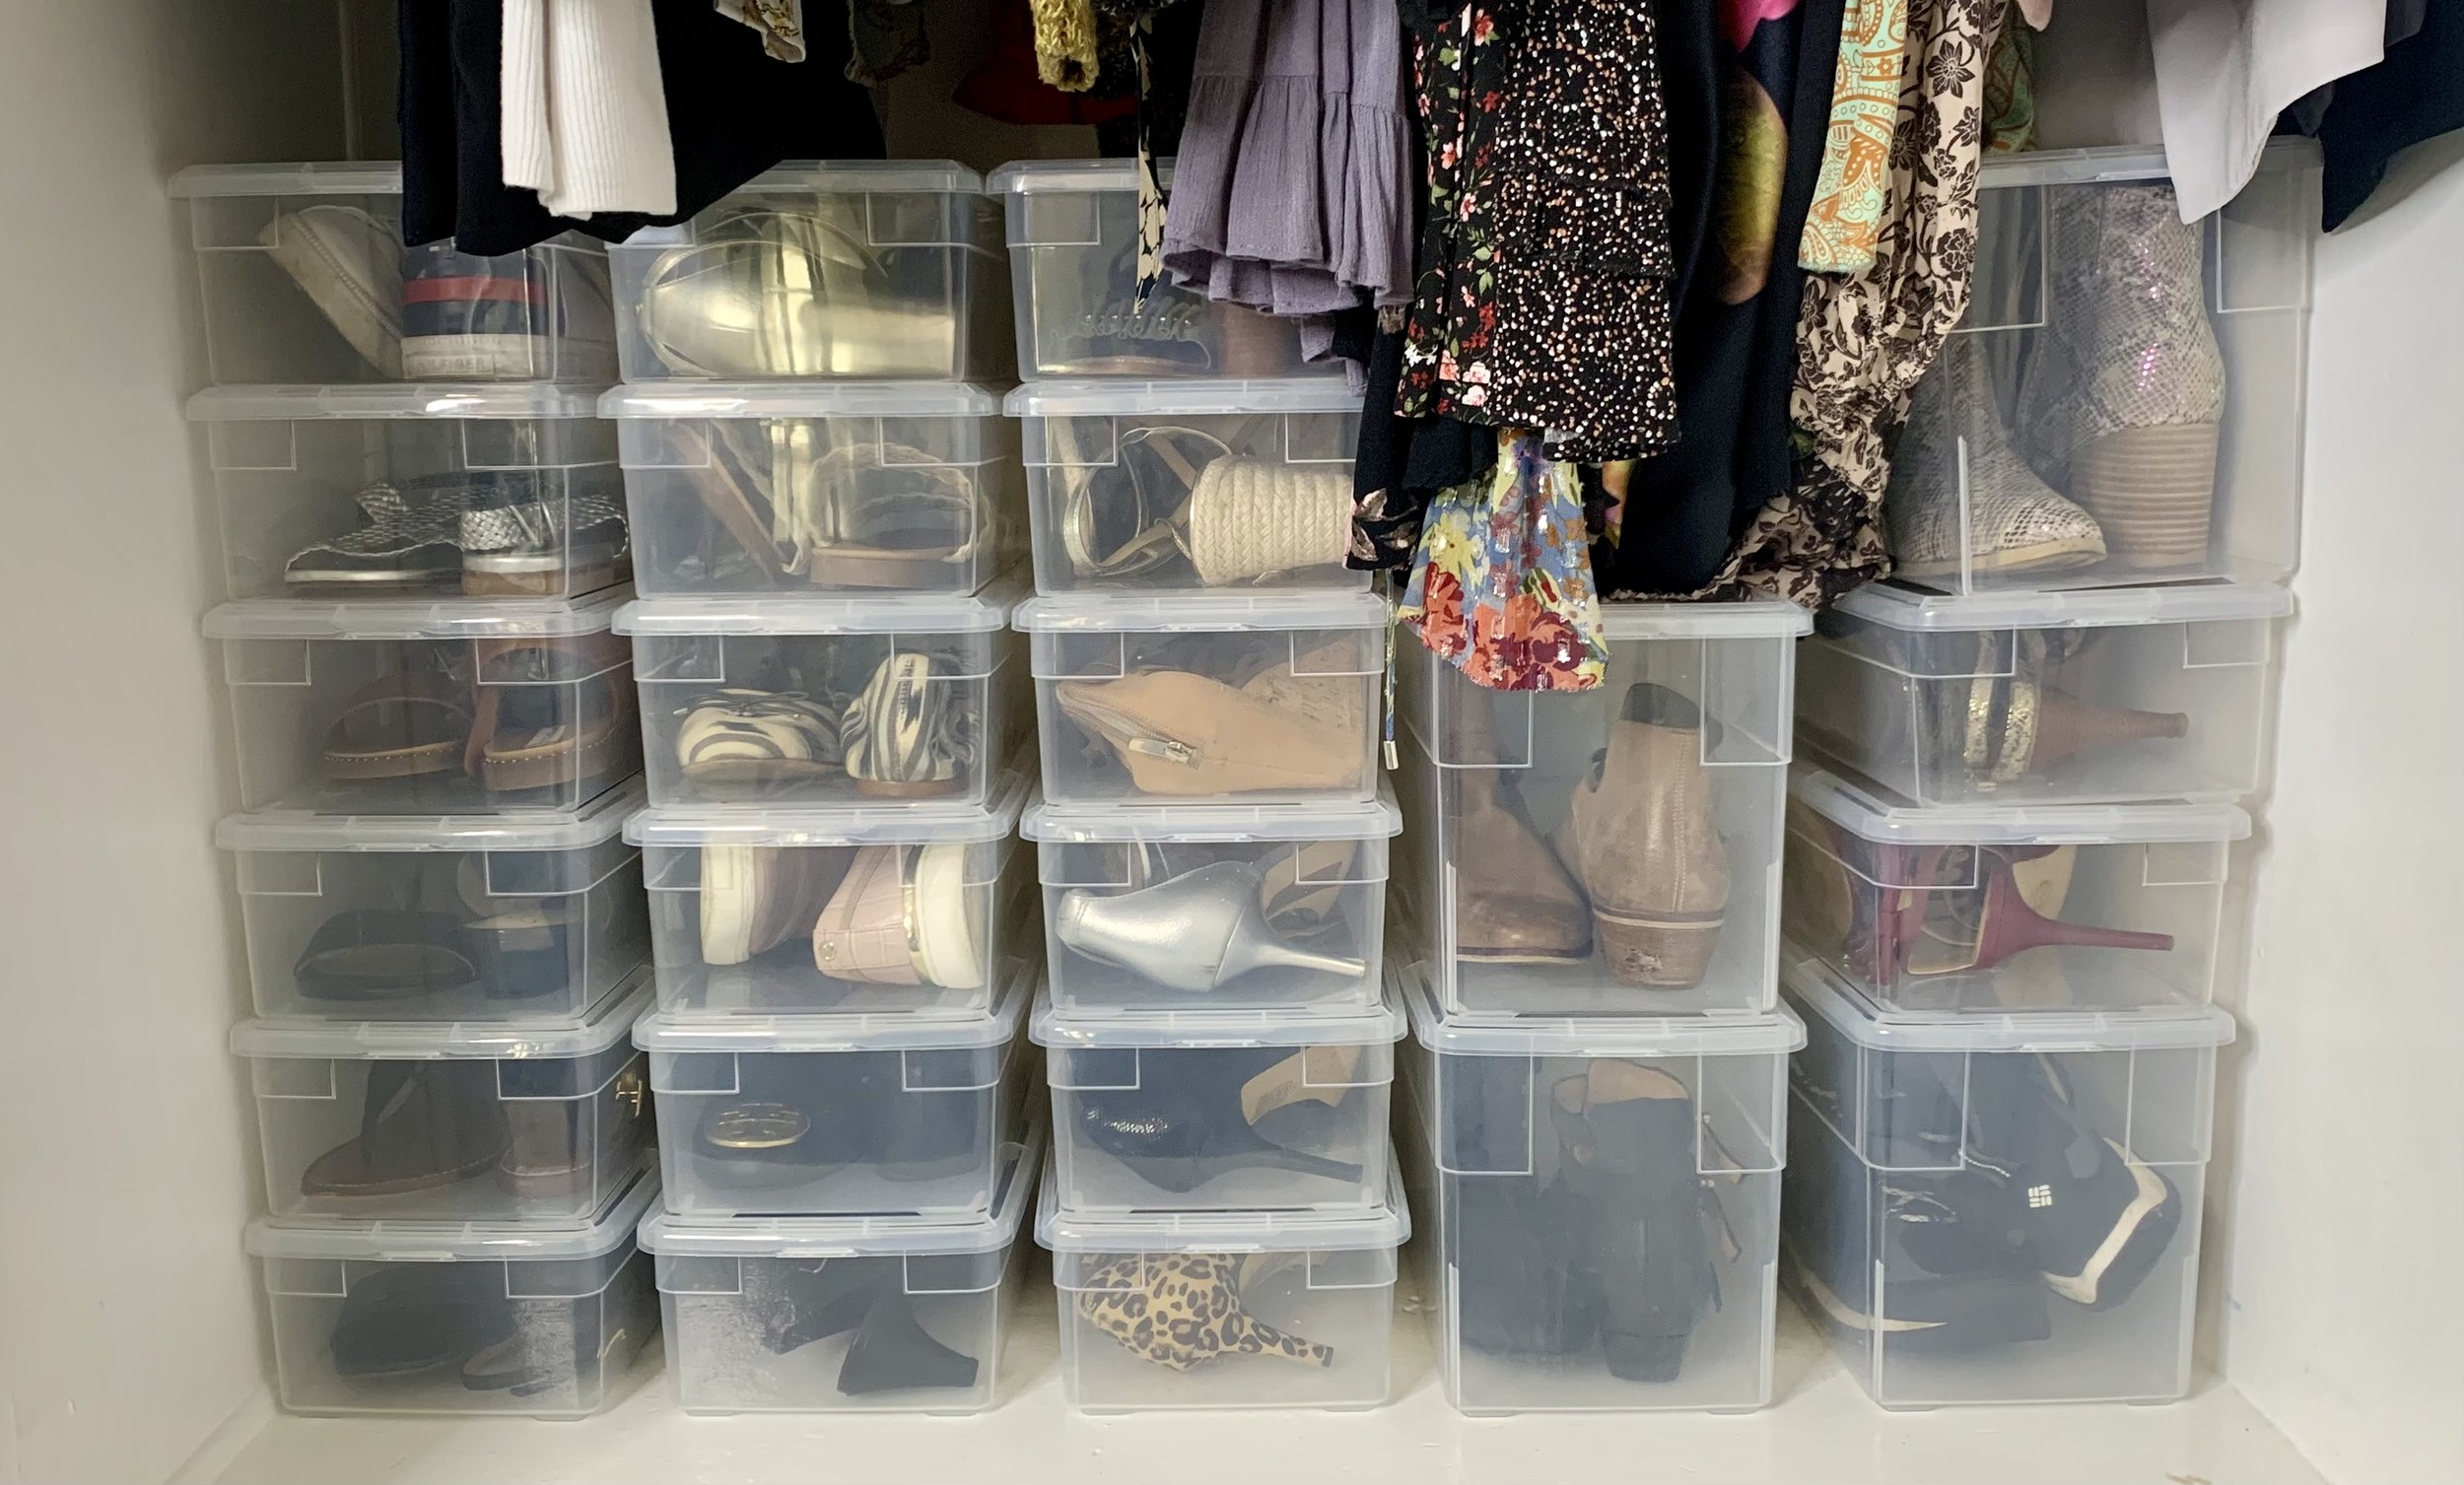
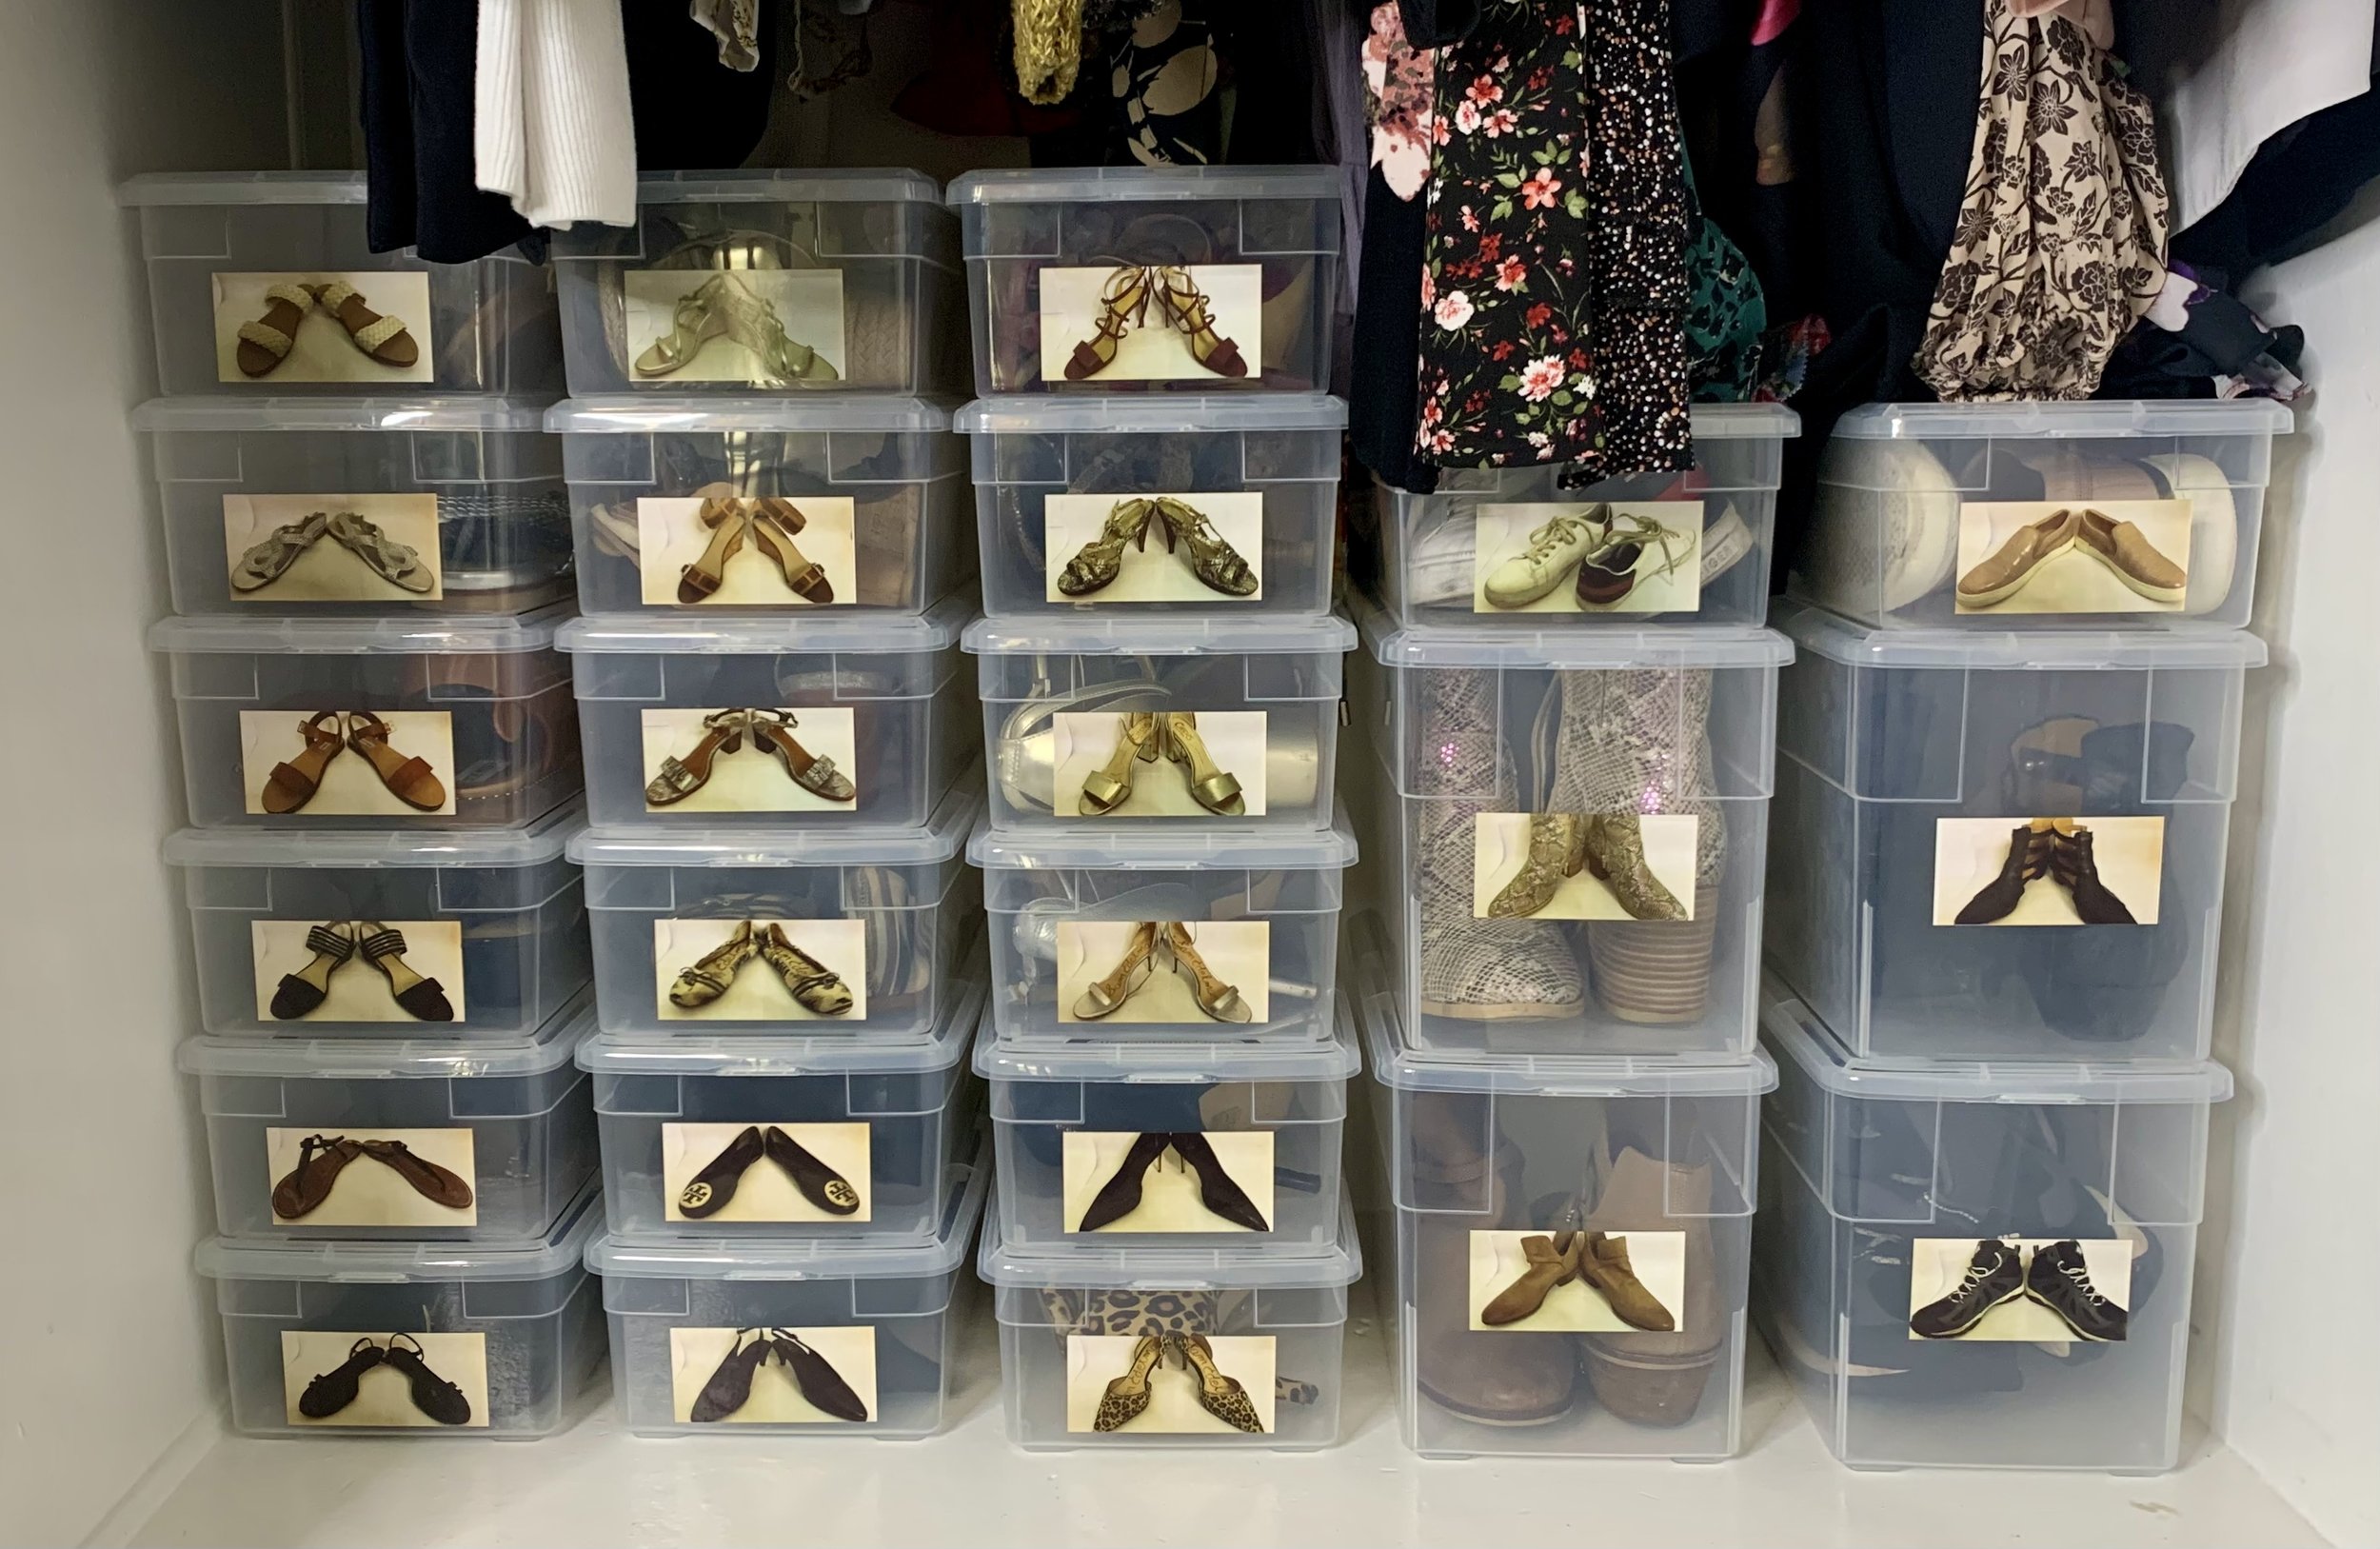
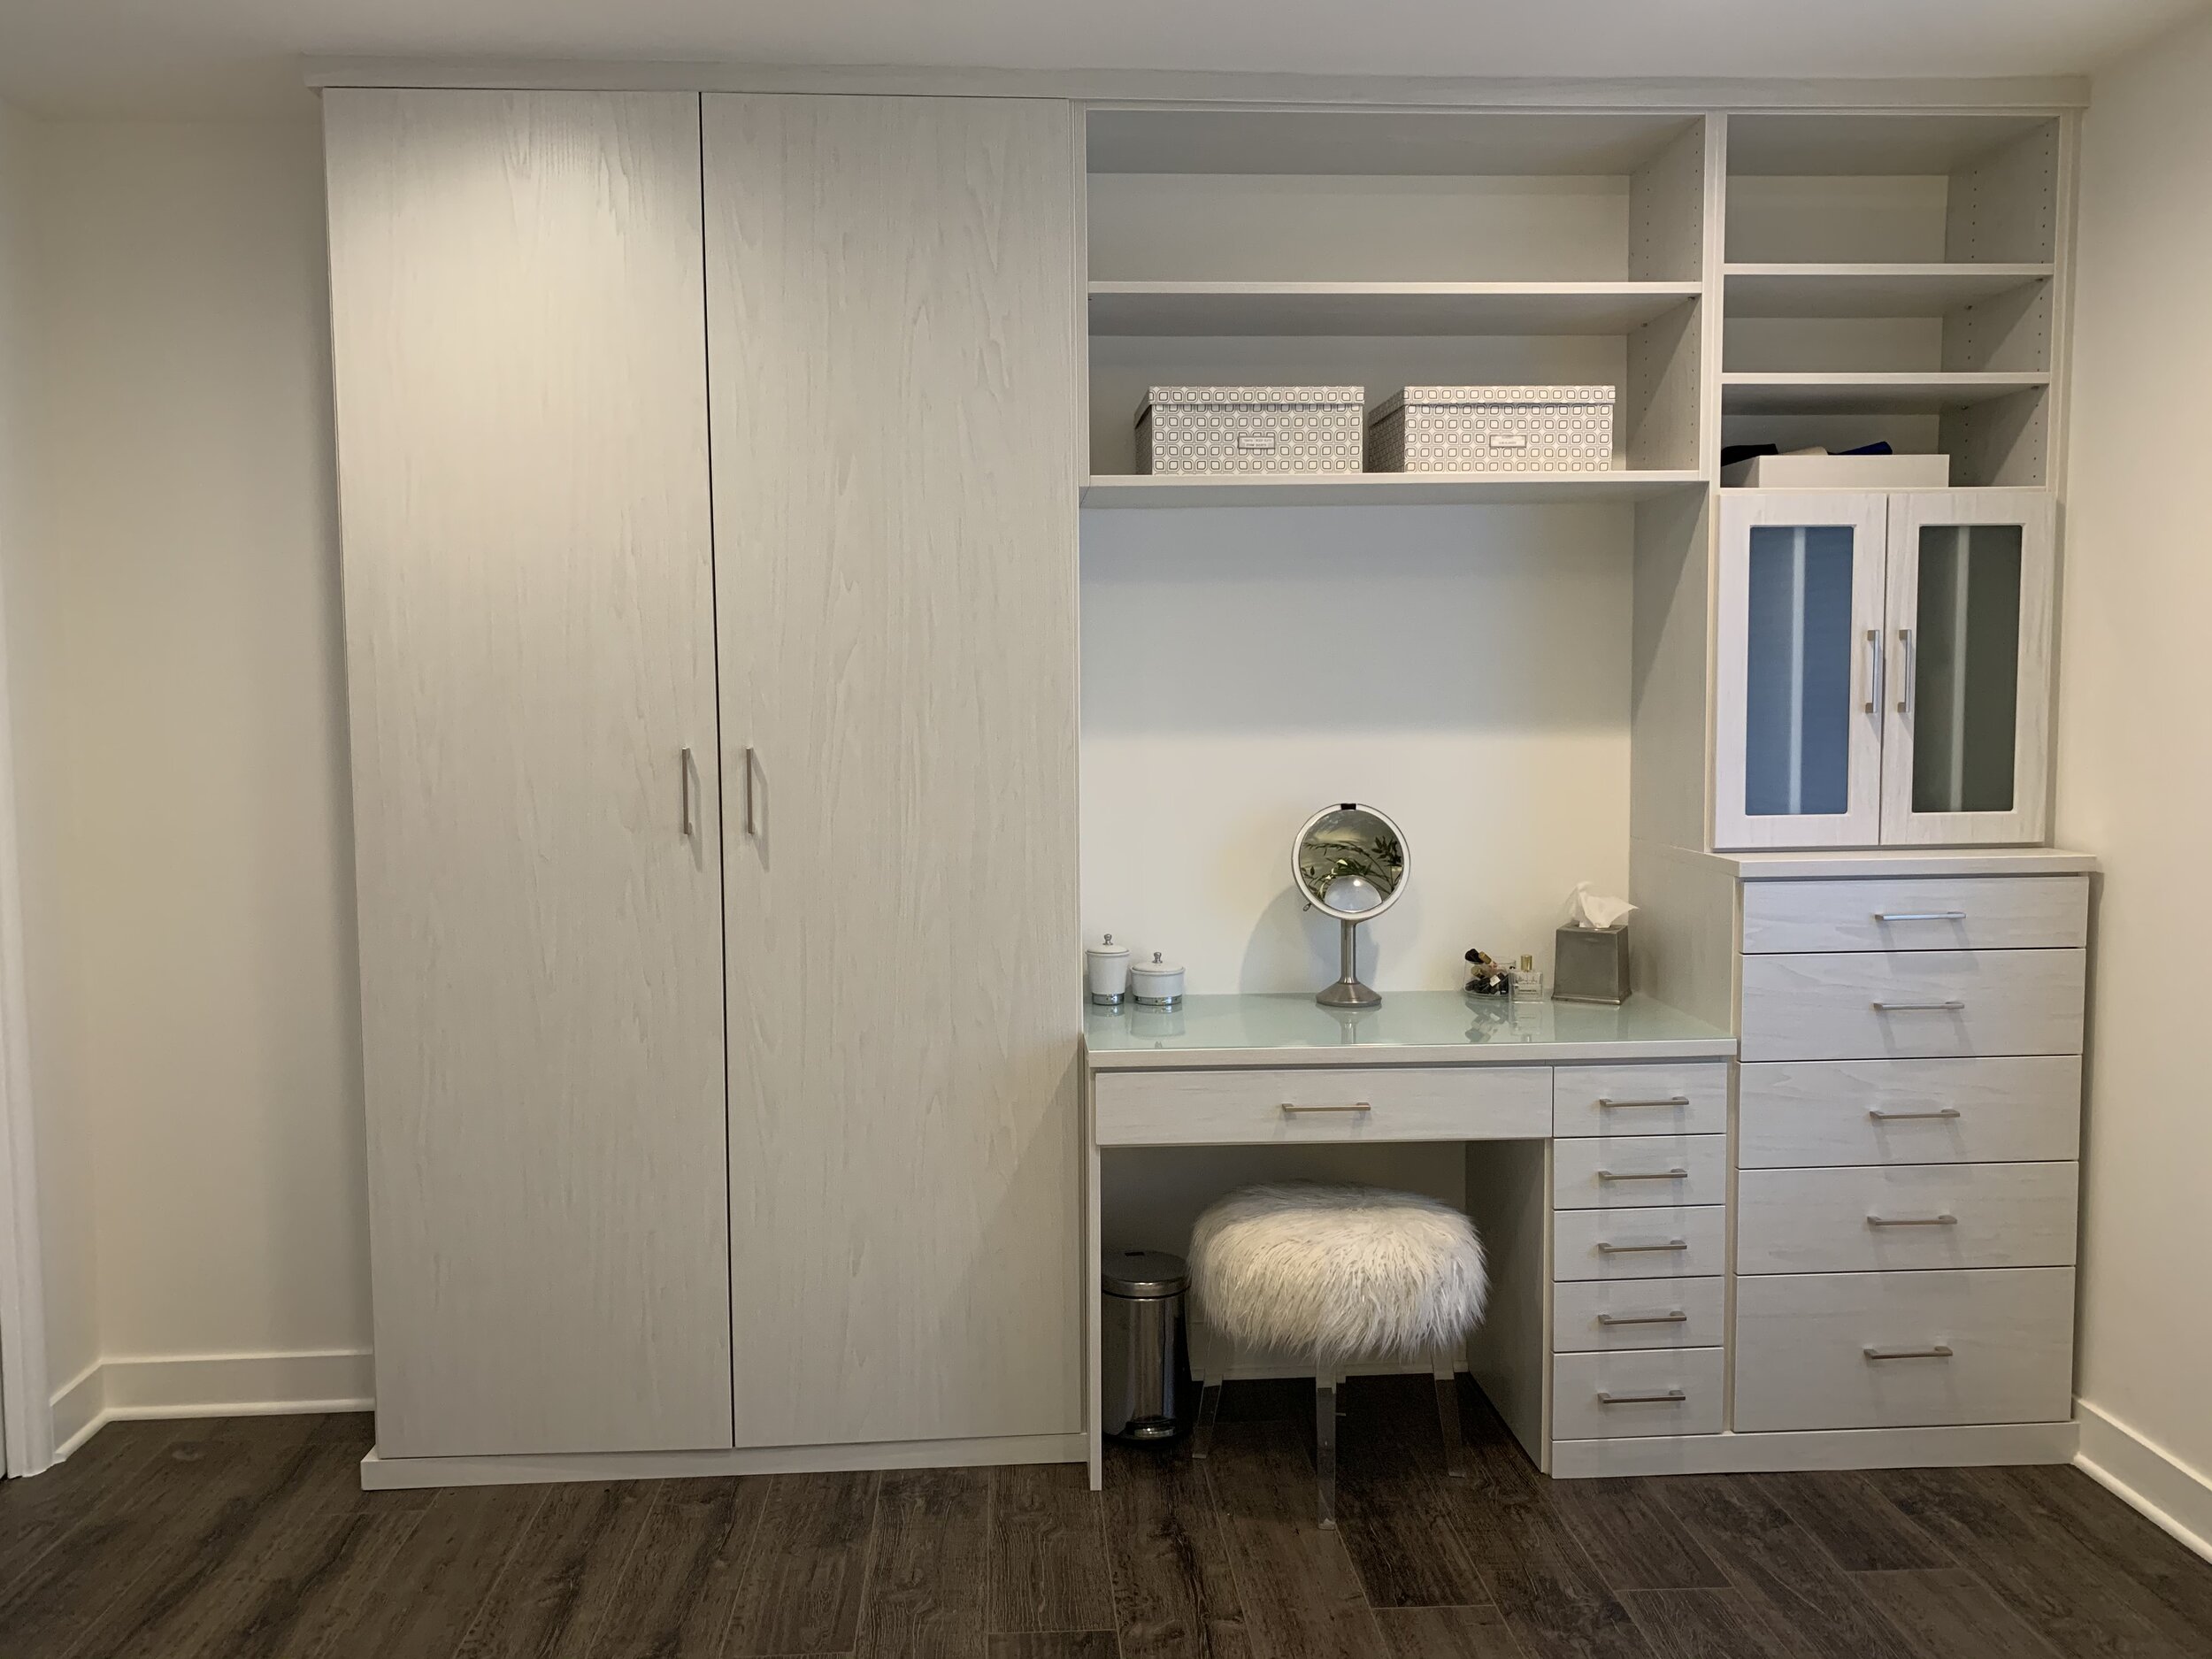
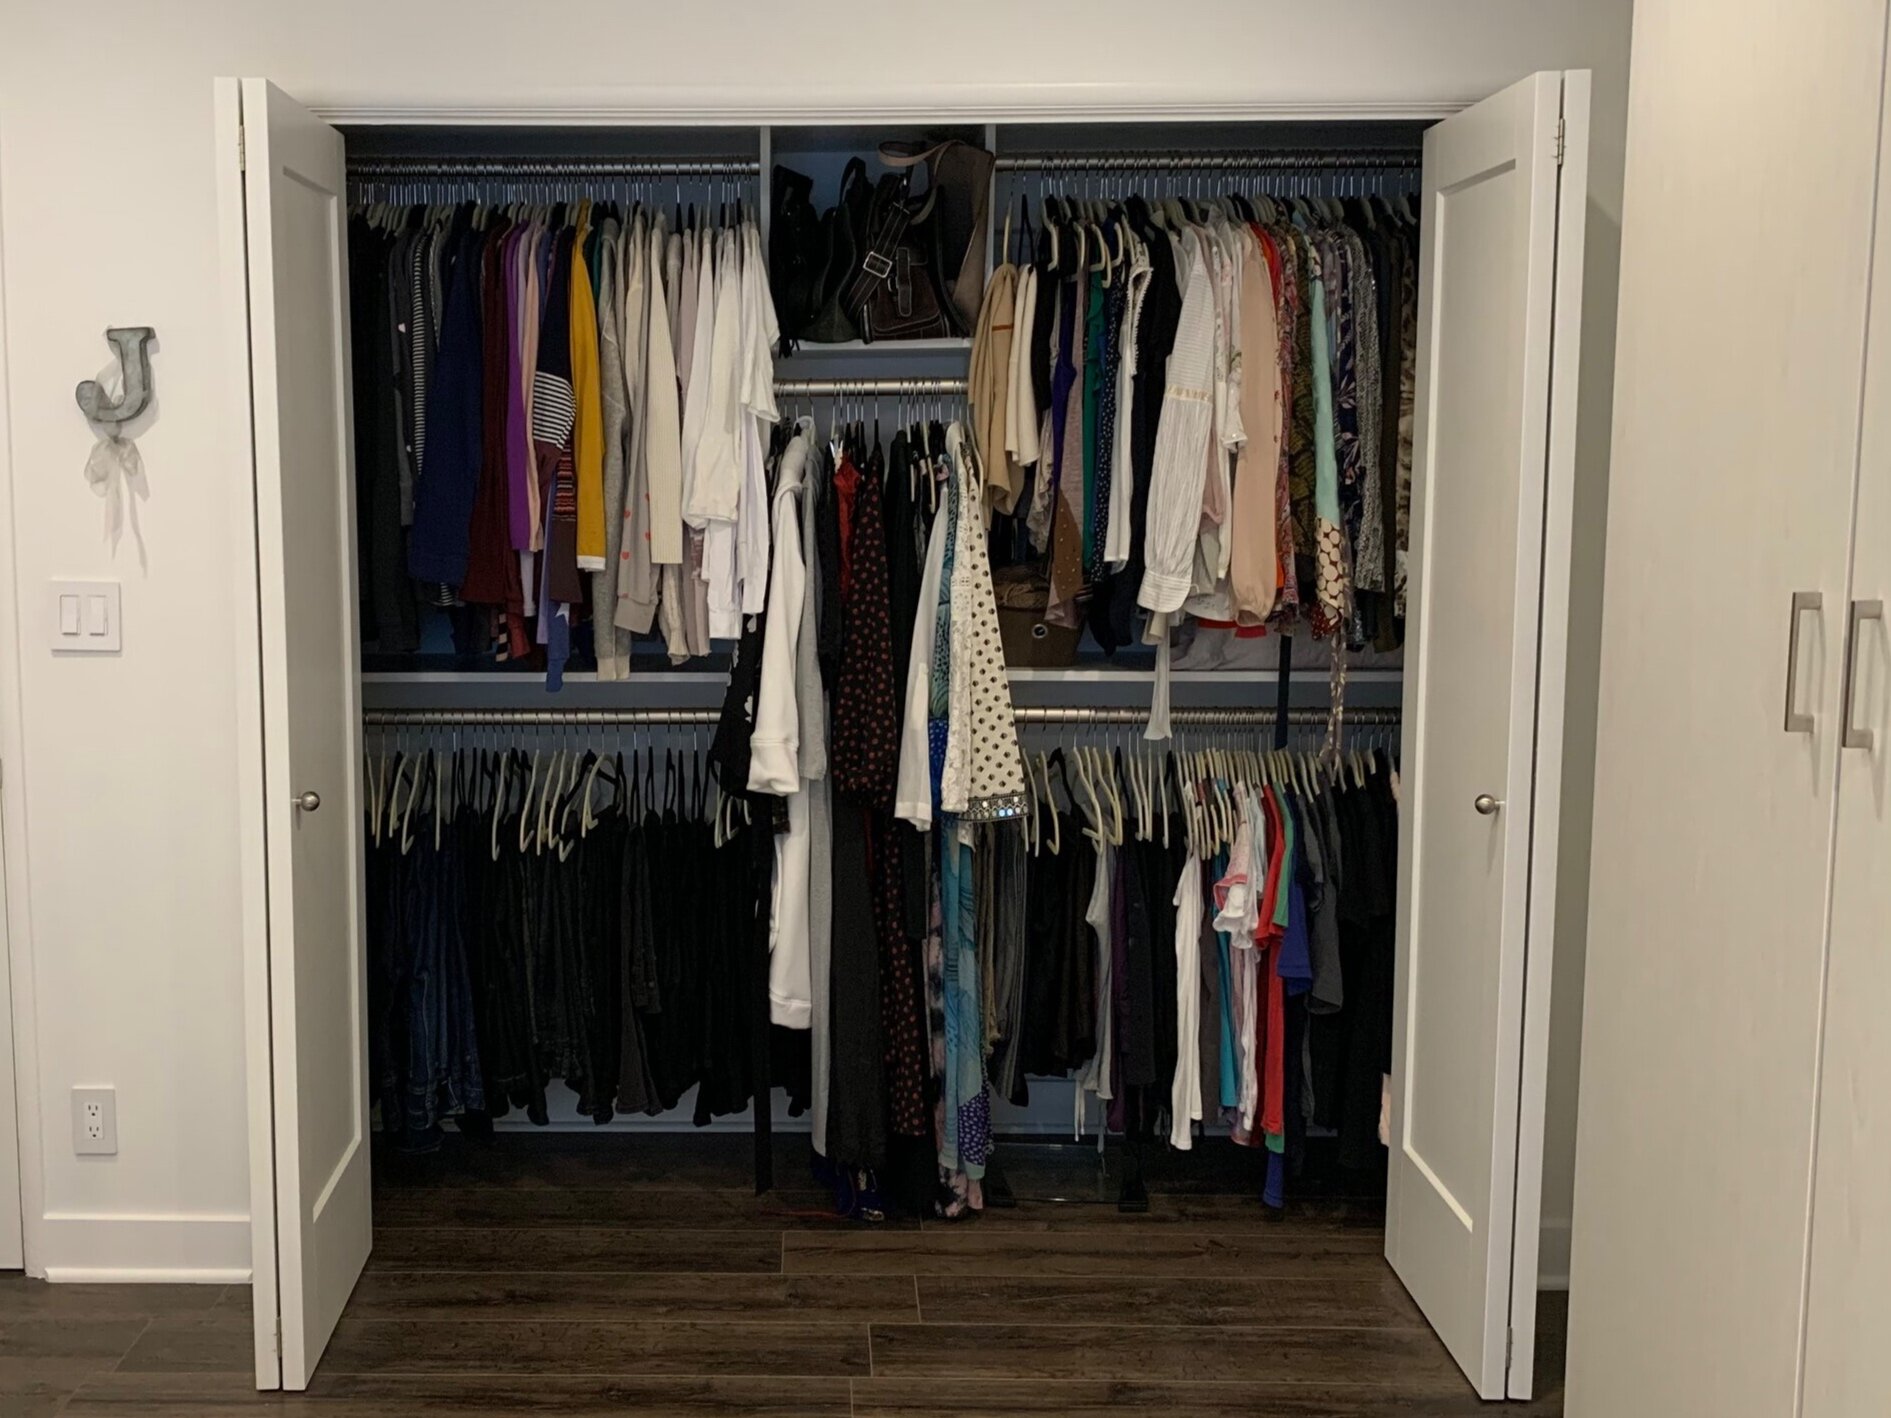
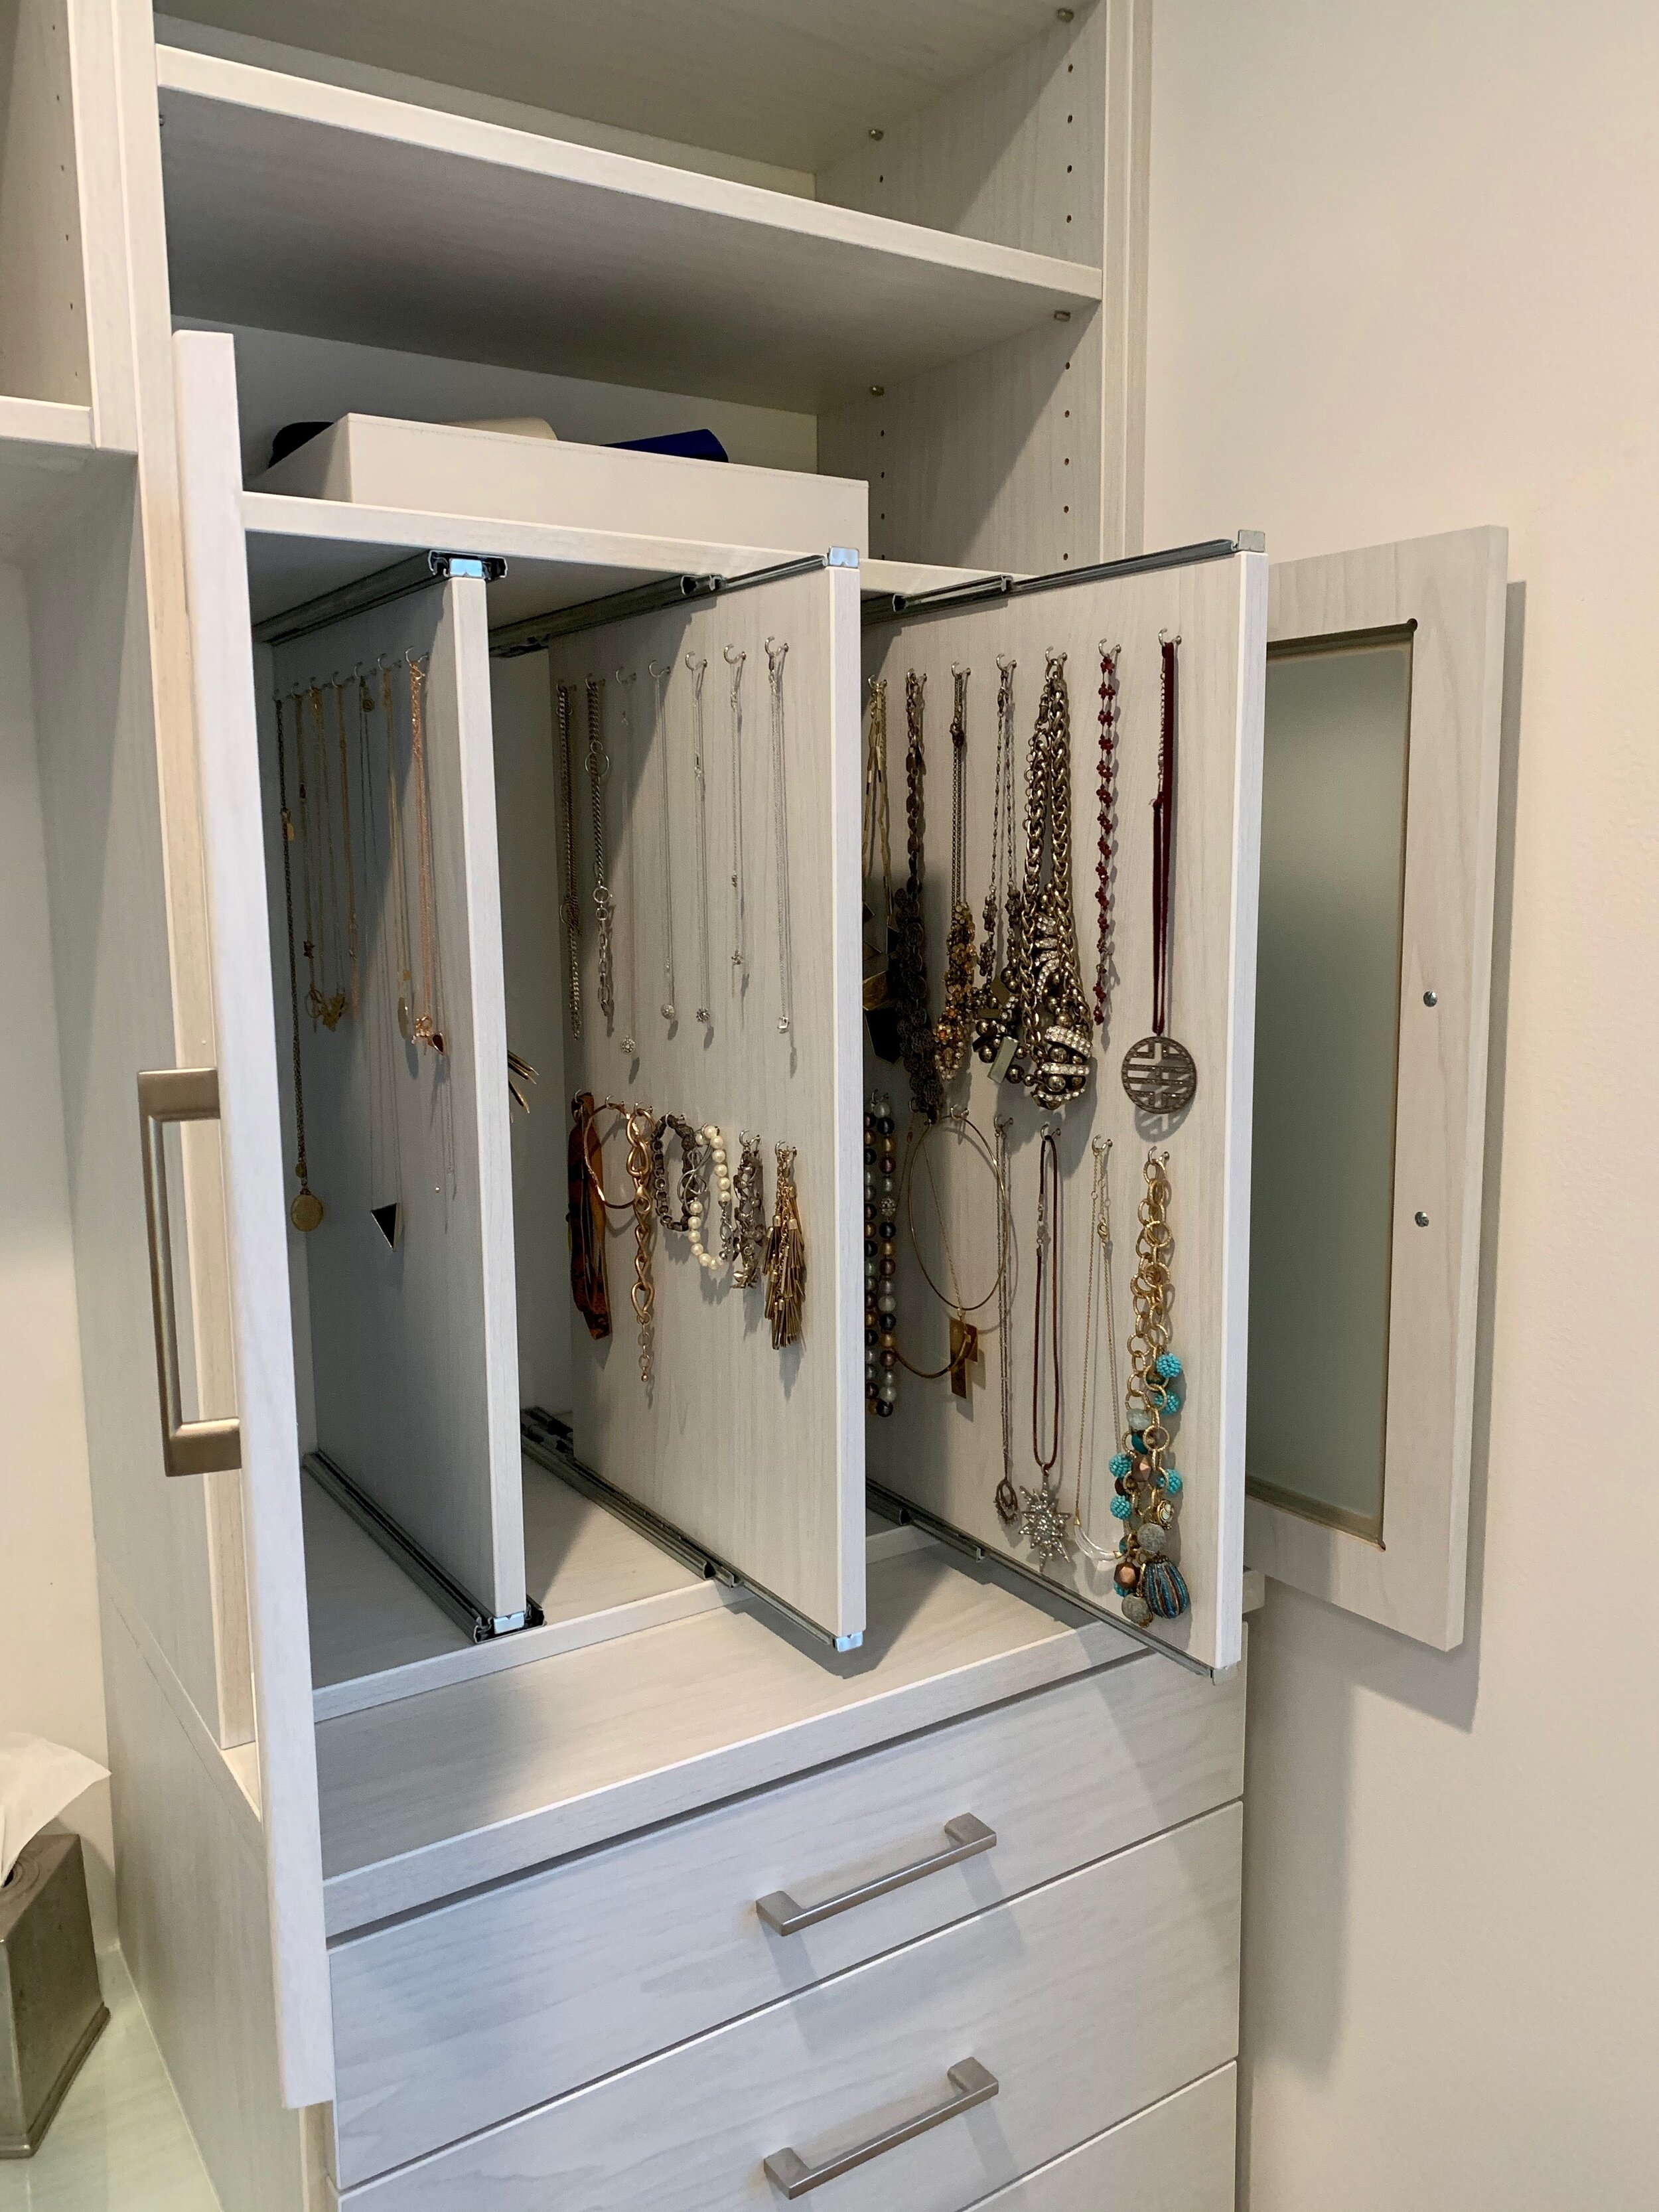
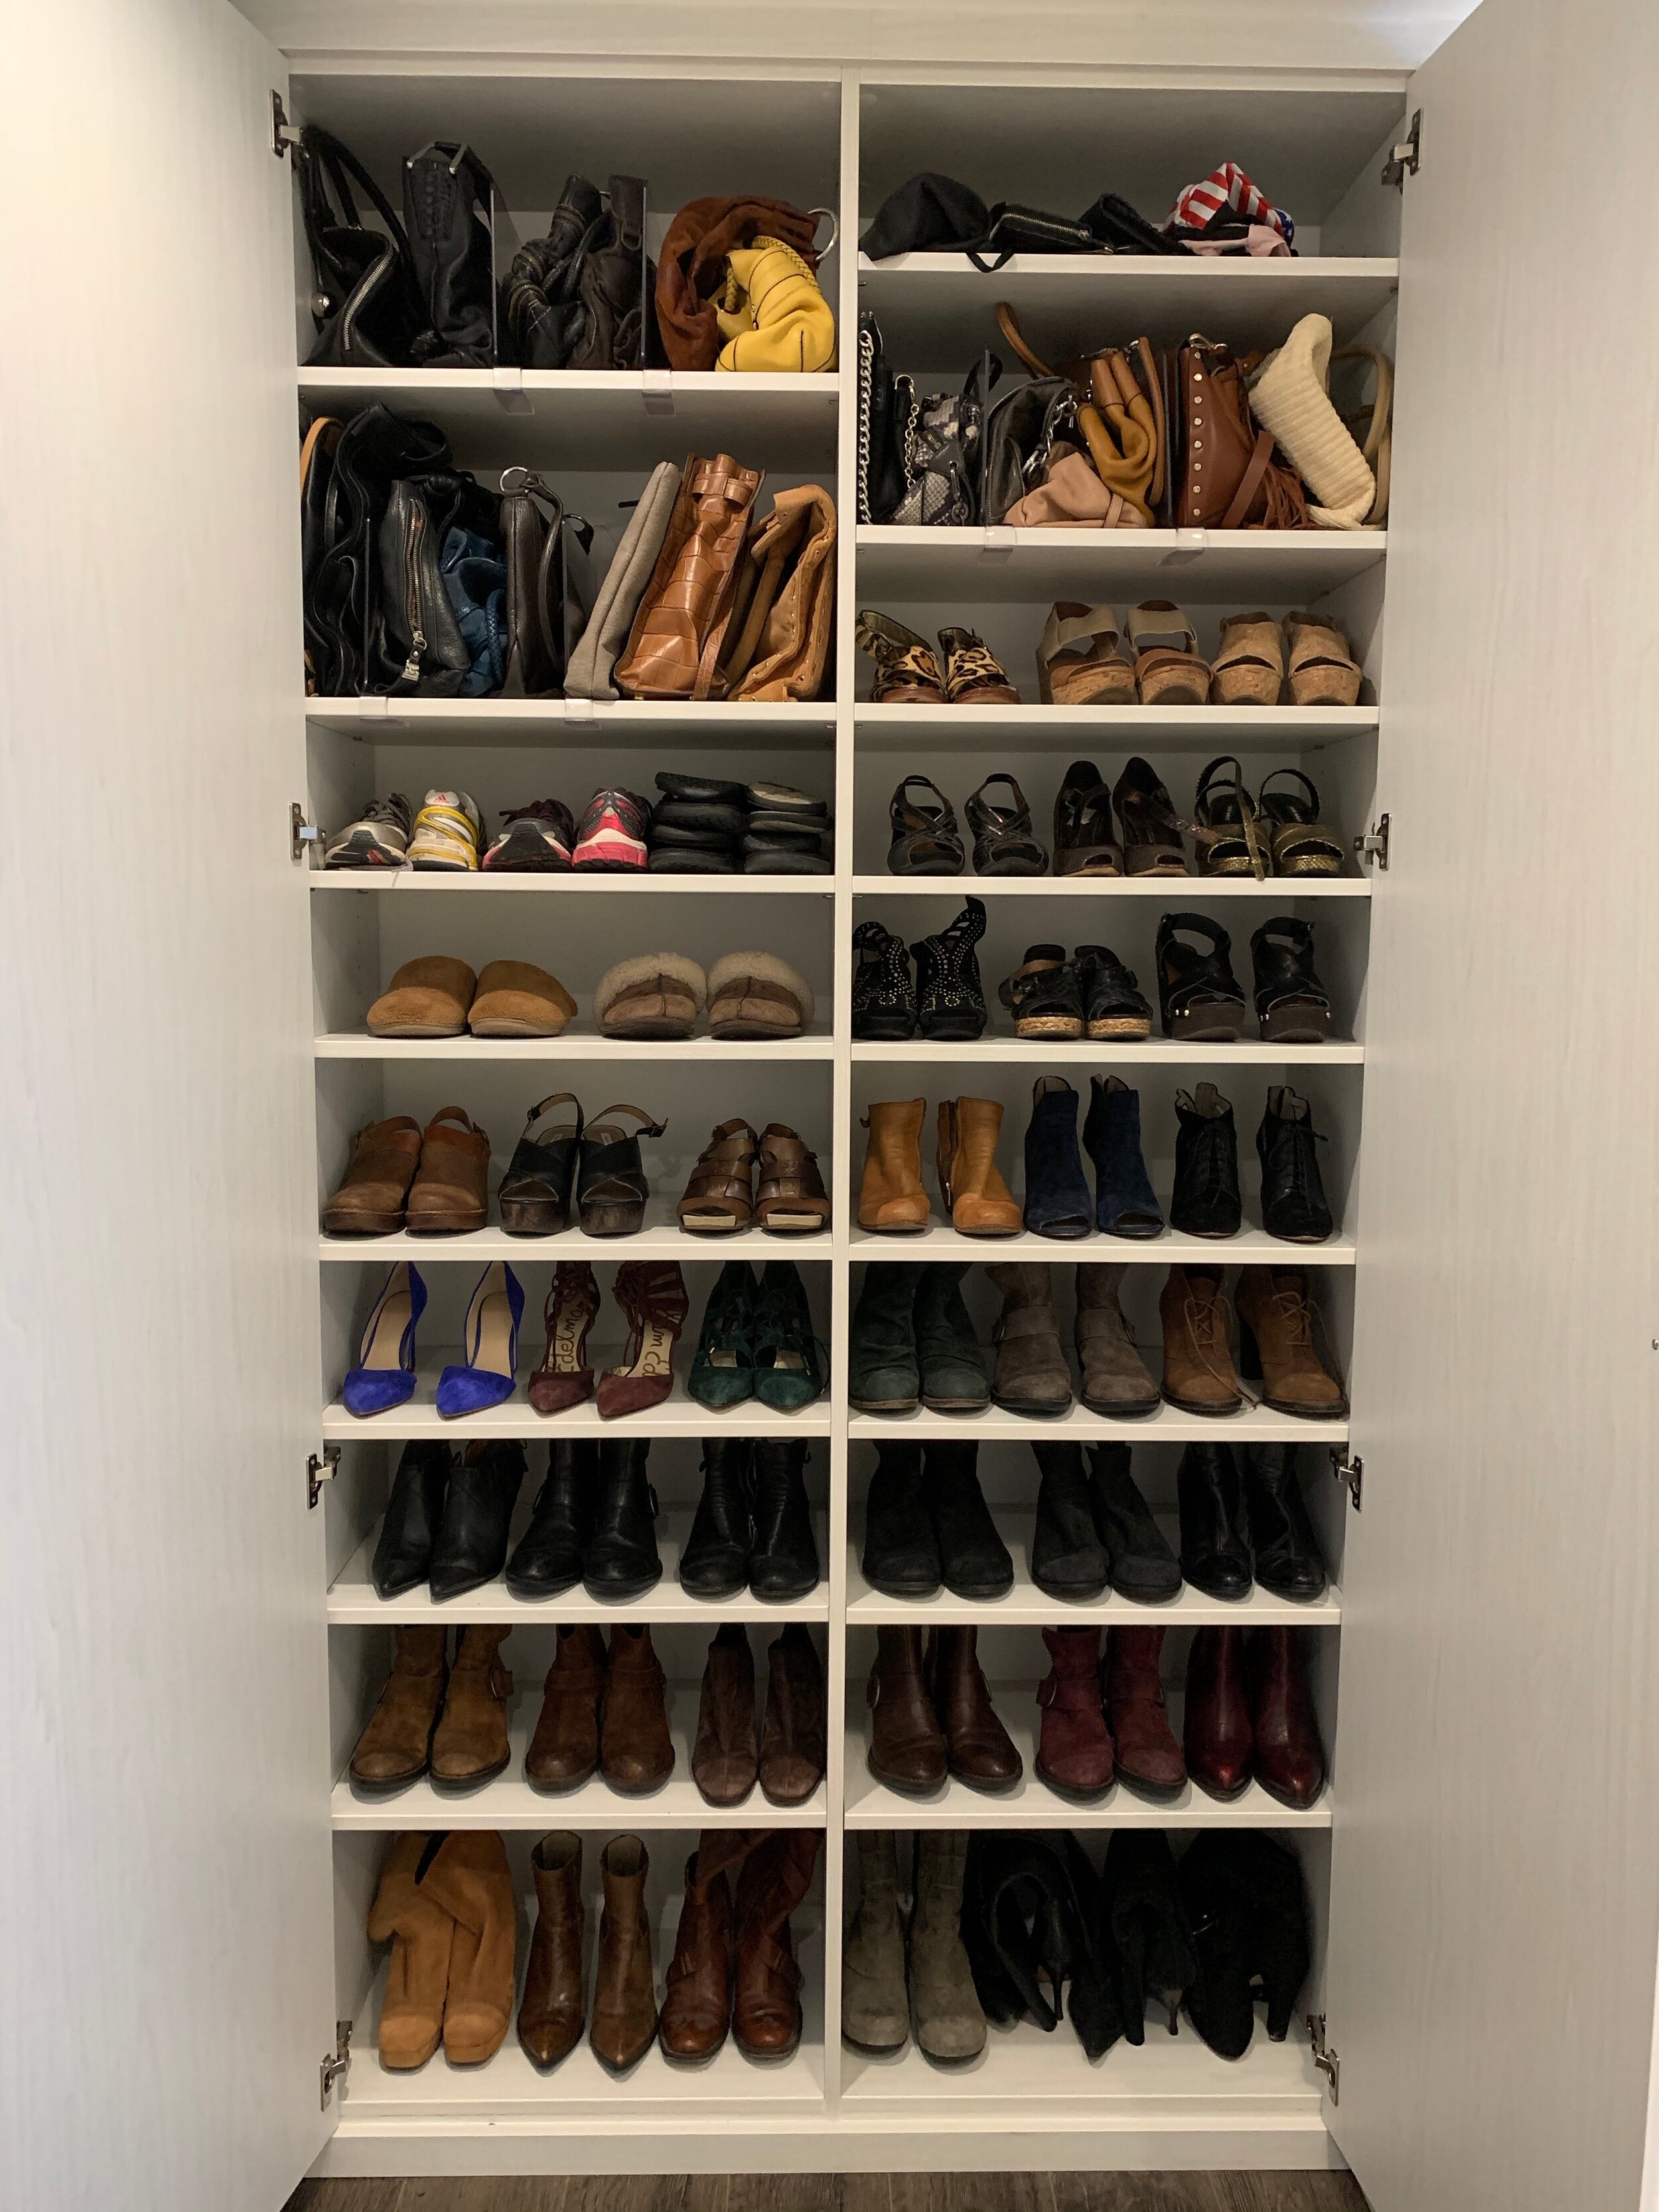
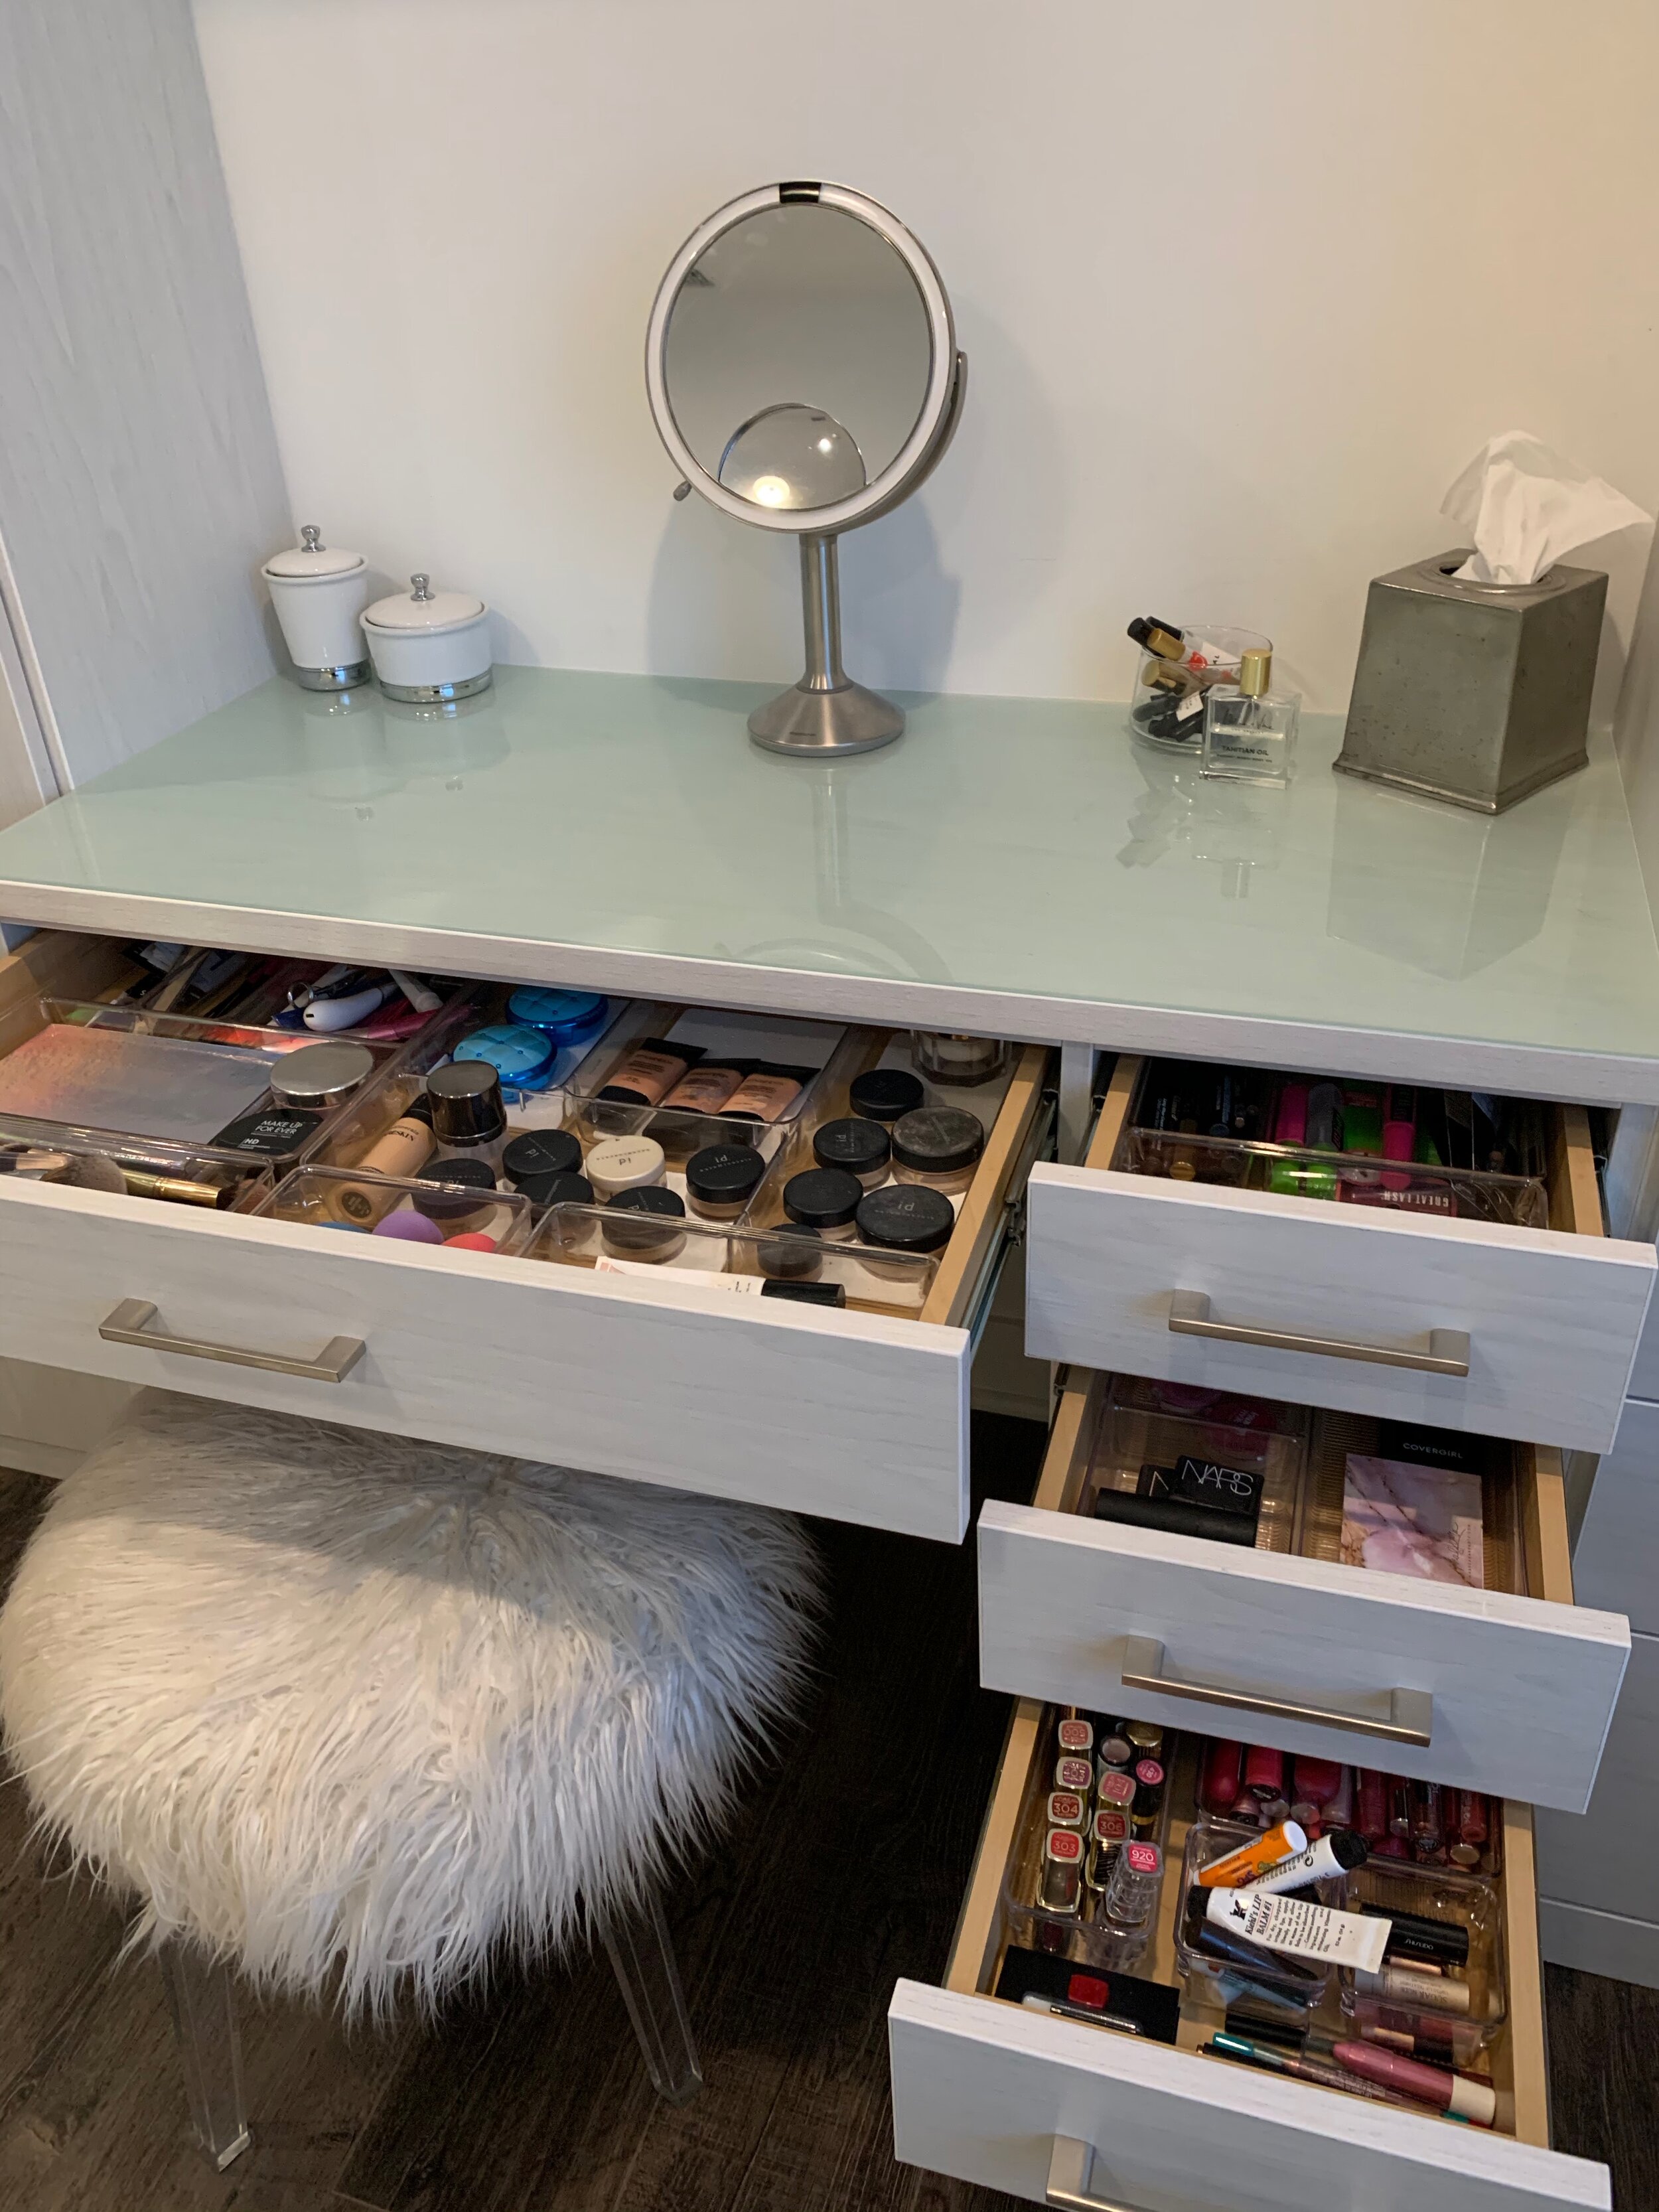
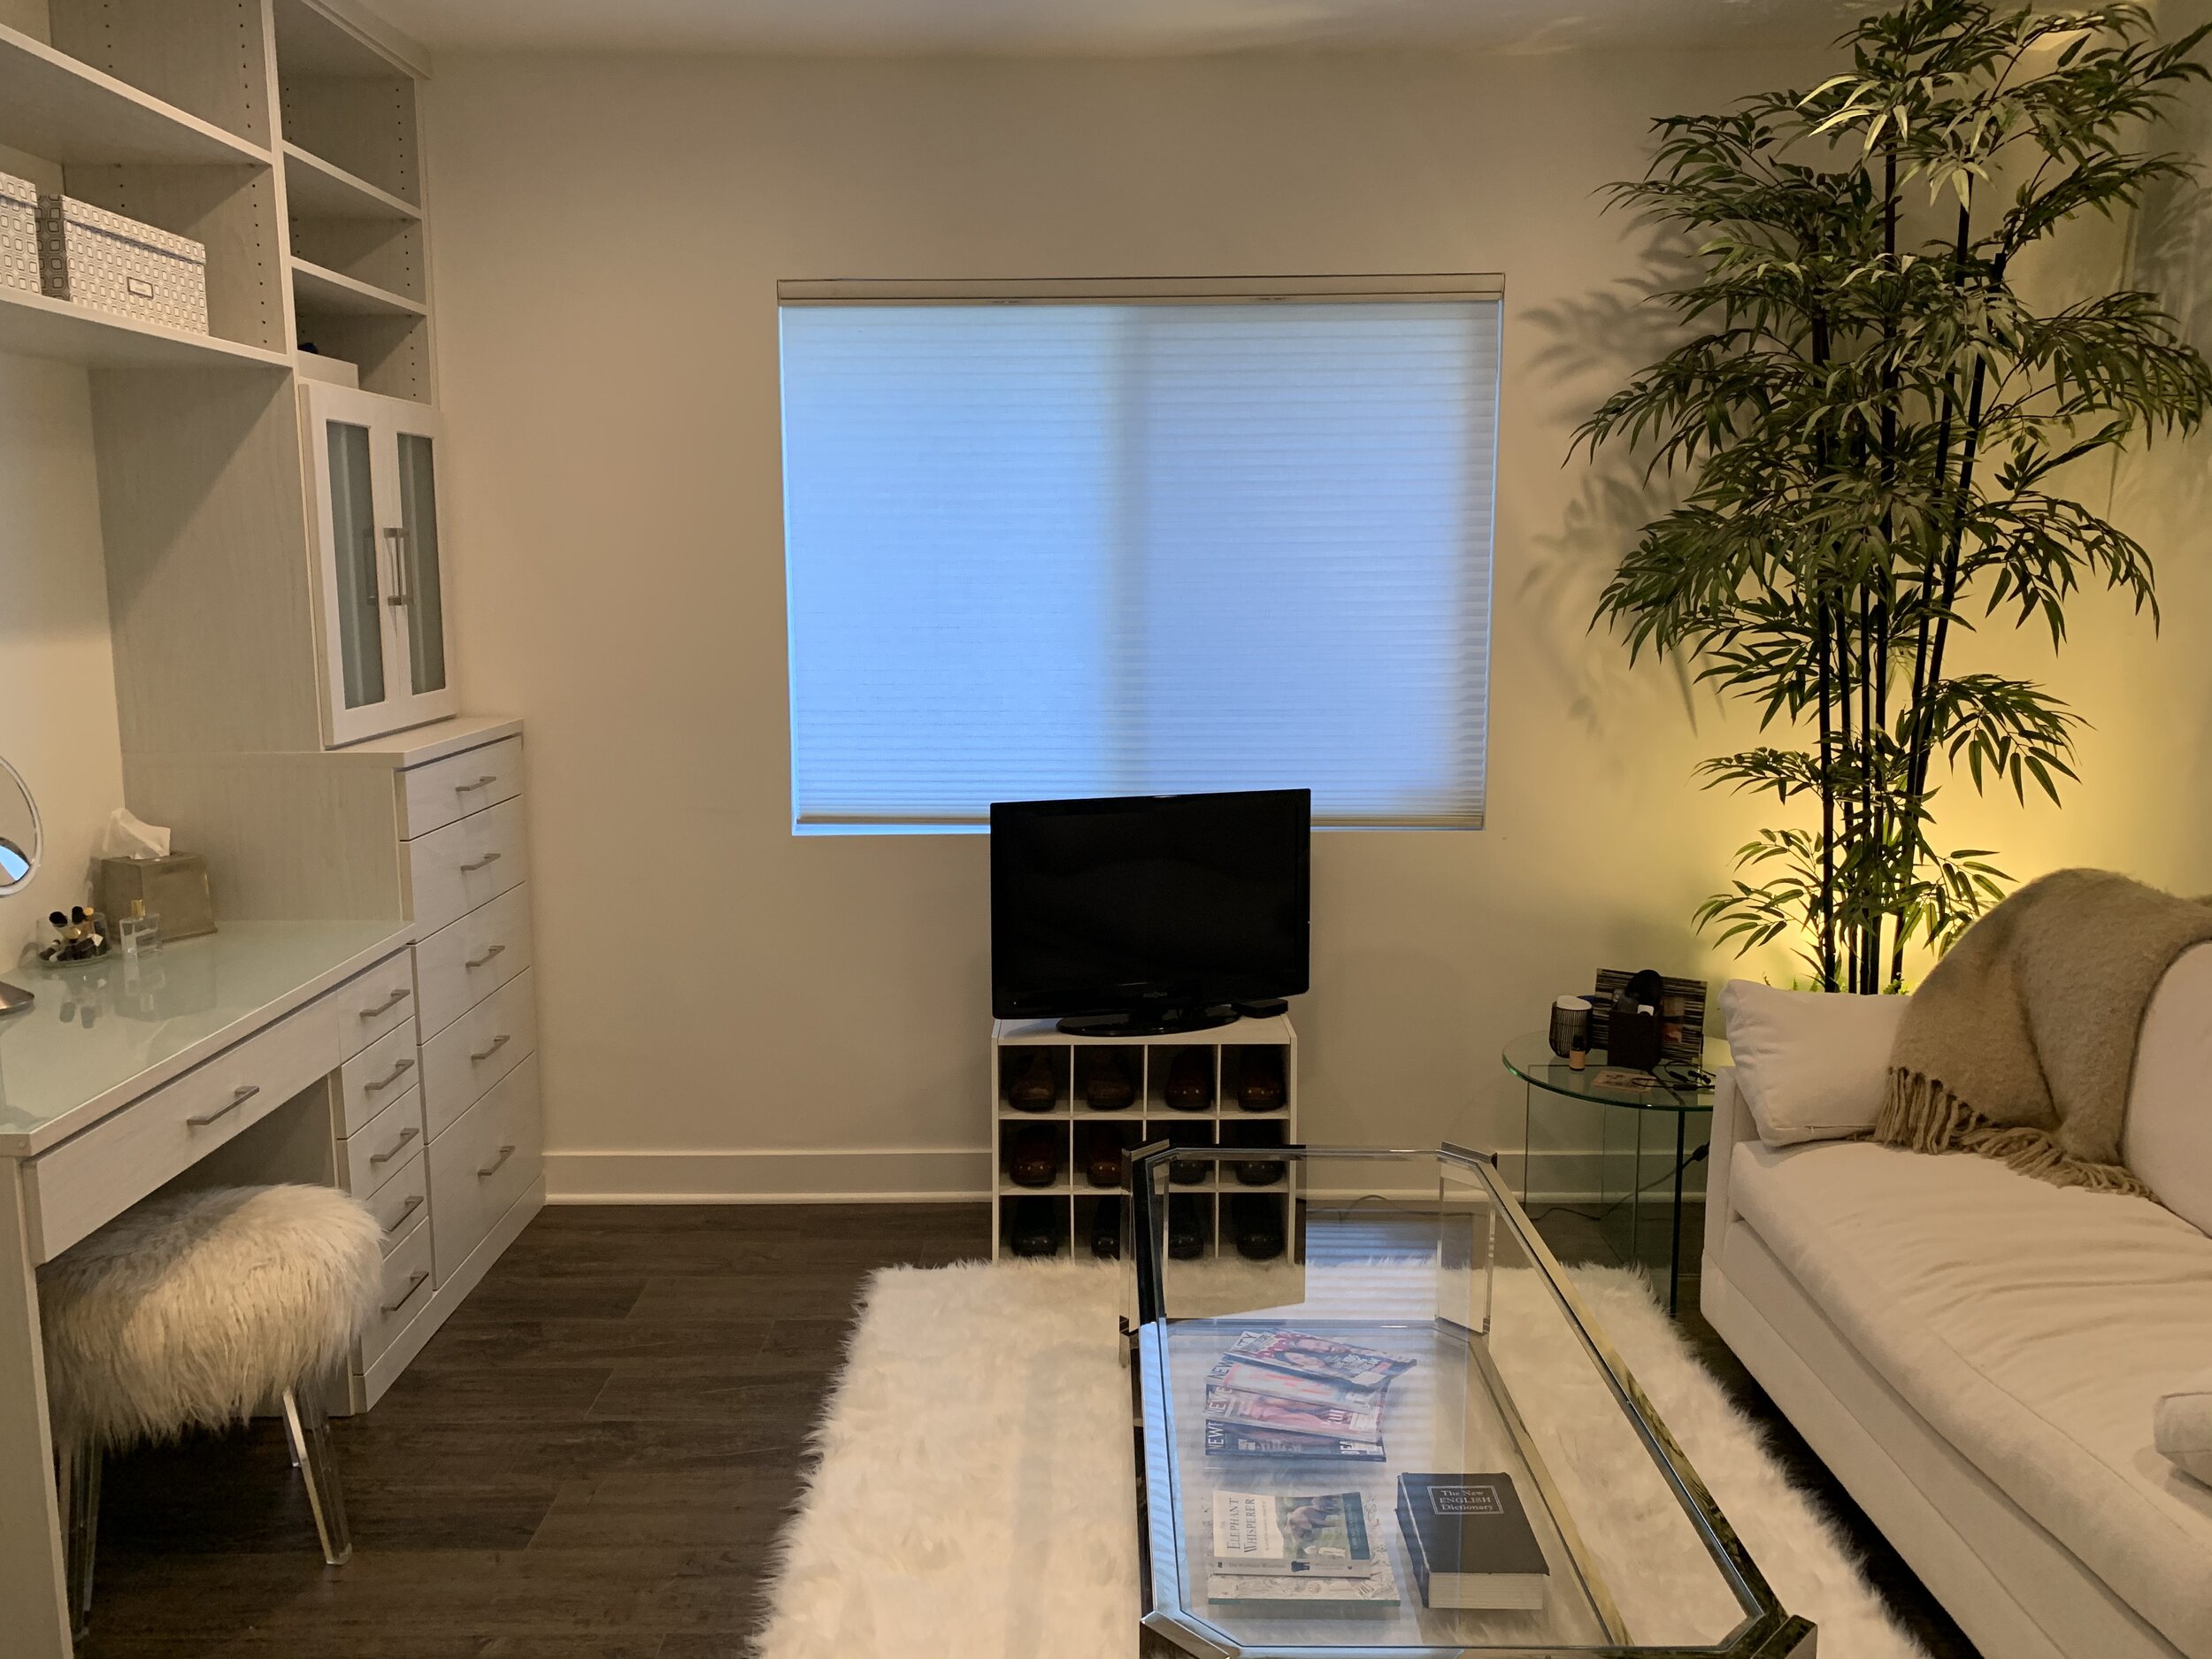
In the project featured in this video, I worked with a couple moving in together. One partner was moving into the other’s home, and the biggest challenge was stuff. The closet was full, the storage situation was tight, and we needed to make room—not just for more belongings, but for both people to feel like they had a home in the space.

We started by decluttering, making intentional decisions about what to keep, what to donate, and what no longer served them. This wasn’t just about getting rid of things—it was about making space for a new chapter in their lives.

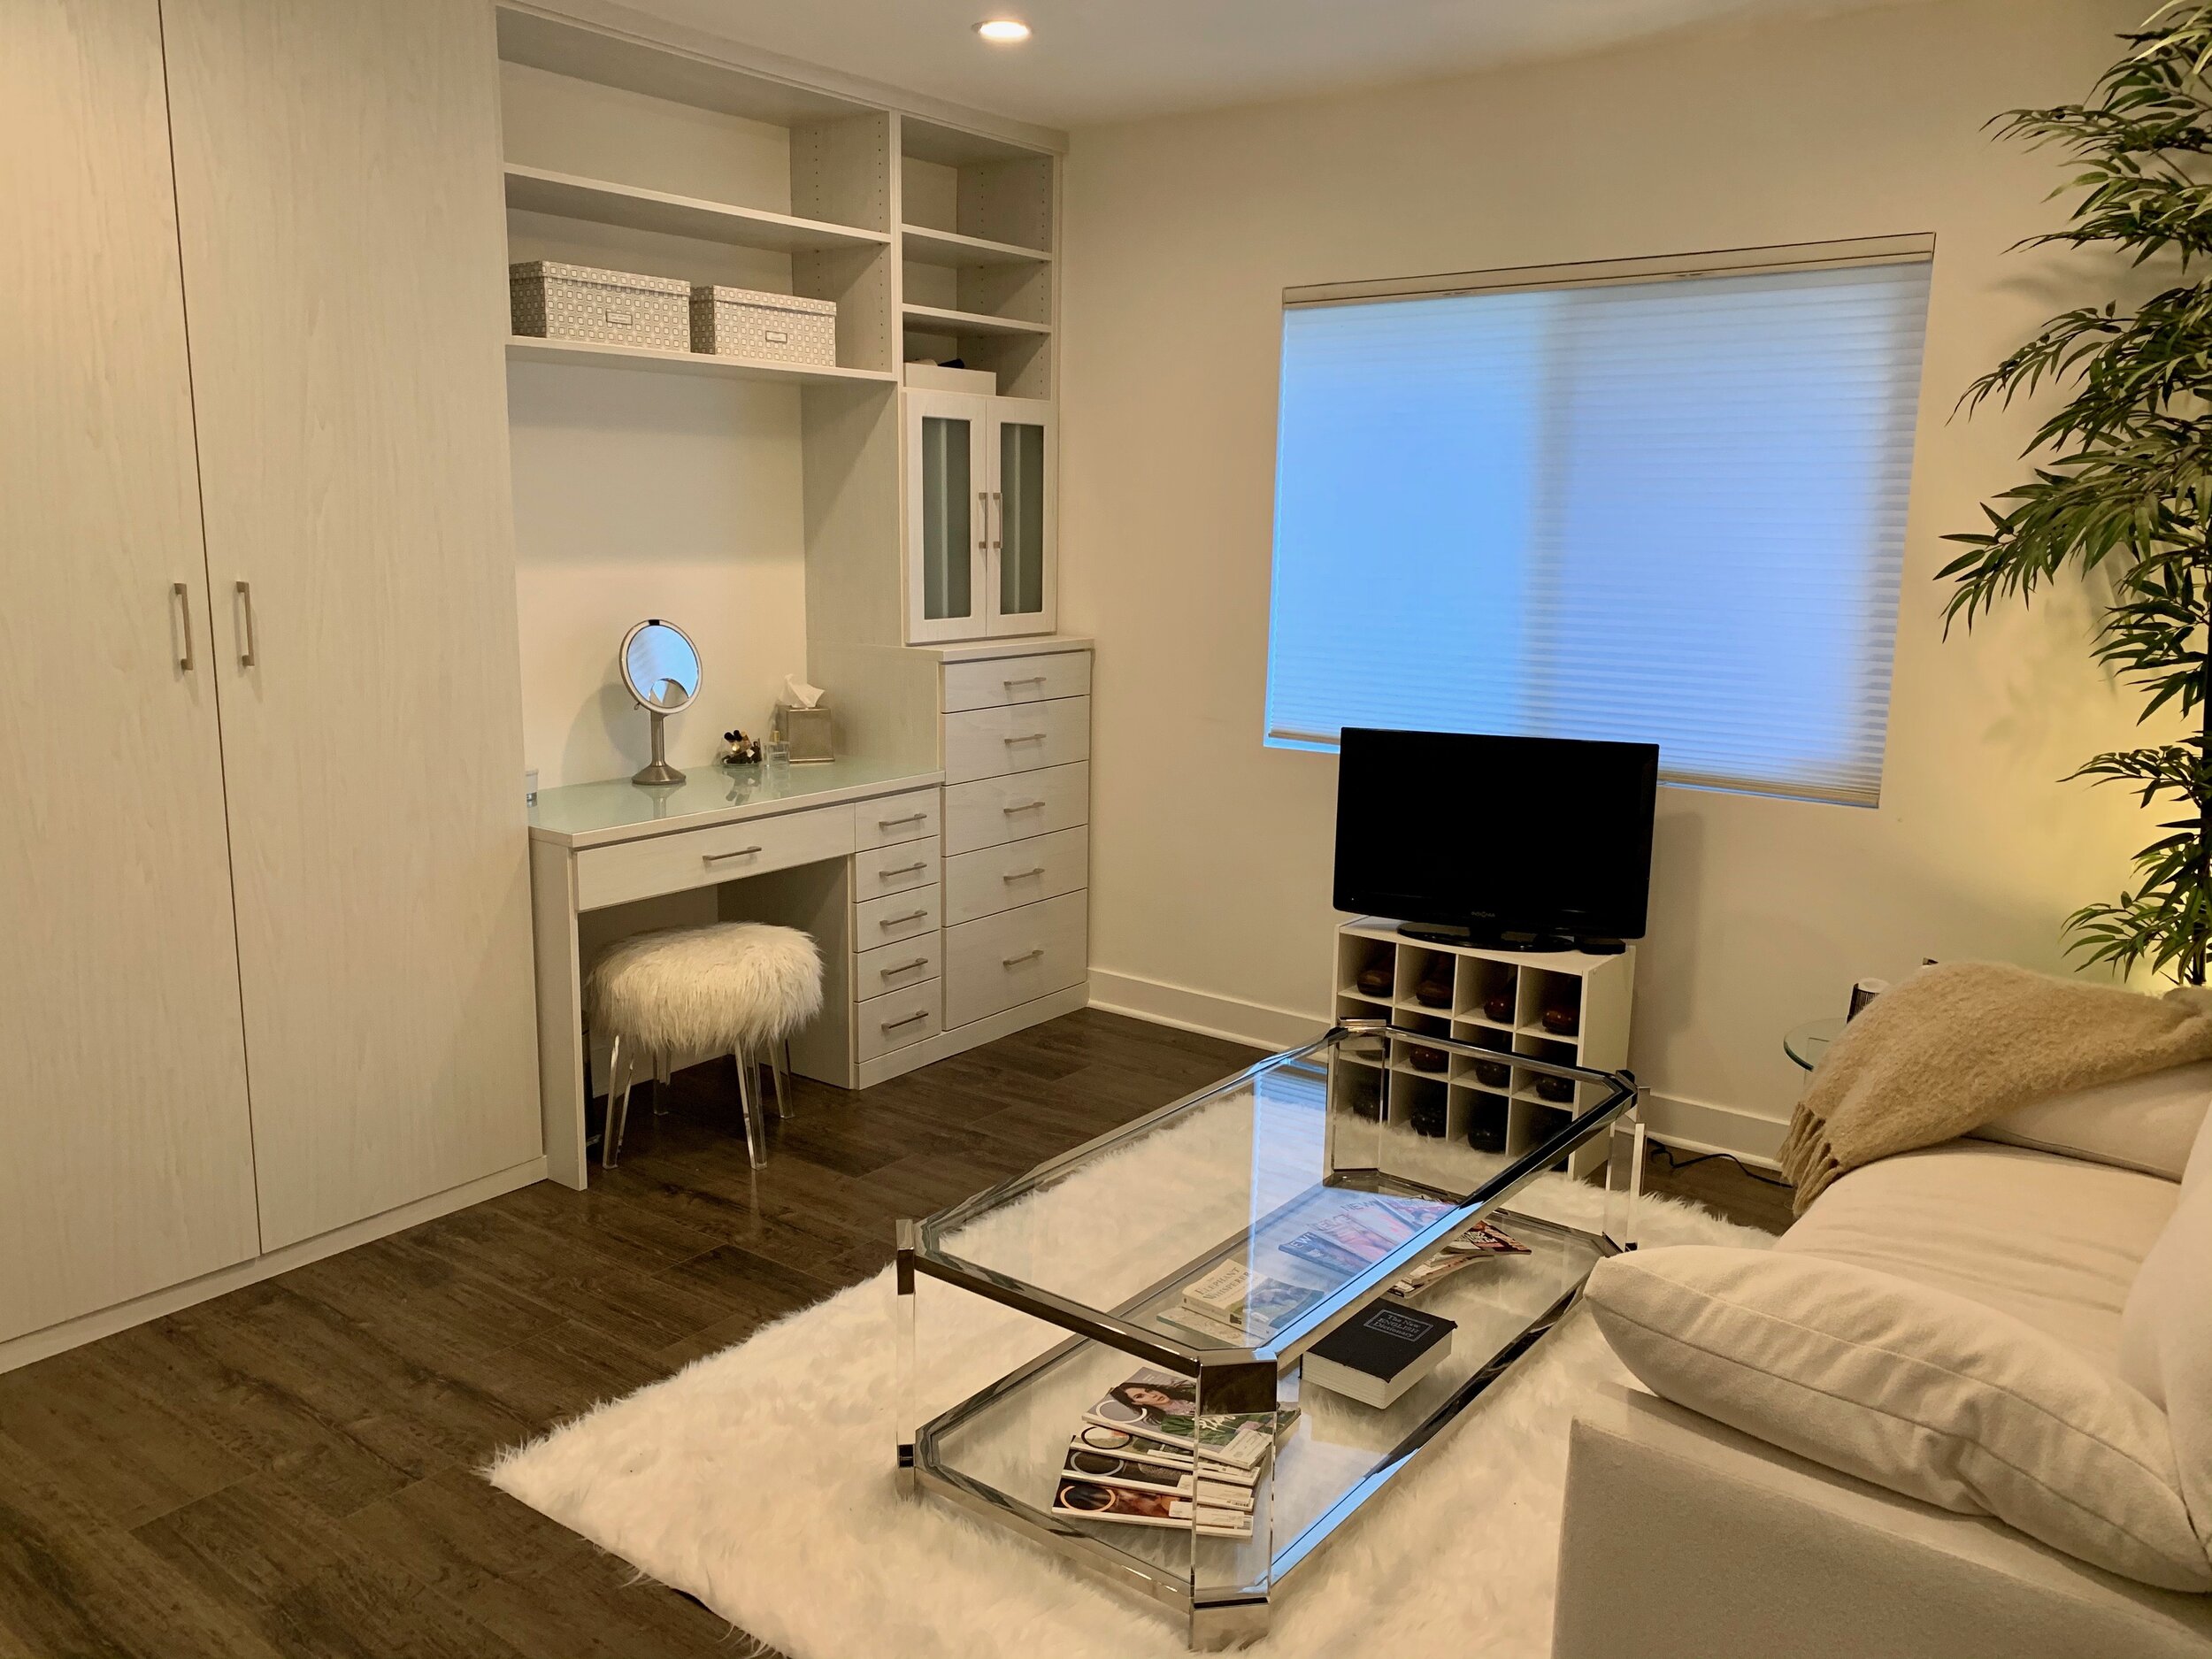
To maximize storage, we added a freestanding wardrobe from IKEA to keep everything organized within the bedroom instead of spreading items throughout the house. That one change helped create a sense of unity and balance, rather than making one person feel like a guest in their own home.

Beyond organization, Feng Shui played a key role in setting the tone for a peaceful, supportive relationship. Both partners had a metal element, meaning that neutral colors like whites and grays would enhance their sense of calm and stability. We incorporated these shades into the bedding, curtains, and furniture to create a cohesive and balanced look.

Other important Feng Shui adjustments included:

  • Symmetry in the bedroom – Matching nightstands and lamps on either side of the bed create a sense of balance in the relationship.

  • Intentional artwork – Instead of family photos, which can introduce external energy into the bedroom, we focused on images that symbolized romance and connection.

  • Removing disruptive elements – A large mirror opposite of the window going across the bed was creating too much active energy (chi), making it harder to rest. We moved it inside the closet to maintain function without disrupting sleep.

Your home should reflect the life you’re building together, not just serve as a storage unit for your belongings. By decluttering, organizing, and incorporating Feng Shui, you can create a space that feels intentional, peaceful, and designed to support your relationship.

And beyond your home, think about your unfinished projects. What’s something you’ve been putting off for years? Maybe today is the day you finish it—or finally let it go.

If you’ve been waiting for the right time, consider this your sign. Finish it or forget it.

Want to learn more about your Feng Shui element and the best colors for your space? Leave a comment with your gender and birthdate, and I’ll let you know.

For more personalized organizing and Feng Shui tips, feel free to reach out at info@spacetolove.com.

Post Prom Dress Problems

Hi, Christel here from Space to Love! I was organizing recently and found myself in a bit of a dilemma—one that so many of my clients can relate to. It all started when I came across a piece of my past that I’d completely forgotten about: my prom dress.

Now, I’m a little older, and let’s just say the dress doesn’t fit anymore. It’s a lovely reminder of a special time, though. My mother made it for me, which gives it a lot of sentimental value. But what’s funny is that, as an organizer, I’ve learned how sentimental attachments can lead us to hold onto things we might not actually need or use.

When I first decided I didn't want to keep the dress, I passed it on to my best friend. I didn’t want to donate it because of the sentimental attachment, but I also wasn’t sure what to do with it. So, I thought, Hey, why not let her daughter use it for dress-up? That way, the dress could have another life. Little did I know, my friend was thinking, “It’s too nice for that; I’ll just hold onto it for her.”

Fast forward a few decades, and when I visited New York to pick up some winter clothes, my friend handed me a surprise—my prom dress! She never got rid of it after all. Suddenly, I was faced with the very dilemma that many of my clients face: the attachment is now stronger than before, and I still don’t know what to do with it!

So, here I am, a professional organizer who coaches people through letting go, but now holding onto my prom dress because it feels even more special. My friend cared for it for all these years, and it’s now a little piece of our shared history. But realistically, I know I’ll never wear it again, and it's taking up space that I could use for something more practical.

This experience made me realize that even as organizers, we’re not immune to the emotional pull of items with personal history. So now, I’d love to hear your thoughts! Should I donate it and let it start a new chapter in someone else’s life, or should I keep it as a memento of my youth and friendship?

Let me know in the comments below. And remember, whether you’re holding onto an item or letting it go, what matters is that it reflects the life you want now, not the memories of the past.

3 Ways to Label Your Shoe Boxes

Hi, Christel here from Space to Love, and it’s been a while since I have written a blog on organizing and decorating. I’m glad to be here today and share a quick tip on 3 ways to label your shoe boxes.

My closet is pretty organized, but I wanted to take it one step further by adding pictures of the shoes to the boxes.

I used to live in New York, the East Village, in a really, really small apartment. My bedroom was only 6’ x 9’; it’s all about the location and not the space when living in Manhattan. Anyway, for my shoe organization, I bought white shoe boxes from Uline, then I used my roommate’s Polaroid camera to take pictures and double-sided tape to attach them to the boxes.

Fast forward to today, and living in Los Angeles, my room is a little bigger, and I actually have space in my closet for my shoes. Yay!

I have clear bins from the Container Store and am no longer using the white Uline boxes. However, I find it hard to see exactly what shoes are in what box when looking down in front of my closet, trying to get dressed. So, I thought I would recreate the NY shoe system here in LA.

Watch the video below, or keep on reading.

I don’t have a Polaroid camera or a roommate anymore, but I do have a mini photo printer with 2” label tape that prints sticker photos. I went ahead and took pictures of all my shoes, printed them out, and adhered them to the clear shoe boxes.

Space to Love - Before Clear Shoe Bins

Space to Love - After Clear Shoe Bins

Another way to achieve a similar look is to use a regular printer and then laminate them. I uploaded all my pictures to my computer, put them in a Word doc, made each photo 2”x3”, and then printed them out. I used a laminator and paper cutter from Amazon and double-sided tape.

Space to Love

The 3rd way is by using the old favorite, a label maker. This will make sure you know which pair of shoes go back into which box. I would print a label that says the designer’s name and then another to go underneath with the style of the shoe, i.e., Calvin Klein, Gold Wedge. This will make it clear, and you know exactly what’s in the box. Now, your shoes will always go back to where they belong, and this will help you stay organized.

No matter which way you go, make sure your labels are nice and straight:)

Keeping them in bins helps you stay organized, but also, putting them in categories in the closet will help you find what you’re looking for faster. It’s all about saving time. So instead of just randomly putting them back, put them back in categories, i.e., sandals, flats, work heels, dressy heels, boots, sneakers, and so on. Create categories that work best for you.

When I'm looking for my sandals, I know what row to look in and find them quickly. I don’t have that many shoes, so it's not crazy necessary, but when you have triple the amount of shoes or more, it's really great to make your categories and organize your shoes that way. You will thank yourself for it.

Some people ask me, “How many shoes do you have?” or “What do you think the perfect amount of shoes is?” and I think that you want to live within the means of your space. I started this project with 30 pairs of shoes. With that amount, I don't feel like I'm overflowing at all, and I think I'm living within the means of my space. I’m also not overwhelmed by having too many choices when it comes to what shoes to wear; this can be very time-consuming. There are only so many decisions you can make in a day, don’t waste them on what shoes.

All the shoes I do have, I wear and love them. However, I will never pass up an opportunity to go through and do a little decluttering if I can. As I take the pictures of the shoes, I will ask myself these questions…

1- When was the last time I wore them? If longer than six months, Do I plan on wearing them again? If not, donate.

2- Do they hurt my feet? Is it worth it…probably not, donate.

3- Are they in style and still represent who I am? If not, donate.

4- Are they too worn out and can’t be fixed? If yes, trash.

While asking yourself the questions above…feel free to try on all your shoes and walk around; this will make it easier to make those decisions.

I did get rid of two pairs of shoes. I actually liked both of them, but I wore them out too much, so they have definitely seen better days, and I had to let them go. I'm now down to 28 pairs of shoes. I just made some room for new things to come into my life:)

I hope you found this helpful and inspiring. Do you have any shoe-organizing tips that you'd like to share with us at the Space to Love community? Please comment below; we would love to hear from you. Happy organizing!!

How to Organize Your Gift Wrapping Supplies

It’s January and that means it is the official Get Organized Month! Do you have any organizing goals you would like to accomplish this month? If yes, start small with a junk drawer, spice cabinet or a coat closet….

I had so much fun working with this client in New York organizing her coat closet that was also part gift wrapping closet. You never know what you are going to find or what is the best organizing solution until you get in their closets and see what’s going on. However, it didn’t take any time at all with this closet because when I saw all those rolls of wrapping paper and ribbons and bows I knew right away what organizing system this closet needed.

As you watch the video below you will see how we used the Space to Love® 5 Step Method to get this coat/wrapping closet whipped in shape. Then we added the Elfa Gift Wrap over the door rack to help my client get and stay organized.

I hope you found this useful and feel free to share your organizing goals with us. We are here to help:)

Happy Get Organized Month!!!

3 Steps to Creating the Dressing Room of Your Dreams

As a professional organizer in Los Angeles, I get to work with some amazing people and spaces. I couldn’t wait to design this dressing room for my client. I’ve been working with her for years and she was moving into a bigger home and we were able to use one of the rooms as a dressing room. At first, we were initially thinking of a stand-alone vanity and armoire but, as I thought it over, I had a vision of a kind of walk-in closet. I was familiar with all of her stuff and knew she would need more space for her accessories and shoes.

Here are the 3 steps I used to create the dressing room of her dreams.

First, you want to declutter. I sound like a broken record because I say this all the time but it is so important to have only what you need, use, and love. Everything else will get in the way of your vision. Start by sorting like with like and then pick the best and get rid of the rest.

Second, you want to take inventory of your items. It’s important to know what you have so that you can create the space that you need. How many shoes, scarves, purses, belts and hats do you have? Also, ask yourself, do I want to hang my t-shirts and jeans or fold them? And, if I fold them, will they be in a drawer or on shelves? Think about the socks, underwear, intimates and pj’s you have. How many drawers will that take up?  How many feet of hanging space do you need? Double-hanging in the closet is a better use of the vertical space if you don’t have too many long hanging items. I also took into consideration all the jewelry she owned. There were many necklaces that needed a home. She also had an ample supply of makeup and a vanity so plenty of drawer space was imperative. This brings us right into the next step.

Third, you want to design the space now that you know what you need. I designed the space and then we hired Inspired Closets to build it out for us. Of course, if you don’t want to do the design part they will do it for you. It was easier for me because I already knew what my client needed. So we looked at the layout of the room and picked the wall that would best be suited for the unit. I drew a sketch of what the unit would potentially look like. Starting with the vanity in the middle and then adding shelves for the shoes and purses to the left. On the right side, I added the drawers. The top one was for her jewelry and the rest for socks, pj’s, workout, etc. I wanted to include these cool pull-outs for hanging jewelry that Inspired Closets had, I added those above the drawers. I added double hanging bars in the closet for all her blouses and she also wanted to hang her jeans. Then I gave the sketch to Inspired Closets and they came out and took the final measurements. My client went down to the showroom and picked the finishes and hardware that she liked. All we were waiting for was the vanity mirror with lights to come. We ordered that separately. Inspired Closets really are a dream to work with.

If you are looking to create a space that makes you want to get up and get dressed in the morning, use these three steps. No matter what size space you have you can create a dressing room or area of your dreams.